
There’s something magical about the smell of banana bread baking — warm, sweet, and cozy all at once. The best part? You don’t need eggs, dairy, or butter to make it taste amazing. This vegan banana bread is soft, moist, and bursting with banana flavor. It’s so good, no one will even guess it’s plant-based!
Step 1: Gather Your Simple, Plant-Powered Ingredients
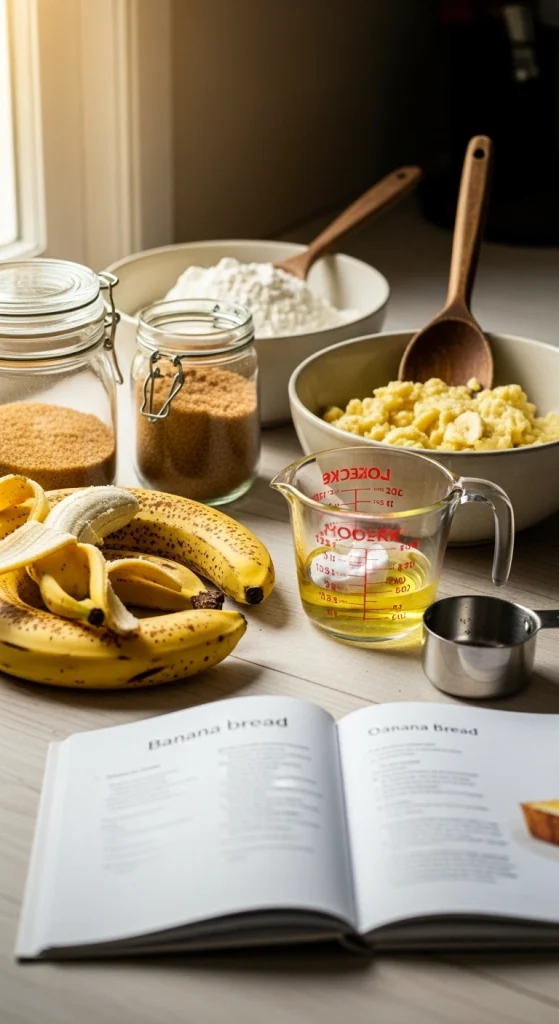
The beauty of banana bread is that it uses pantry staples — things you probably already have sitting around.
You’ll need:
- 3 ripe bananas – the spottier, the better!
- ⅓ cup coconut oil or olive oil – adds richness and moisture.
- ½ cup brown sugar or coconut sugar – for caramel-like sweetness.
- 1 teaspoon vanilla extract – brings warmth and aroma.
- 1 ½ cups all-purpose flour (or whole wheat for extra fiber).
- 1 teaspoon baking soda – helps the bread rise.
- ½ teaspoon salt – enhances all the flavors.
- ½ teaspoon cinnamon (optional but highly recommended).
- ¼ cup plant-based milk – almond, soy, or oat all work great.
Optional mix-ins:
- ½ cup chopped nuts (walnuts, pecans)
- ½ cup vegan chocolate chips or berries
Pro tip: Overripe bananas — the ones with brown spots — are the secret to natural sweetness and that irresistible banana aroma.
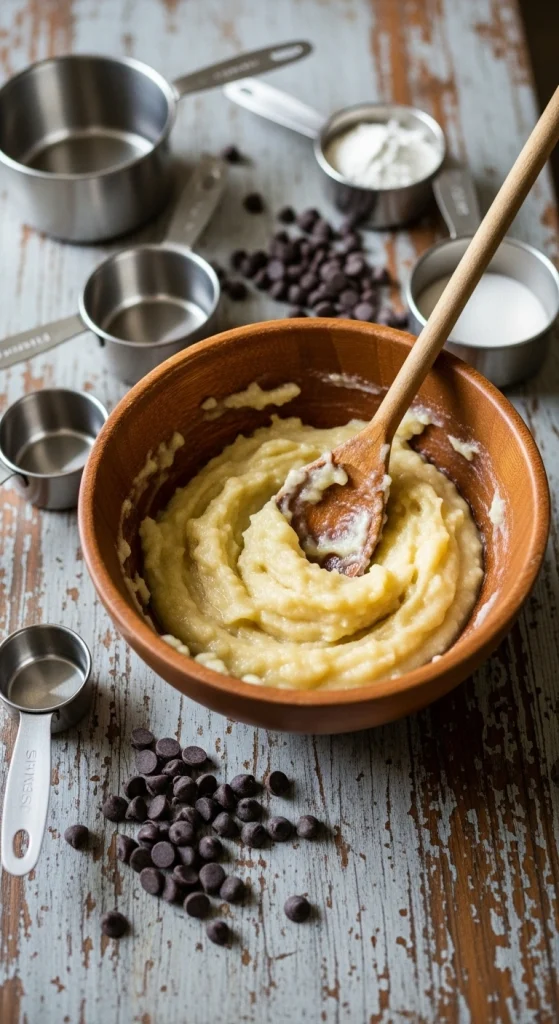
Step 2: Mash, Mix & Make Magic
This step is where all the magic begins — and no fancy mixer is needed!
- Mash the bananas: In a large bowl, mash your ripe bananas with a fork until smooth but slightly chunky.
- Add the wet ingredients: Stir in coconut oil, sugar, vanilla extract, and plant milk until everything blends together.
- Mix the dry ingredients: In a separate bowl, whisk together flour, baking soda, salt, and cinnamon.
- Combine gently: Add the dry mix into the wet mix and stir until just combined. Don’t overmix — that can make your bread dense.
- Fold in extras: Gently fold in your nuts, chocolate chips, or other mix-ins.
Pro tip: If you like a more cake-like texture, use an electric whisk for the wet ingredients before adding the flour.
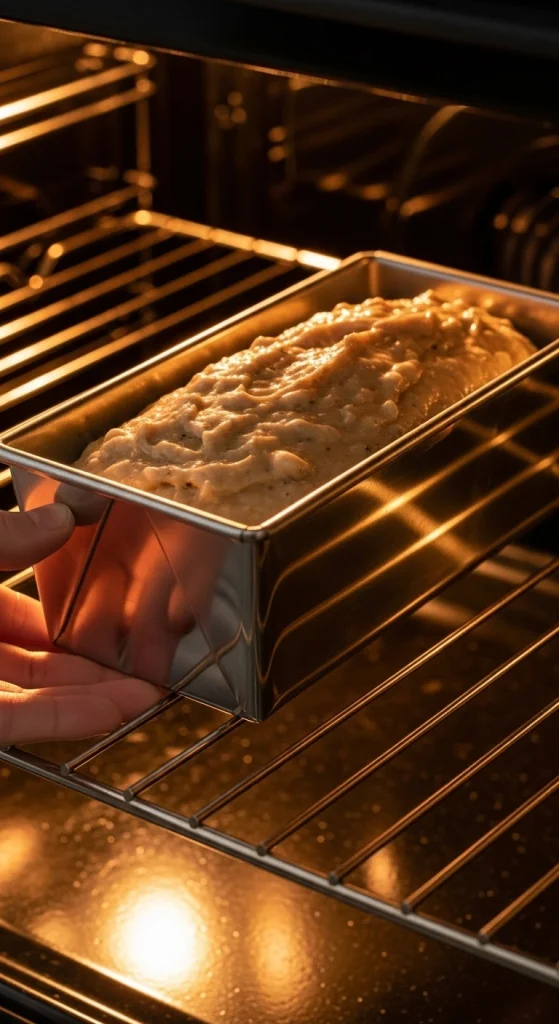
Step 3: Bake to Golden Perfection
Now it’s time to turn that batter into a loaf of cozy, golden deliciousness.
- Preheat your oven to 350°F (175°C).
- Grease a loaf pan with oil or line it with parchment paper for easy removal.
- Pour in the batter and smooth the top with a spatula.
- Bake for 50–60 minutes, until the top is golden and a toothpick comes out clean.
- Cool completely before slicing (the hardest part!).
Pro tip: If the top starts browning too quickly, cover it loosely with foil halfway through baking.
Step 4: Add Creative Twists
Once you’ve mastered the base recipe, the fun part begins — getting creative with flavors!
Flavor ideas to try:
- Chocolate lovers: Add cocoa powder and chocolate chips for a double chocolate version.
- Nutty crunch: Swirl in almond or peanut butter before baking.
- Tropical flair: Mix in shredded coconut and pineapple bits.
- Spiced delight: Add nutmeg, cloves, or ginger for cozy fall vibes.
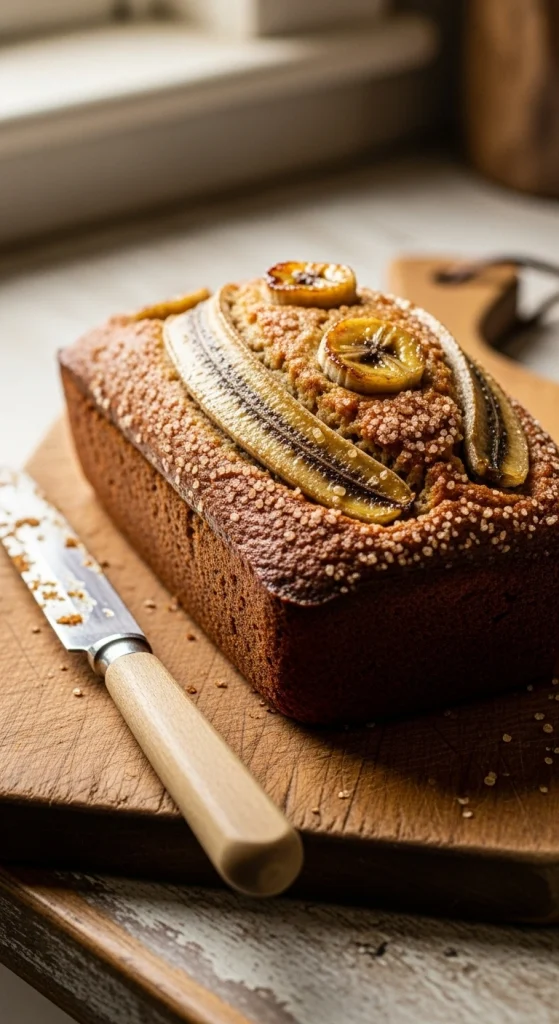
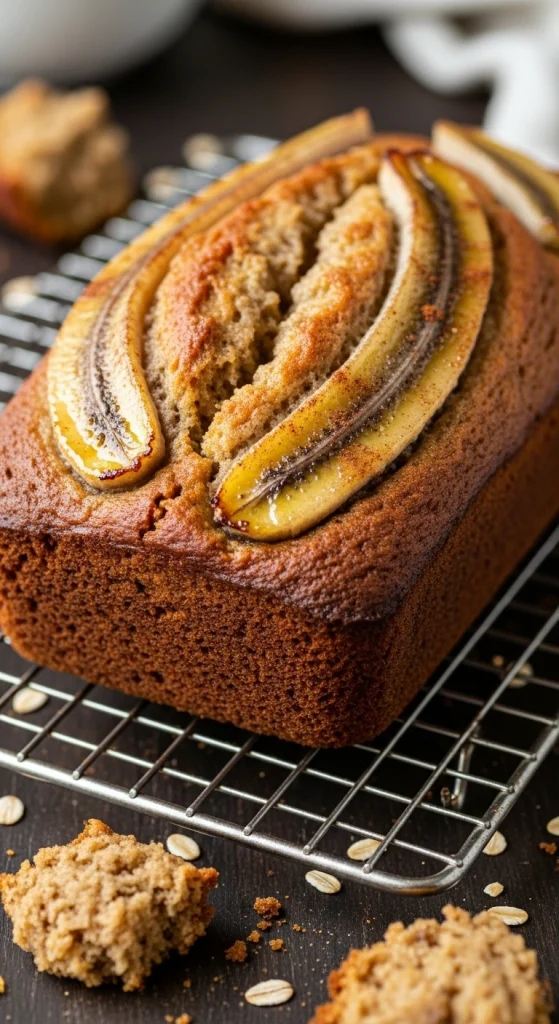
Pro tip: For a bakery-style look, slice a banana lengthwise and lay it on top of the batter before baking. It caramelizes beautifully!
Step 5: Serve It, Store It & Love It
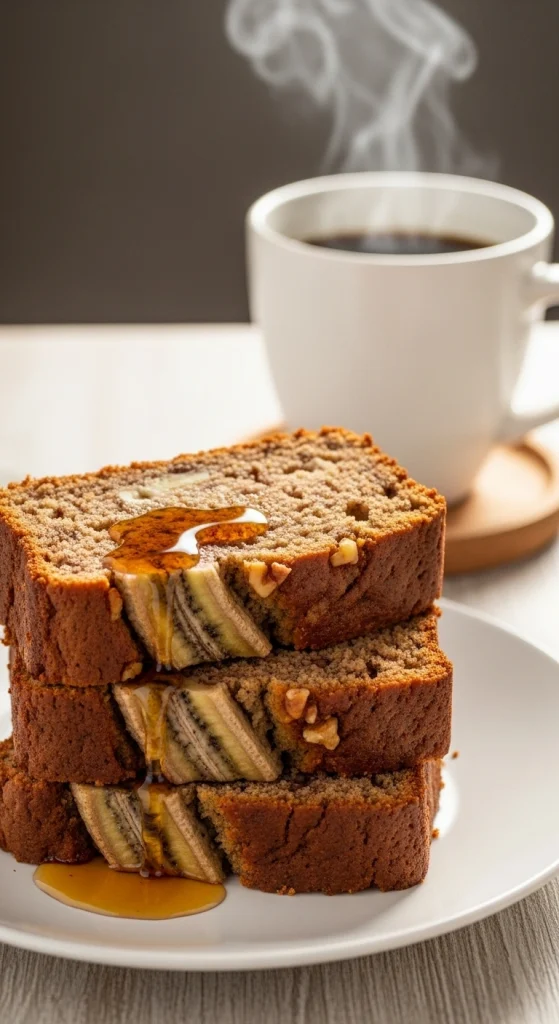
There are endless ways to enjoy your vegan banana bread — warm, cold, toasted, or even as dessert!
Serving ideas:
- Spread with vegan butter or almond butter.
- Drizzle with maple syrup or vegan caramel sauce.
- Pair with coffee or plant-based milk for a cozy breakfast.
Storage tips:
- Store leftovers in an airtight container at room temperature for up to 3 days.
- For longer storage, refrigerate for up to a week or freeze slices for up to 3 months.
Pro tip: Warm up a slice in the microwave for 10 seconds before serving — it’ll taste like it just came out of the oven.
The Final Slice
Vegan banana bread proves that comfort food doesn’t need eggs or dairy to be delicious. It’s moist, perfectly sweet, and packed with wholesome, plant-based goodness — a treat you can feel good about.
So next time you see those bananas turning brown, don’t toss them — transform them into something warm, comforting, and full of love.

Hannah Collins is a passionate home cook and food storyteller who believes every recipe tells a little love story. At TastyWriter, she shares simple, delicious recipes made for real kitchens and busy days — from cozy comfort dishes to creative new favorites. When she’s not cooking, you’ll find her photographing food, testing family recipes, or sipping tea while dreaming up her next tasty idea.
Leave a Reply