
There’s something almost magical about homemade caramel sauce — the way sugar transforms from grainy white crystals into a silky, amber dream that’s buttery, glossy, and rich. Whether you drizzle it over ice cream, stir it into coffee, or spoon it straight from the jar (no judgment here!), the right caramel sauce can make any dessert taste luxurious.
The Secret to Perfect Caramel: Patience + Precision
Caramel sauce is simple — just sugar, butter, and cream — but it’s also a lesson in timing. One second too long on the heat, and you’ve got bitterness instead of bliss. The key is patience and attention.
Before we start, gather your essentials:
- 1 cup granulated sugar
- 6 tablespoons unsalted butter (cut into cubes)
- ½ cup heavy cream (room temperature)
- 1 teaspoon pure vanilla extract
- A pinch of salt
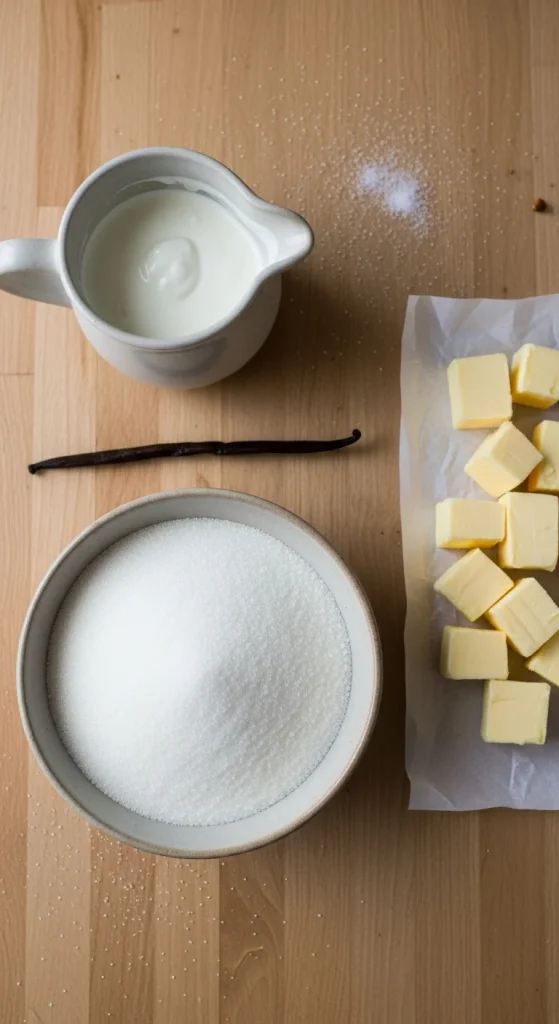
Pro Tip: Measure everything before turning on the stove. Once the sugar starts melting, there’s no time to pause.
Step 1: Melt the Sugar (The Heart of Caramel)
Use a heavy-bottomed saucepan to help the sugar heat evenly.
- Add the sugar in an even layer over medium heat.
- Stir gently with a heat-resistant spatula or swirl the pan — avoid over-stirring.
- Watch closely as the sugar clumps, melts, and turns a golden amber colour.
You’ll know it’s ready when it smells slightly nutty and looks like liquid honey.
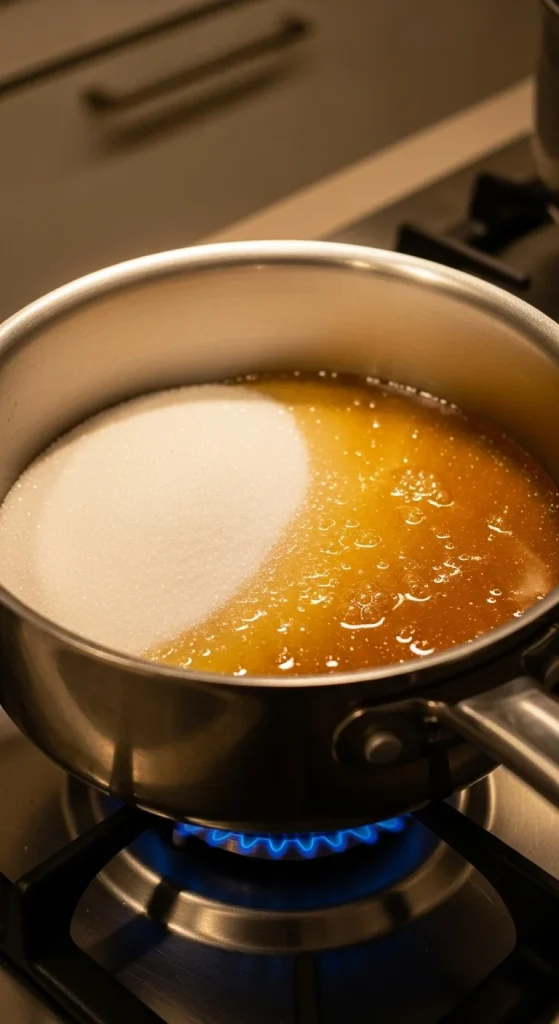
Warning: Don’t walk away. Caramel goes from perfect to burnt in seconds. If it turns too dark or starts smoking, it’s time to start over.
Step 2: Add the Butter (The Glossy Transformation)
Once your sugar is fully melted, immediately add the butter. Be prepared — it will bubble and sizzle dramatically.
- Stir until the butter melts completely and combines with the caramelised sugar.
- If the butter separates, keep stirring gently until it becomes smooth again.
This is the moment when the caramel starts to look glossy and smell irresistible.
Pro Tip: Use room-temperature butter to prevent the caramel from seizing or hardening when added.
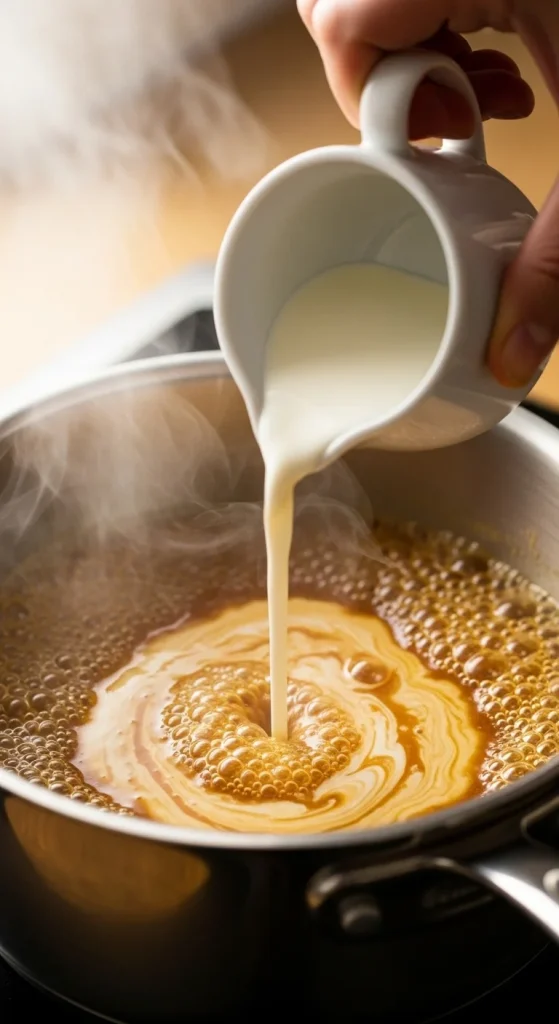
Step 3: Add the Cream (The Silky Finish)
Remove the saucepan from heat and slowly pour in the cream while stirring constantly. The mixture will bubble up again, so pour carefully.
- Once the bubbling settles, stir until smooth and creamy.
- Add vanilla extract and a pinch of salt to balance the sweetness.
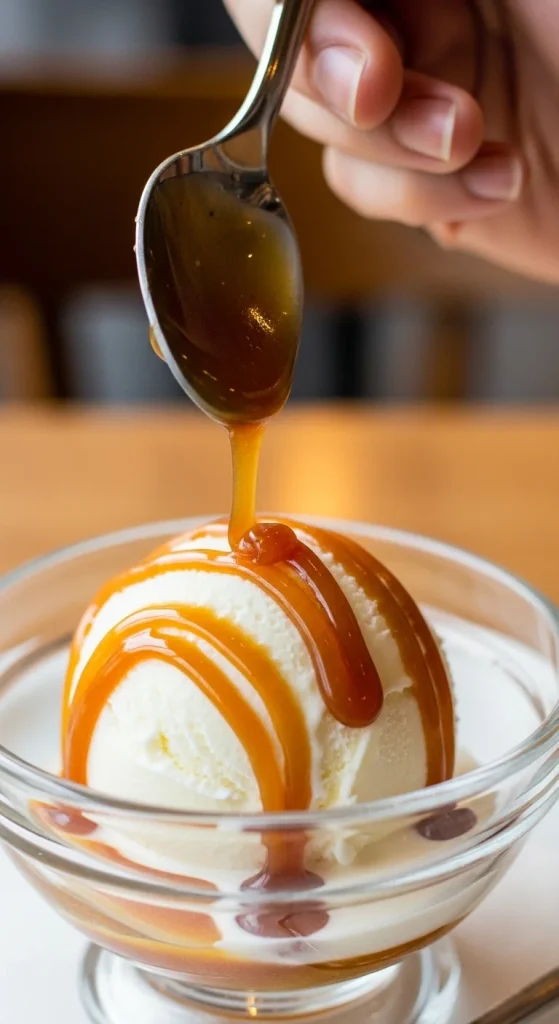
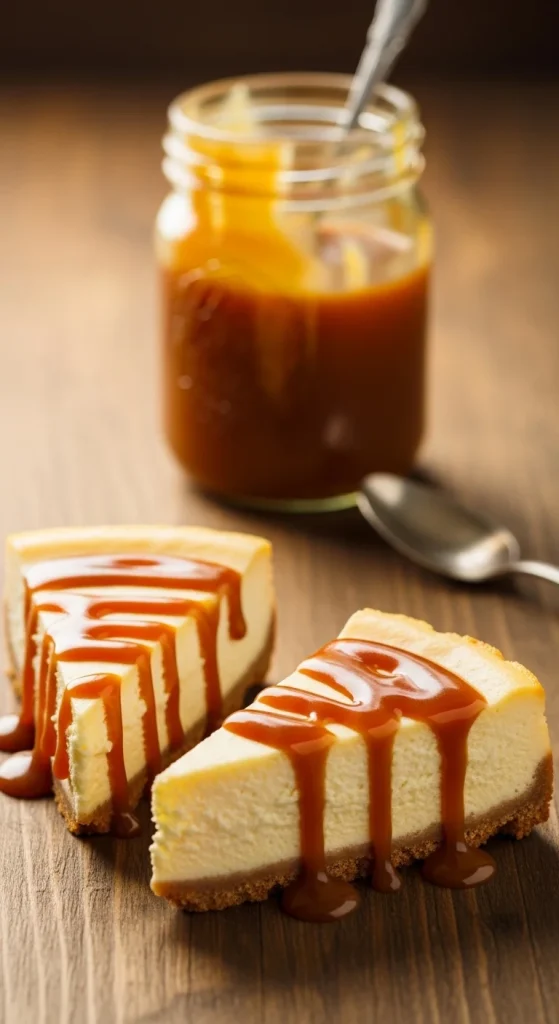
The result? A luscious, golden caramel that clings beautifully to any dessert.
Optional Twist: Add a pinch of flaky sea salt for a salted caramel version. The contrast of sweet and salty is pure perfection.
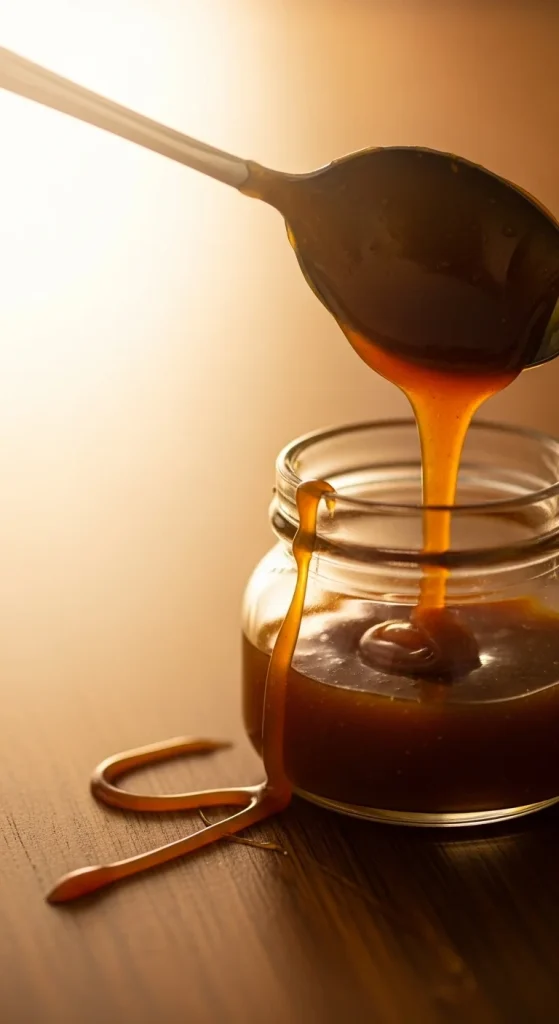
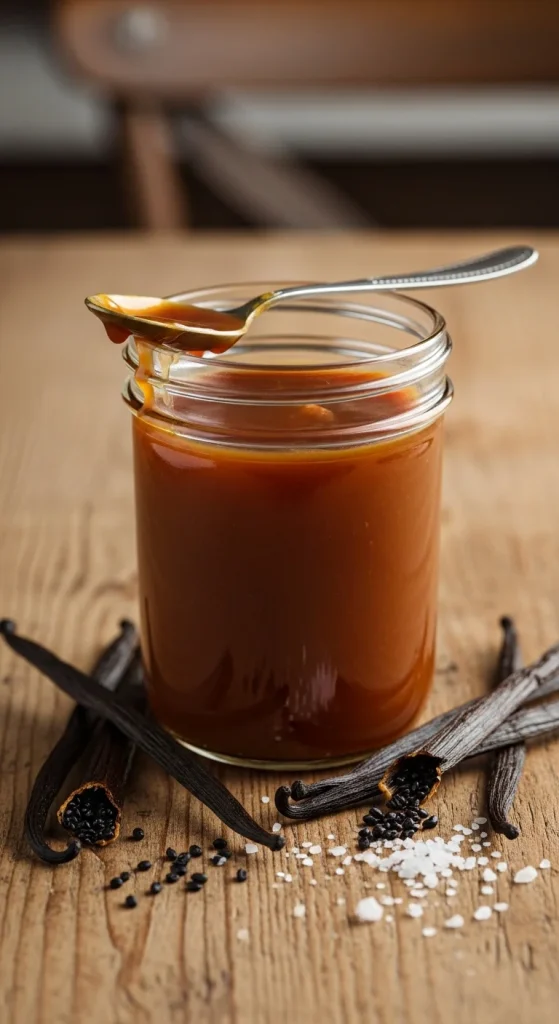
Step 4: Cool, Store & Enjoy
Let your caramel sauce cool for 10–15 minutes before transferring it to a glass jar. It will thicken as it cools, creating that dreamy texture we all love.
Store in the fridge for up to 2 weeks — simply warm it in the microwave for 10–15 seconds before using.
Try it on:
- Vanilla ice cream
- Pancakes or waffles
- Brownies or apple pie
- Coffee or hot chocolate
Troubleshooting Common Caramel Mistakes
Even pros mess up caramel sometimes. Here’s how to fix (or avoid) the most common issues:
- Grainy texture? Sugar crystallised. Use clean tools and avoid stirring too much early on.
- Separated sauce? Remove from heat and whisk in a tablespoon of warm water until smooth again.
- Bitter taste? The sugar burned — next time, lower the heat slightly and watch the colour.
- Too thick? Whisk in a splash of warm cream to loosen it.
Caramel can be temperamental, but once you master it, you’ll never go back to store-bought again.
Final Sweet Takeaway
Homemade caramel sauce is one of life’s simplest luxuries. It’s quick, elegant, and turns even plain desserts into showstoppers. All you need is a bit of focus and a love for that buttery golden magic.
So grab your saucepan and make a batch — your kitchen will smell divine, and your desserts will thank you.
Save this recipe for later — your future self (and sweet tooth) will be so glad you did!

Hannah Collins is a passionate home cook and food storyteller who believes every recipe tells a little love story. At TastyWriter, she shares simple, delicious recipes made for real kitchens and busy days — from cozy comfort dishes to creative new favorites. When she’s not cooking, you’ll find her photographing food, testing family recipes, or sipping tea while dreaming up her next tasty idea.
Leave a Reply