
If you think making vegan cheese sounds complicated — think again! You don’t need fancy tools or a culinary degree to create creamy, meltable, and downright delicious plant-based cheese right in your kitchen. With the right ingredients and a little patience, you can whip up a cheese that tastes so good, even dairy lovers will be impressed.
Why Make Vegan Cheese at Home?
Store-bought vegan cheeses have come a long way, but nothing beats homemade. When you make it yourself, you control the flavors, texture, and quality — plus, it’s cheaper and fresher.
Homemade vegan cheese:
- Has no preservatives or artificial ingredients.
- Can be tailored to your taste (smoky, tangy, nutty, or herby).
- Is fun to experiment with — think mozzarella, cheddar-style, or spreadable cream cheese.
And the best part? Most versions are made from simple, everyday ingredients like cashews, almonds, or even potatoes and carrots.
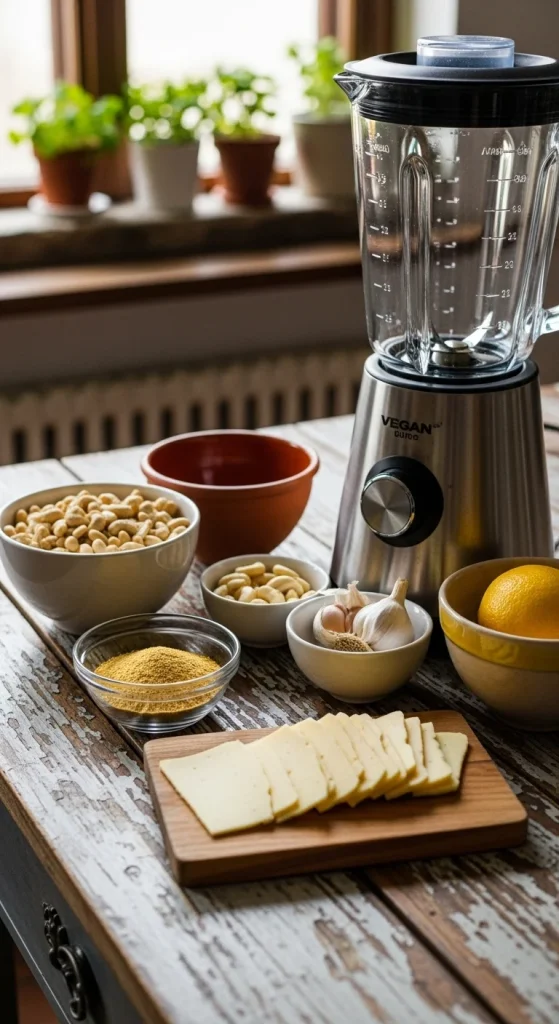
Step 1: Choose Your Base
Different bases give different textures and flavours. Here are the most common ones:
- Cashews: The creamiest and easiest to blend. Perfect for soft cheeses or spreads.
- Almonds: Great for firmer, slightly nutty cheeses.
- Sunflower seeds: Ideal for nut-free recipes.
- Potato & carrot: Great for meltable, “cheddar-like” sauces.
Pro Tip: Always soak your nuts or seeds first (4–6 hours or overnight). This makes them easier to blend and gives your cheese a smoother texture.
Step 2: Add the Flavor Magic
Here’s where vegan cheese gets its cheesy goodness. Instead of dairy, you’ll use ingredients that mimic the umami and tang of real cheese:
- Nutritional yeast: The #1 must-have — adds cheesy, nutty flavor.
- Lemon juice or apple cider vinegar: Brings tang and freshness.
- Garlic powder or fresh garlic: Adds depth.
- Salt: Essential for that savoury bite.
- Miso paste: A little goes a long way in adding richness.
- Turmeric or paprika: For colour and subtle warmth.
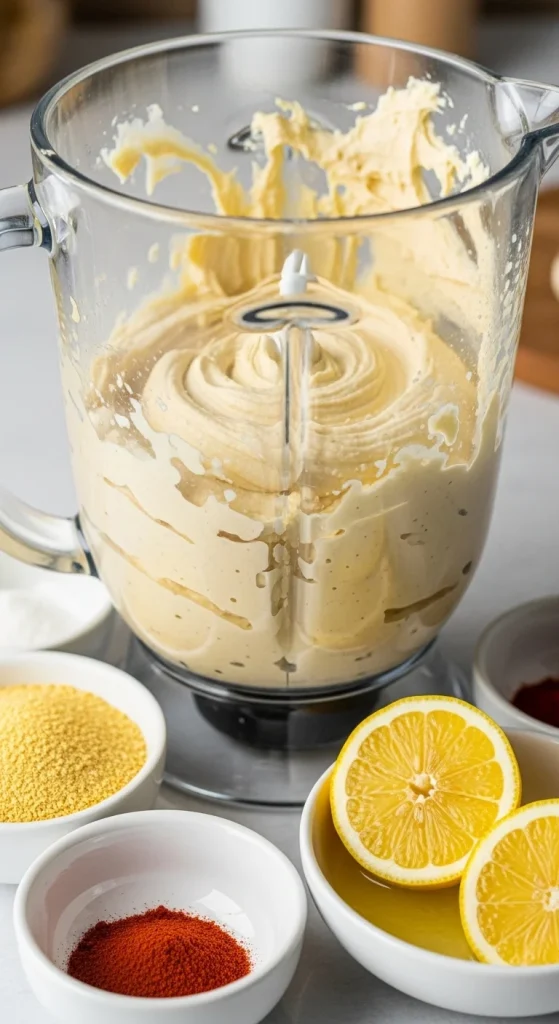
Blend everything together with a splash of water or non-dairy milk until smooth and velvety. The mixture should taste slightly saltier and tangier than you want — it mellows as it sets.
Step 3: Thicken It Up
Depending on the style of cheese you’re making, you can use one of these thickeners to get the right consistency:
- Agar-agar powder: Creates sliceable, firm cheese.
- Tapioca starch: Gives that gooey, stretchy texture perfect for melting.
- Cornstarch: Works for creamy cheese sauces.
To make a firm cheese:
- Dissolve agar powder in water and simmer for 2–3 minutes.
- Mix into your blended cheese base.
- Pour into a mould and refrigerate for a few hours until set.
To make a stretchy cheese (like mozzarella):
- Add tapioca starch to your blended mix.
- Heat in a pan and stir until it becomes thick and stretchy.
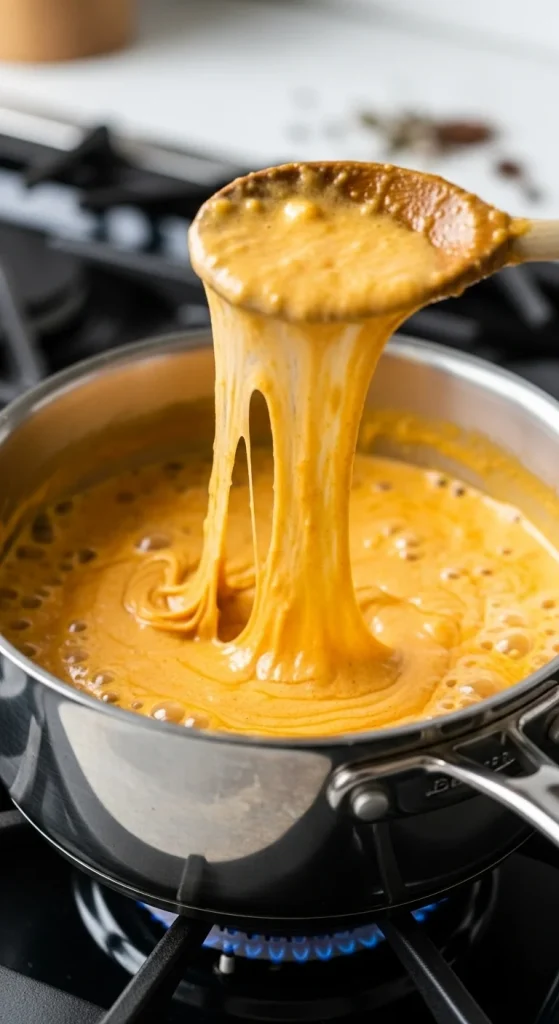
Pro Tip: Don’t overcook the mix — just heat until the texture looks glossy and smooth.
Step 4: Shape, Chill & Enjoy
Once your mixture is ready, pour it into a container or mould (a glass bowl or silicone form works great). Smooth the top with a spatula and refrigerate for 2–4 hours.
Once chilled, you’ll have a cheese that’s firm enough to slice or spread — depending on your recipe.
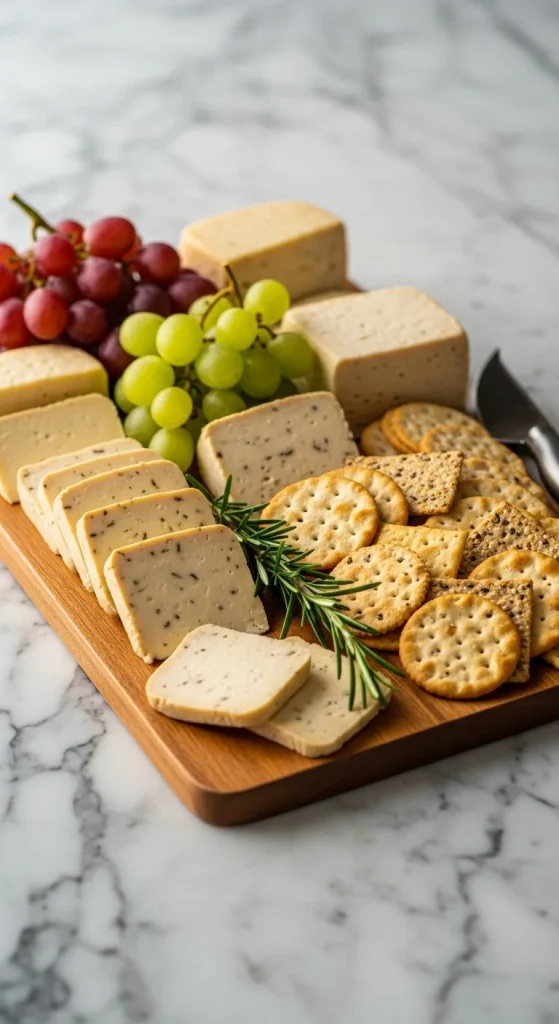
Now comes the fun part: taste testing! Spread it on toast, melt it over pizza, or pair it with crackers and fruit for a stunning vegan charcuterie board.
Step 5: Customise Your Cheese
Once you’ve mastered the basics, experiment with flavours and textures:
- Herb cheese: Mix in chopped chives, basil, or dill before setting.
- Smoked cheese: Add a dash of liquid smoke or smoked paprika.
- Pepper cheese: Stir in crushed peppercorns for a bold kick.
- Truffle cheese: A drizzle of truffle oil turns it gourmet instantly.
Vegan cheese is endlessly adaptable — and it only gets better with practice.
Bonus: Quick No-Cook Cheese Spread
Need something faster? Try this 5-minute recipe:
- Blend 1 cup soaked cashews, 2 tbsp nutritional yeast, 1 tbsp lemon juice, ½ tsp garlic powder, salt, and a little water.
- Chill for 30 minutes.
That’s it — you’ve got a creamy, spreadable vegan cheese perfect for bagels or veggies.

Final Thoughts
Making vegan cheese at home is surprisingly simple — and incredibly rewarding. You’ll save money, eat cleaner, and impress anyone who tries it. Once you taste how rich, creamy, and flavourful your own plant-based cheese can be, you’ll never go back to store-bought.
So go ahead — get creative, grab that blender, and start your dairy-free cheese adventure today.

Hannah Collins is a passionate home cook and food storyteller who believes every recipe tells a little love story. At TastyWriter, she shares simple, delicious recipes made for real kitchens and busy days — from cozy comfort dishes to creative new favorites. When she’s not cooking, you’ll find her photographing food, testing family recipes, or sipping tea while dreaming up her next tasty idea.
Leave a Reply