
Few things are as satisfying as biting into perfectly cooked chicken thighs — that crisp golden skin giving way to tender, juicy meat. Yet, achieving that ideal balance can feel tricky. Cook them too long, and they dry out; too short, and they’re rubbery. The good news? With a few simple techniques, you can master chicken thighs that are crispy outside, juicy inside, and full of flavor — every single time.
Why Chicken Thighs Are the Real MVP
Chicken thighs are the unsung heroes of weeknight cooking. They’re:
- Juicier than chicken breasts, thanks to higher fat content.
- More forgiving — they stay moist even if slightly overcooked.
- Full of flavor, especially when cooked with the skin on.
Whether you’re roasting, pan-searing, or grilling, chicken thighs deliver rich, savory goodness every time.
Step 1: Start with the Right Cut
There are two main types of chicken thighs:
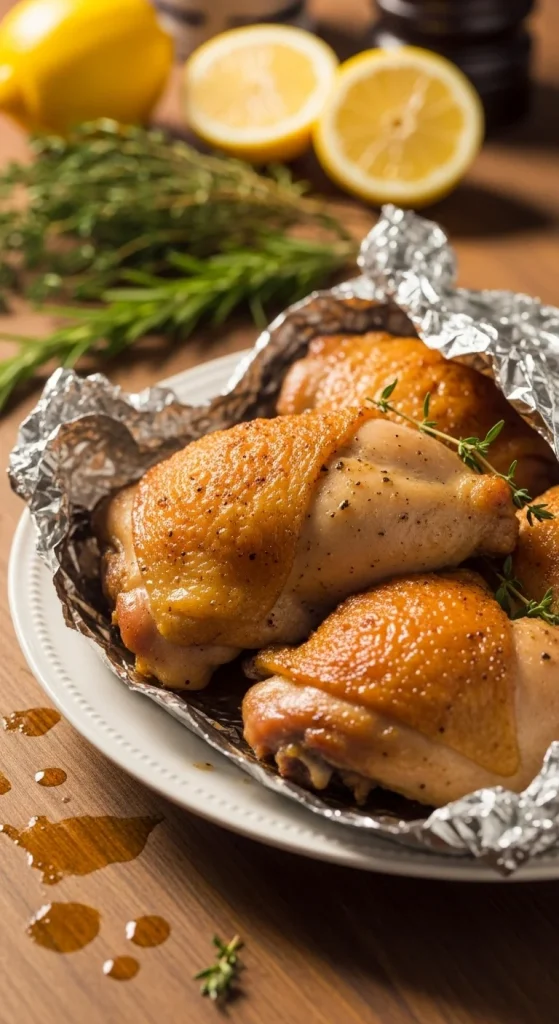
- Bone-in, skin-on: Best for roasting or pan-searing. The bone helps retain moisture, and the skin crisps beautifully.
- Boneless, skinless: Great for stir-fries, grilling, or quick skillet meals.
If crispy skin is your goal (and we’re guessing it is), go with bone-in, skin-on.
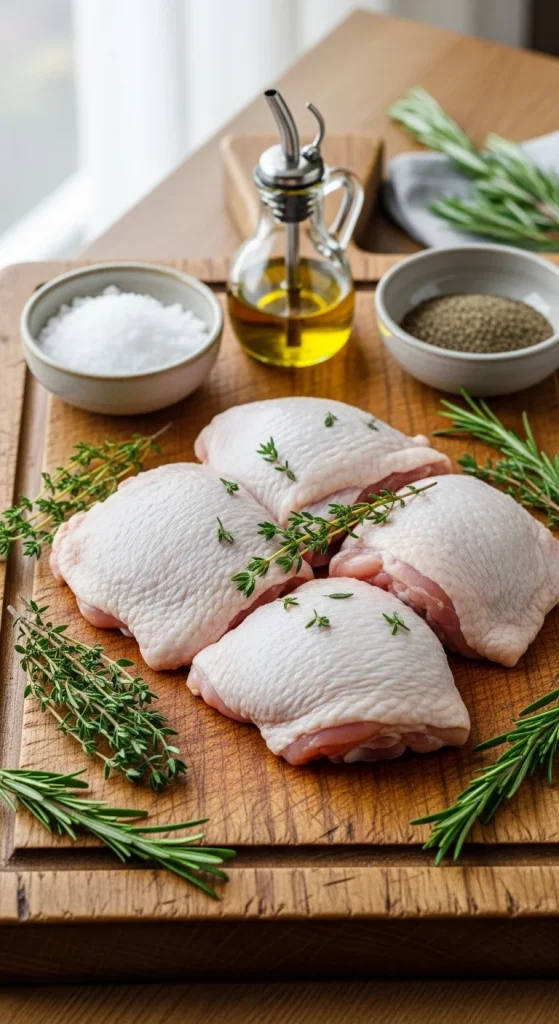
Pro Tip: Pat the chicken completely dry with paper towels before seasoning — moisture is the enemy of crispiness.
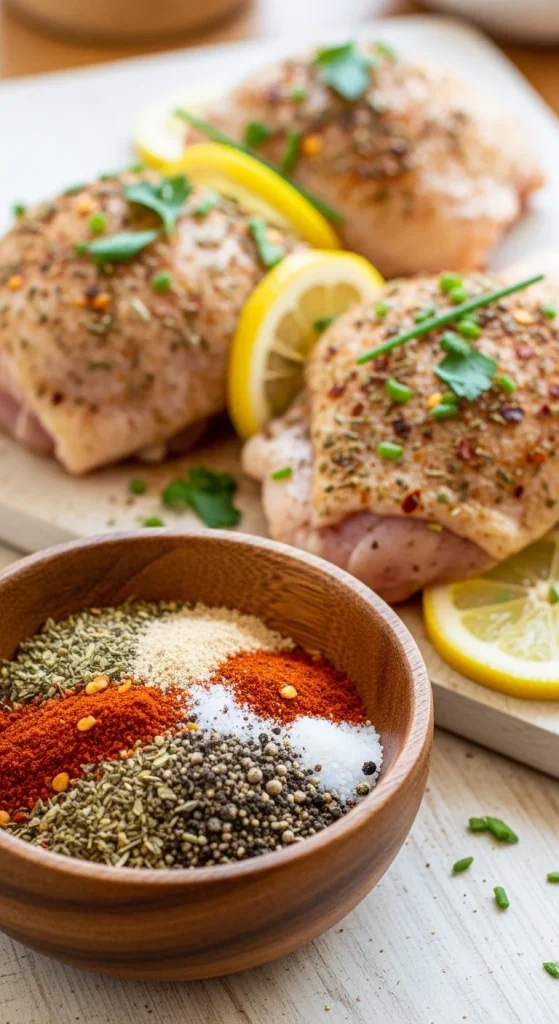
Step 2: Season Boldly
Chicken thighs love bold seasoning. At minimum, you’ll need:
- Salt and black pepper
- Olive oil or avocado oil
- Optional extras: garlic powder, paprika, smoked salt, lemon zest, or fresh herbs
Rub the seasoning all over — even under the skin for maximum flavor.
Flavor Boost Ideas:
- Lemon-Garlic: Mix minced garlic, lemon juice, and olive oil.
- Smoky BBQ: Paprika, cumin, brown sugar, and a dash of cayenne.
- Herb Butter: Mix softened butter with rosemary, thyme, and garlic, then spread under the skin.
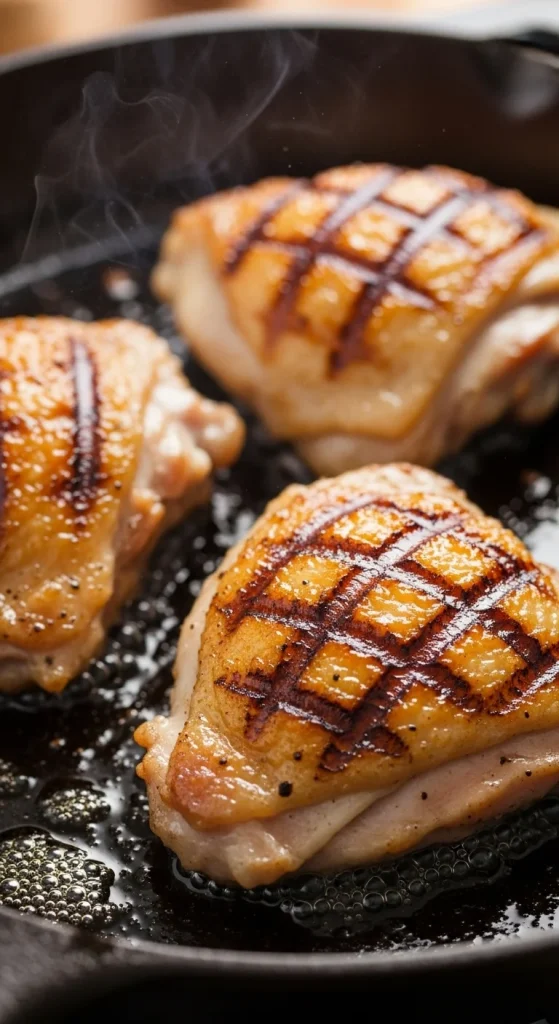
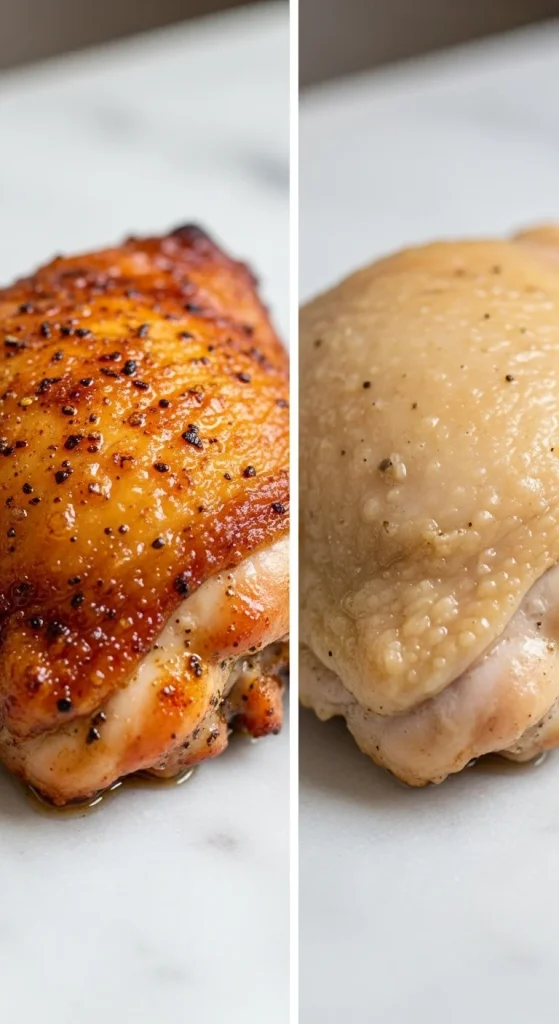
Step 3: The Secret to Crispy Skin — Dry Heat
To achieve that perfect golden crunch, you need high, dry heat.
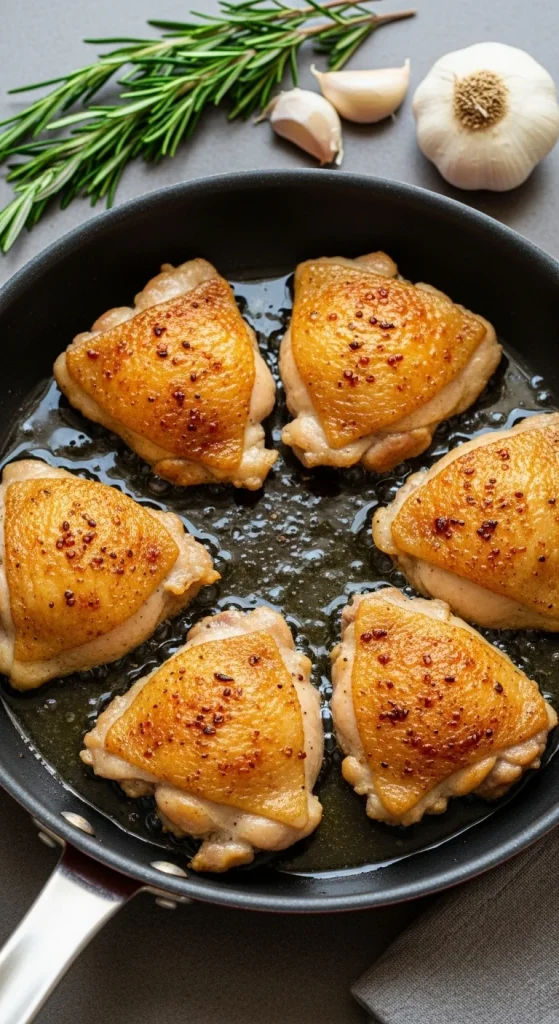
Option 1: Pan-Sear First, Then Roast
This two-step method guarantees crispy skin and juicy meat:
- Preheat oven to 400°F (200°C).
- Heat a cast-iron skillet over medium-high heat with 1–2 tablespoons of oil.
- Place thighs skin-side down and sear for 5–7 minutes (don’t move them!).
- Flip and transfer the pan to the oven for 15–20 minutes, until internal temperature hits 165°F (74°C).
Option 2: Oven-Only Method
- Place seasoned thighs on a wire rack over a baking sheet.
- Roast at 425°F (220°C) for 35–40 minutes.
- Let them rest for 5 minutes before serving.
Pro Tip: The wire rack allows air to circulate, crisping the skin evenly without sogginess.
Step 4: Don’t Skip the Rest
It’s tempting to dive right in, but letting your chicken rest for 5–10 minutes makes a big difference. The juices redistribute, keeping the meat moist and flavorful.
Cover loosely with foil and resist cutting into it immediately — patience pays off!
Step 5: Serving Ideas That Elevate the Dish
Crispy chicken thighs pair beautifully with almost anything, but here are some crowd-pleasers:
- Classic Combo: Mashed potatoes and roasted green beans.
- Mediterranean Style: Serve over couscous with olives, tomatoes, and tzatziki.
- Asian-Inspired: Glaze with soy sauce, honey, and sesame oil for a sticky, flavorful finish.
- Healthy Option: Add to a quinoa or kale salad for a protein boost.
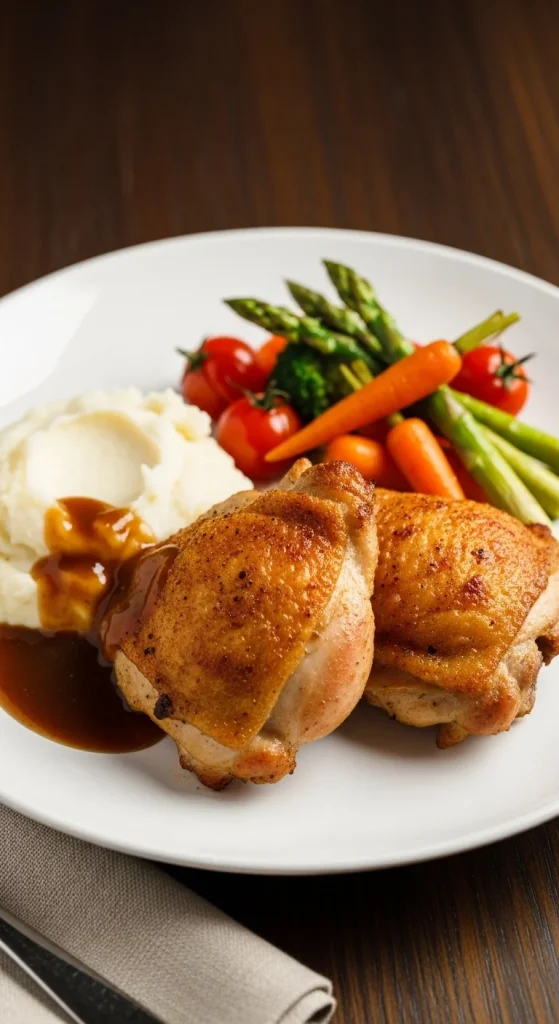
Pro Tip: For extra shine, brush your thighs with melted butter or pan drippings right before serving.
Step 6: Troubleshooting Common Mistakes
Even pros slip up sometimes! Here’s how to avoid common pitfalls:
- Skin not crispy? You didn’t dry it enough before cooking, or your pan wasn’t hot enough.
- Dry meat? Overcooked — check with a meat thermometer (165°F is your target).
- Soggy skin after roasting? Let the chicken rest on a wire rack instead of directly on the baking sheet.
Final Bite
Crispy-on-the-outside, juicy-on-the-inside chicken thighs are the kind of meal that feels gourmet but takes surprisingly little effort. With the right prep, a hot pan, and a few simple tricks, you’ll have a dish that’s perfect for family dinners, meal prep, or date nights at home.
So go ahead — grab that skillet, season boldly, and cook like a pro.
Save this recipe for later — your future self (and your taste buds) will thank you!

Hannah Collins is a passionate home cook and food storyteller who believes every recipe tells a little love story. At TastyWriter, she shares simple, delicious recipes made for real kitchens and busy days — from cozy comfort dishes to creative new favorites. When she’s not cooking, you’ll find her photographing food, testing family recipes, or sipping tea while dreaming up her next tasty idea.
Leave a Reply