
There’s nothing quite like the smell of roasted chicken filling your kitchen. That golden skin. That juicy, tender meat. It’s the kind of meal that feels special — even if it’s just an ordinary Sunday. Yet, for many home cooks, the perfect roast chicken feels tricky to achieve. Too dry? Not enough flavor? Not anymore. Here’s your foolproof guide to roasting chicken like a pro — crispy outside, juicy inside, and packed with flavor.
Step 1: Start With the Right Chicken
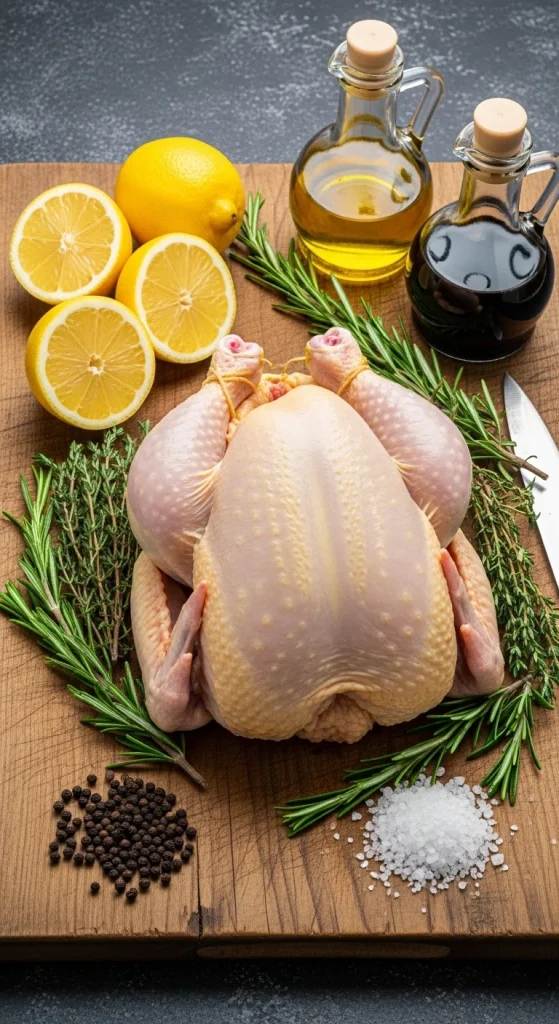
A good roast starts with a good bird.
- Choose fresh, not frozen — or if it’s frozen, let it thaw completely in the fridge for at least 24 hours.
- Go for whole: About 3–4 pounds is ideal for even cooking.
- Pat it dry: Moisture on the skin stops it from crisping up. Use paper towels to get every part dry.
Pro tip: Let the chicken rest uncovered in the fridge for a few hours before roasting. This helps dry out the skin — the secret to that irresistible crunch.
Step 2: Season Like You Mean It
Salt is your best friend here. Don’t be shy — a generous sprinkle inside and out makes all the difference. It helps draw out moisture while creating flavor and texture.
Add a few extras to take it from good to great:
- Inside the cavity: Lemon halves, garlic cloves, and a handful of fresh herbs (rosemary, thyme, parsley).
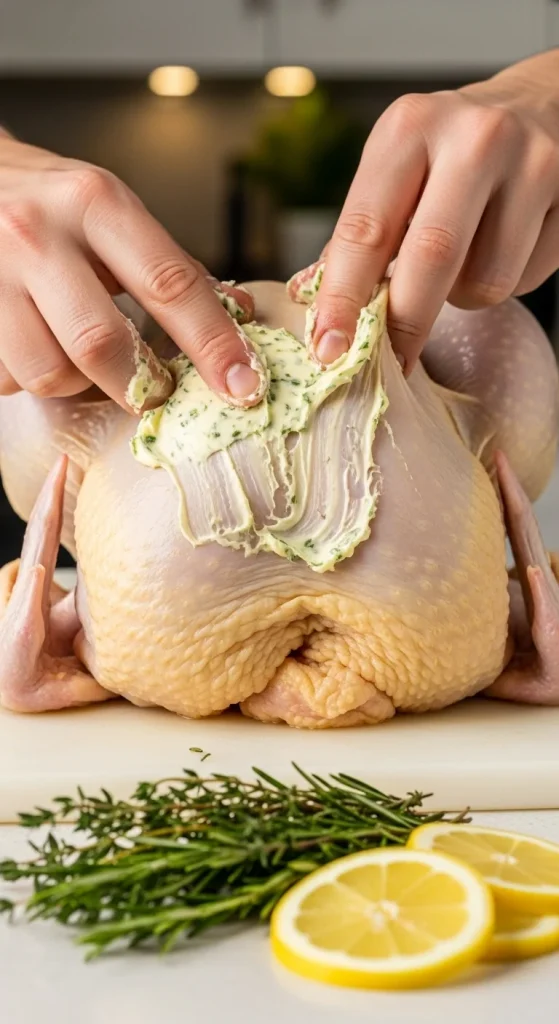
- Outside: Rub olive oil or softened butter all over, then season with salt, pepper, and any spices you love — paprika, garlic powder, or a pinch of chili for heat.
Pro move: Mix your butter with herbs and slide it under the skin on the breast. This melts into the meat as it roasts, keeping it tender and flavorful.
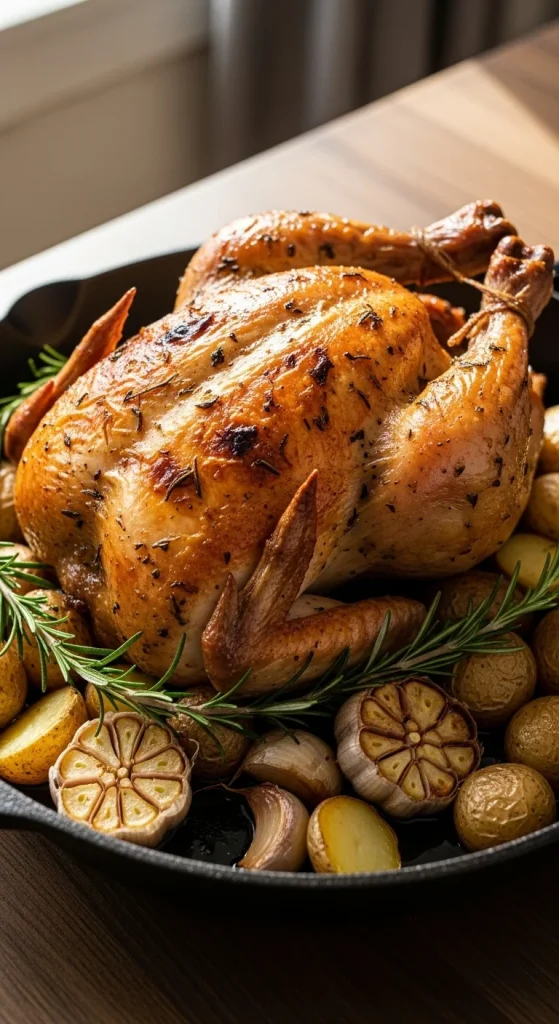
Step 3: Get the Temperature & Timing Right
The magic numbers: 425°F (220°C) and about 60–75 minutes for a 3–4 lb chicken.
Here’s how to make it perfect:
- Preheat the oven — hot air from the start gives you crispy skin.
- Use a roasting rack — it lets air circulate around the chicken, helping it cook evenly.
- Start breast-side up — this keeps the breast juicy and the skin beautifully browned.
- Baste halfway through — spoon the pan juices over the chicken once or twice to add extra flavor and shine.
Want to be sure it’s cooked? Use a thermometer. The thickest part of the thigh should reach 165°F (75°C).
Step 4: Let It Rest — Patience Pays Off
This is the part most people skip, but it’s crucial.
After taking the chicken out of the oven, let it rest for at least 15 minutes before carving. Cover it loosely with foil. This lets the juices redistribute throughout the meat instead of spilling out onto the cutting board.
It’s the difference between “pretty good” and “can’t-stop-eating-this” chicken.
Step 5: Serve It Like a Pro
Now comes the fun part — plating your masterpiece.
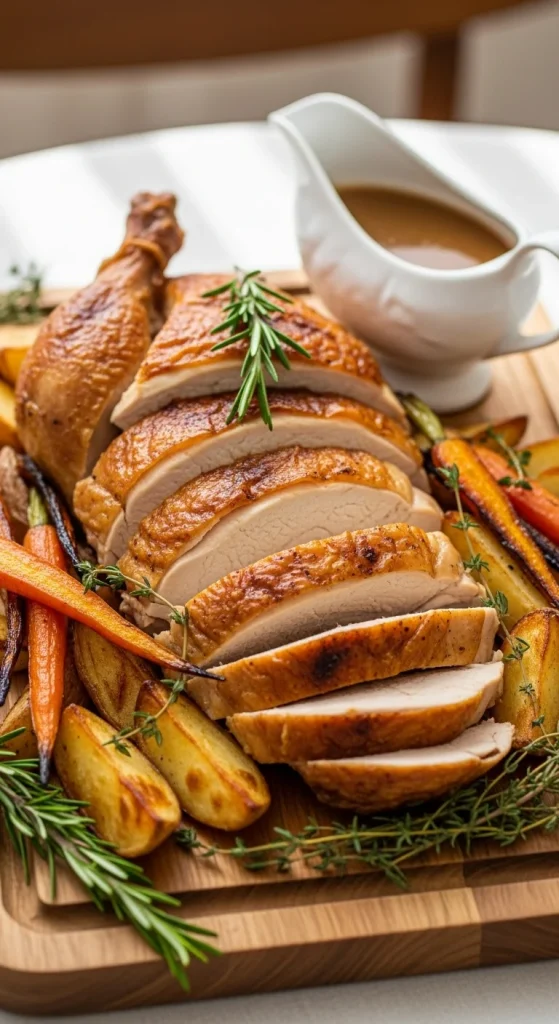
Cut between the joints for clean, even portions:
- Remove the legs first.
- Then the wings.
- Finally, slice the breast meat against the grain for tenderness.
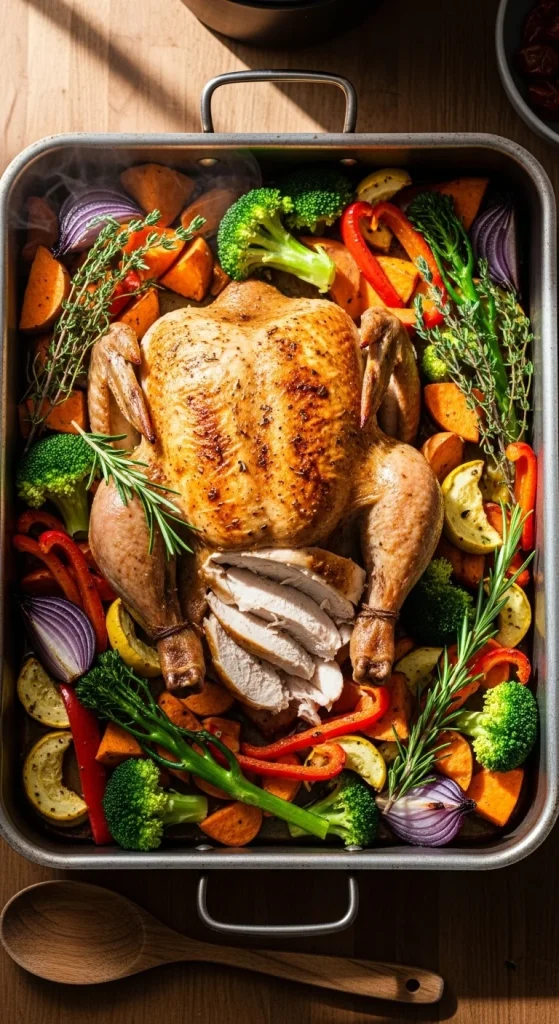
Add roasted vegetables or mashed potatoes on the side, and drizzle a little pan sauce for extra flavor. To make a quick gravy, whisk a spoon of flour or cornstarch into the leftover drippings, add a splash of broth or wine, and simmer until thickened.
Quick Tips for Consistent Results
- Room temperature bird: Let your chicken sit out for 30 minutes before cooking. Cold meat cooks unevenly.
- Flip halfway (optional): Start breast-side down for the first 30 minutes, then flip it. This trick helps keep the breast extra moist.
- Add veggies to the pan: Potatoes, carrots, and onions soak up all the delicious drippings.
- Make it your own: Try honey-glazed skin, smoked paprika rubs, or a citrus marinade for variety.
Why This Method Works Every Time
It’s all about balance — high heat for crispiness, resting for juiciness, and seasoning for depth. By paying attention to these simple steps, you get that perfect combination every cook dreams of: crackly golden skin and tender, flavorful meat.
No fancy gear. No chef-level skills. Just a few small techniques that make all the difference.
The Takeaway
Roasting a chicken isn’t just cooking — it’s a little ritual that fills your home with warmth and the best smells imaginable. Once you try this method, you’ll never go back to store-bought rotisserie again.
So go ahead, preheat that oven and grab your herbs — your next dinner masterpiece is waiting.
Save this guide for your next Sunday roast or holiday meal!

Hannah Collins is a passionate home cook and food storyteller who believes every recipe tells a little love story. At TastyWriter, she shares simple, delicious recipes made for real kitchens and busy days — from cozy comfort dishes to creative new favorites. When she’s not cooking, you’ll find her photographing food, testing family recipes, or sipping tea while dreaming up her next tasty idea.
Leave a Reply