
There’s something magical about pulling a loaf of homemade sourdough bread out of the oven — golden, crusty, and warm enough to make your kitchen smell like heaven. What makes sourdough special isn’t just the taste; it’s the process. The slow fermentation gives every loaf a deep flavor and chewy texture that regular bread can’t match. And the best part? You can make it at home with a little patience and practice.
What You’ll Need to Get Started
Before you bake, gather your essentials. Sourdough doesn’t need fancy equipment, just a few simple tools and ingredients:
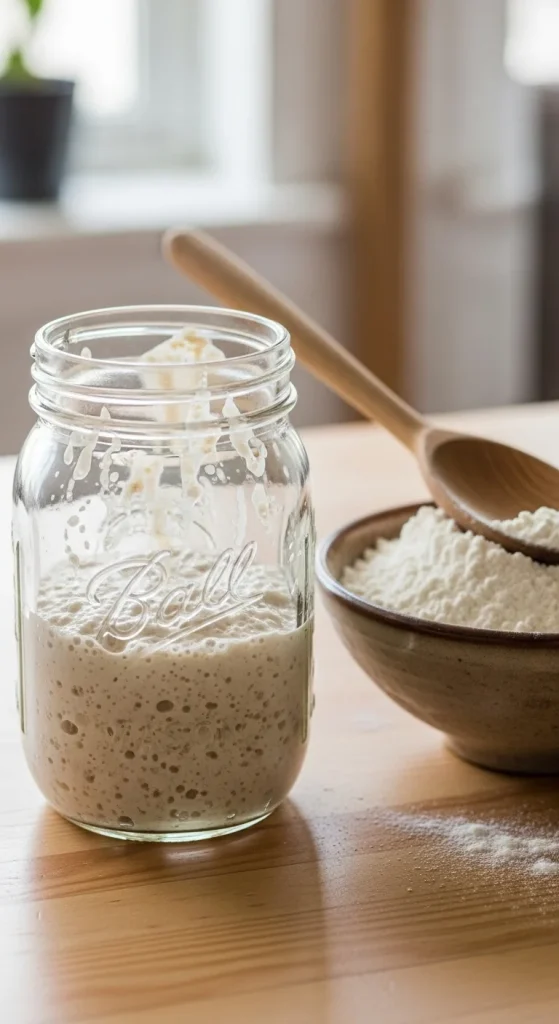
- 1 active sourdough starter (about 100g)
- 375g warm water
- 500g bread flour (or a mix of whole wheat and white)
- 10g salt
- A mixing bowl, bench scraper, and Dutch oven or oven-safe pot with a lid
If you don’t have a sourdough starter yet, you can make one by mixing equal parts flour and water, feeding it daily until it bubbles and smells slightly tangy — usually within 5–7 days.
Step 1: Mix & Rest (Autolyse)
In a large bowl, mix your flour and water until no dry spots remain. It’ll look rough — that’s okay. Cover it with a damp towel and let it rest for 30–60 minutes.
This resting stage, called autolyse, helps the flour absorb water and begin gluten development naturally. It’s what gives sourdough its elastic texture later.
After resting, add your sourdough starter and salt. Mix well using your hands or a wooden spoon. The dough should feel sticky but workable.
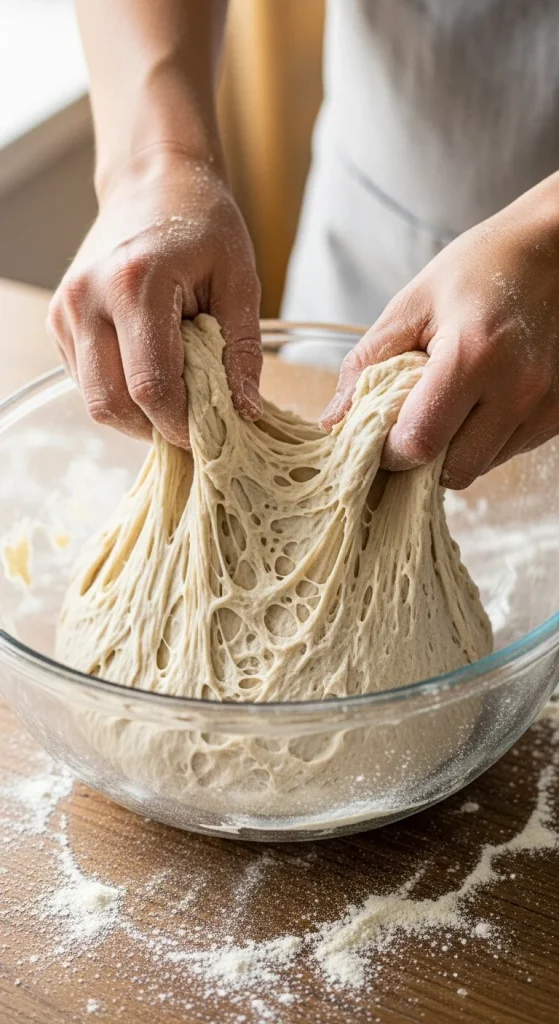
Step 2: Stretch & Fold
Instead of kneading, sourdough relies on a stretch-and-fold technique to build strength.
- Every 30 minutes for the next 2 hours, grab one side of the dough, stretch it upward, and fold it over itself.
- Rotate the bowl a quarter turn and repeat until all sides are folded.
By the last round, the dough should feel smoother and tighter. This slow process develops gluten without overworking the dough.
Step 3: Bulk Fermentation
Cover your dough and let it rest at room temperature for 4–6 hours, or until it doubles in size. The exact timing depends on your room temperature — warmer kitchens ferment faster.
Look for these signs:
- The dough has risen noticeably.
- It feels airy and jiggly when you shake the bowl.
- Small bubbles appear near the surface.
This slow rise is where flavor develops, so resist the urge to rush it.
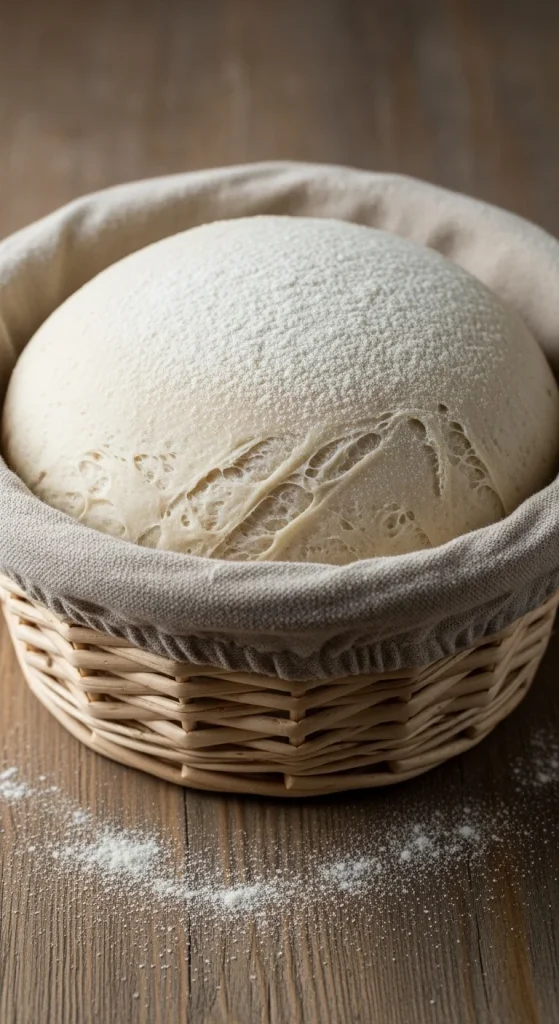
Step 4: Shape Your Loaf
Once the dough has risen, it’s time to shape it.
- Lightly flour your counter and turn the dough out gently.
- Fold it into itself to form a round or oval shape.
- Use a bench scraper to tighten the surface by pulling it toward you slightly.
Place it seam-side up in a floured proofing basket or bowl lined with a towel. Cover and refrigerate overnight for a slow, flavorful proof.
Step 5: Preheat & Bake
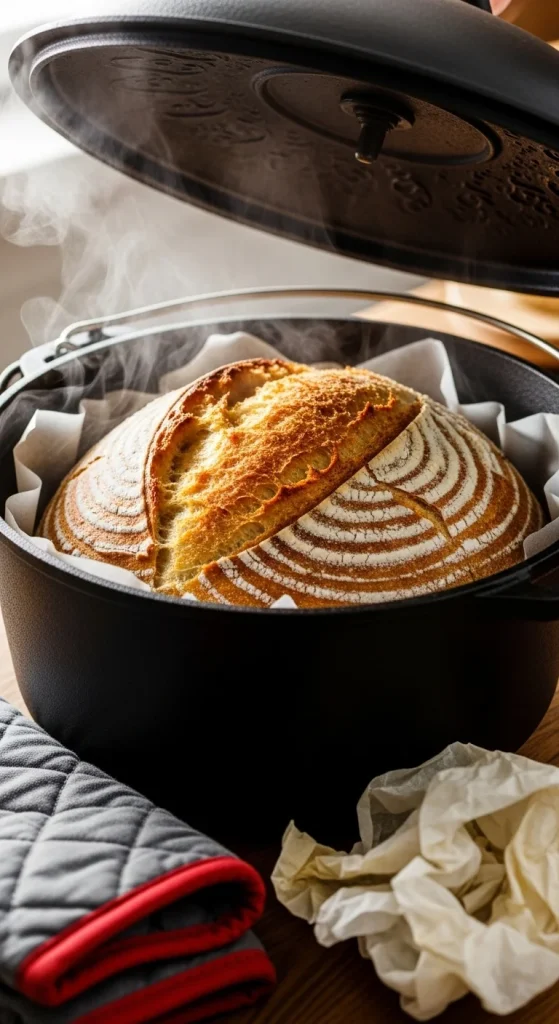
The next day, preheat your oven to 450°F (230°C) with your Dutch oven inside for at least 30 minutes.
Once hot, carefully place your dough into the pot, seam-side down. Score the top with a sharp knife or razor — this helps it expand while baking.
- Bake covered for 25–30 minutes.
- Remove the lid and bake another 15–20 minutes until golden brown and crackly.
When you tap the bottom, it should sound hollow — that’s how you know it’s done.
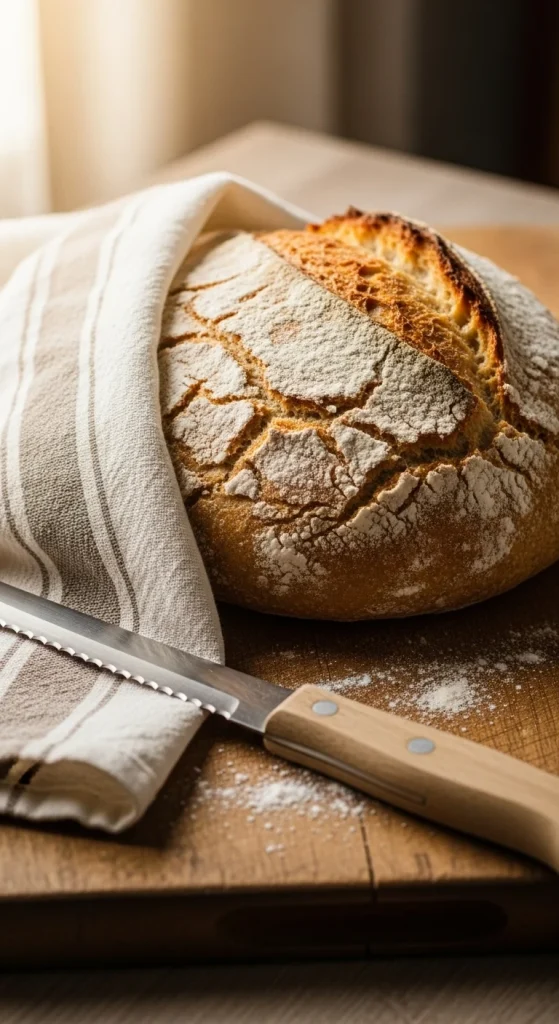
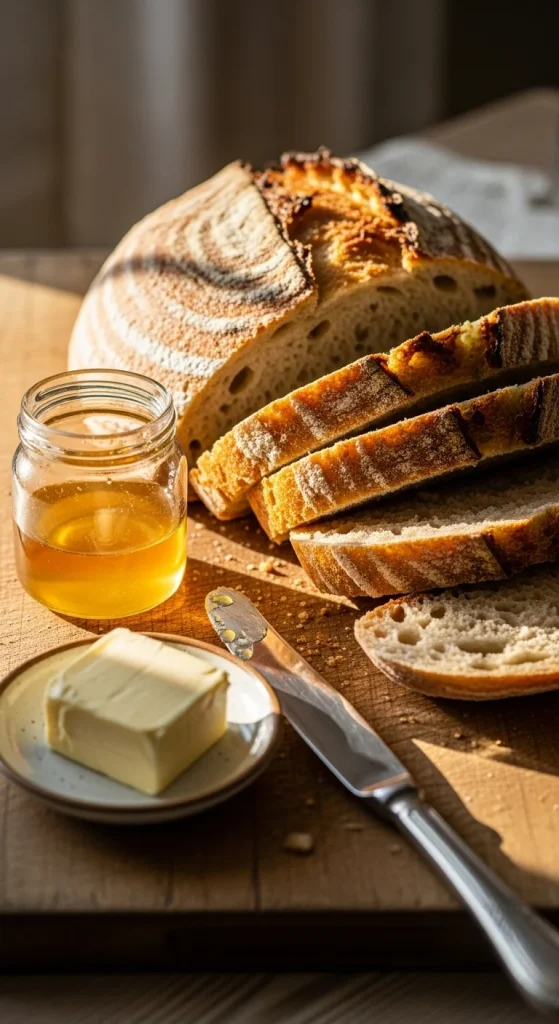
Step 6: Cool & Slice
This might be the hardest part — waiting! Let your bread cool on a rack for at least an hour before slicing. Cutting too soon releases steam and can make the inside gummy.
When you finally cut into it, you’ll see that beautiful open crumb and hear the gentle crunch of the crust. Spread on some butter, honey, or jam, and enjoy every bite.
Troubleshooting Tips
If your first loaf doesn’t come out perfect, don’t worry — sourdough takes practice. Here’s how to fix common issues:
- Dough too sticky? Add a bit more flour next time.
- Didn’t rise much? Your starter may need extra feedings.
- Too sour? Shorten the fermentation time or use less starter.
- Flat loaf? Try shaping it tighter before the final proof.
Every bake teaches you something new — that’s part of the fun.
The Joy of Homemade Sourdough
There’s something deeply satisfying about turning flour, water, and salt into a loaf of bread that crackles as it cools. Each sourdough you bake will have its own character, shaped by your hands, your starter, and your kitchen’s rhythm.
It’s not about perfection — it’s about patience and process. So roll up your sleeves, get a little flour on your hands, and enjoy the experience.
Save this guide for your first bake — and share your homemade loaf with someone you love!

Hannah Collins is a passionate home cook and food storyteller who believes every recipe tells a little love story. At TastyWriter, she shares simple, delicious recipes made for real kitchens and busy days — from cozy comfort dishes to creative new favorites. When she’s not cooking, you’ll find her photographing food, testing family recipes, or sipping tea while dreaming up her next tasty idea.
Leave a Reply