
If you’ve ever sliced into a holiday turkey that looked picture-perfect on the outside but turned out dry on the inside — you’re not alone. The secret to a perfectly juicy, tender, and flavorful turkey is one simple step: brining. It’s the game-changer your Thanksgiving table deserves.
Brining locks in moisture, infuses flavor, and ensures that every bite — from the breast to the drumstick — is succulent and delicious. The best part? It’s easier than it sounds.

Step 1: What Is Brining and Why It Works
Brining is the process of soaking the turkey in a saltwater solution before cooking. It’s like a mini spa treatment for your bird — the salt tenderizes the meat, while herbs and aromatics add flavor from the inside out.
Here’s why it works so well:
- Moisture retention: Salt draws water into the meat and locks it there during roasting.
- Even seasoning: The salt and flavors penetrate deep, so every bite is seasoned.
- Tender texture: The brine breaks down tough muscle fibers for a soft, juicy finish.
Pro Tip: You can brine both fresh and frozen turkeys (just make sure the frozen one is completely thawed first).
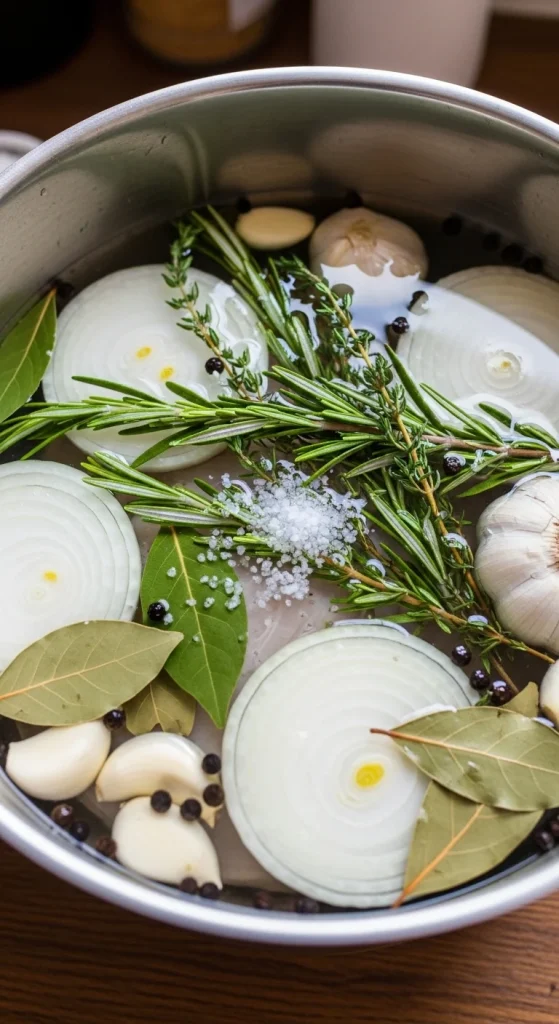
Step 2: Make the Perfect Brine
A good brine doesn’t just rely on salt — it’s a flavor bath. Here’s a simple and reliable recipe for a 12–14 lb turkey:
Ingredients:
- 1 cup kosher salt
- ½ cup brown sugar
- 1 tablespoon black peppercorns
- 3–4 bay leaves
- 1 tablespoon allspice or juniper berries (optional)
- 3–4 garlic cloves, smashed
- 2 onions, quartered
- A few sprigs of thyme, rosemary, and sage
- 1 gallon water + 1 gallon ice water (to cool)
Instructions:
- In a large pot, bring 1 gallon of water to a boil.
- Stir in salt, sugar, and seasonings until dissolved.
- Remove from heat and add 1 gallon of ice water to cool completely.
Pro Tip: Never add your turkey to warm brine — it can encourage bacteria growth. Always make sure the liquid is completely cool.
Step 3: Brine the Turkey
Once your brine is ready and cool, it’s time for the star of the show.
- Place the turkey (giblets removed) in a large container, stockpot, or brining bag.
- Pour the brine over it until fully submerged.
- Cover and refrigerate for 12–24 hours.
If your turkey floats, weigh it down with a plate to keep it fully immersed.

Pro Tip: If fridge space is tight, use a cooler filled with ice packs to keep your brine chilled (but still below 40°F / 4°C).
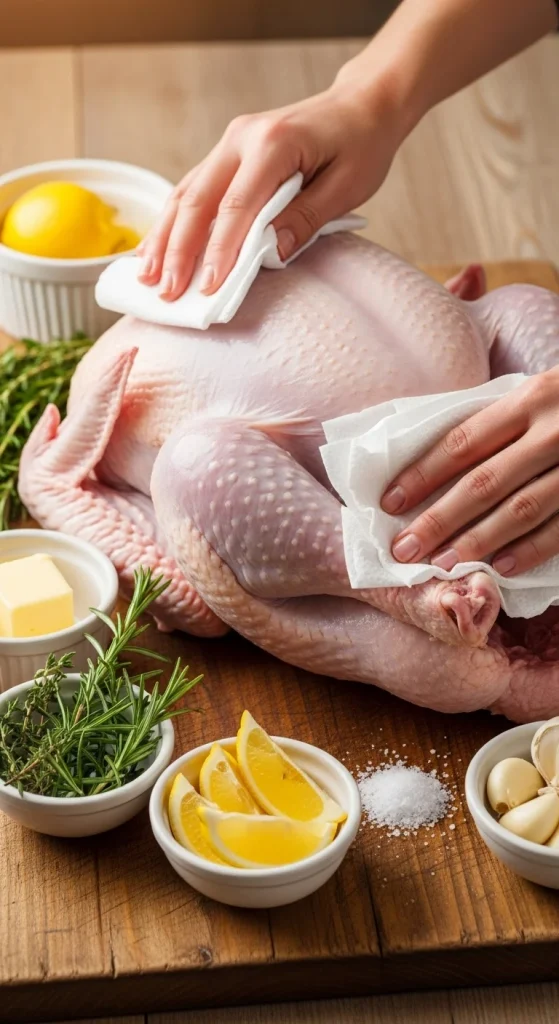
Step 4: Rinse, Dry & Prep for Roasting
After brining, remove the turkey and rinse it well under cold water to wash away excess salt. Then pat it completely dry with paper towels — this is key for crispy, golden skin.
Once dry, let it sit uncovered in the fridge for 1–2 hours (or overnight). This step helps the skin dehydrate slightly, which means you’ll get that perfect crisp when roasting.
Now you’re ready to season and stuff! Try:
- A butter rub made with garlic, lemon zest, and herbs.
- A few lemon wedges, onion quarters, and herbs inside the cavity for aroma.
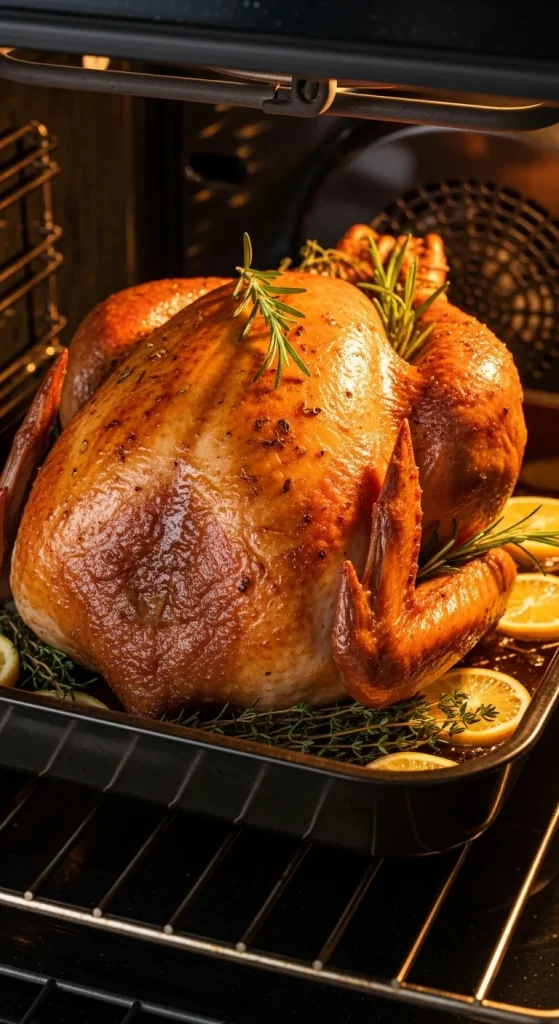
Step 5: Roast to Golden Perfection
Cooking Instructions:
- Preheat oven to 325°F (165°C).
- Place the turkey breast-side up on a rack in a roasting pan.
- Rub softened herb butter under and over the skin.
- Roast uncovered for 15 minutes per pound, or until the internal temperature reaches 165°F (74°C) in the thickest part of the breast.
- Baste every 45 minutes with pan drippings or melted butter.
If the skin browns too quickly, tent the turkey loosely with foil.
Pro Tip: Let the turkey rest for at least 30 minutes before carving. This allows the juices to redistribute for the ultimate tenderness.
Step 6: Garnish & Serve
Presentation is half the fun — especially when your turkey looks this good. Place it on a serving platter and surround it with:
- Fresh rosemary and thyme sprigs
- Orange or lemon slices
- Cranberries for a festive pop of color
Then, grab your carving knife and watch everyone’s eyes light up when they see (and taste) how juicy it is.

Pro Tip: Save the pan drippings for a flavorful gravy — it’s the perfect finishing touch.
Step 7: Bonus Flavor Ideas
Want to take your brined turkey up another notch? Try these flavor variations:
- Apple Cider Brine: Replace half the water with apple cider for a subtly sweet, fall-inspired touch.
- Citrus Brine: Add orange and lemon slices for brightness.
- Spicy Brine: Add crushed red pepper flakes and chili for a bold kick.
Each variation infuses the turkey with its own unique aroma and taste — perfect for experimenting year after year.
Final Bite
Brining might seem like an extra step, but once you taste the results — tender, juicy, and bursting with flavor — you’ll never skip it again. It transforms a basic turkey into a holiday centerpiece everyone will rave about.
So grab your salt, your herbs, and that beautiful bird — this year, your turkey will be the star of the feast.
Save this recipe for later — because your future Thanksgiving self will thank you!


Hannah Collins is a passionate home cook and food storyteller who believes every recipe tells a little love story. At TastyWriter, she shares simple, delicious recipes made for real kitchens and busy days — from cozy comfort dishes to creative new favorites. When she’s not cooking, you’ll find her photographing food, testing family recipes, or sipping tea while dreaming up her next tasty idea.
Leave a Reply