
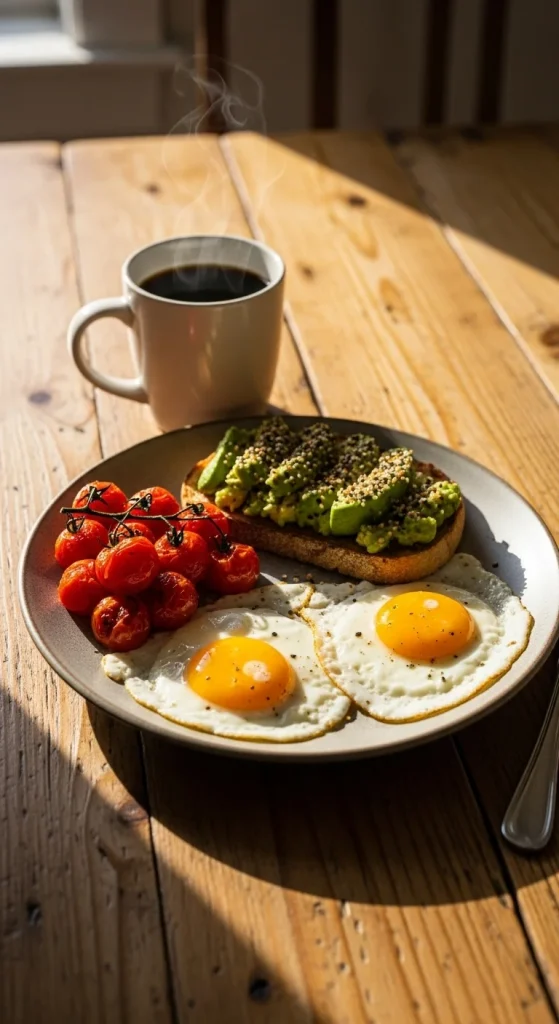
There’s something deeply satisfying about a perfectly fried egg — golden edges, soft whites, and a creamy, runny yolk that melts into your toast. It’s the simplest meal, yet one that feels like a little kitchen triumph when done right. Whether you love it sunny-side up, over-easy, or crispy-edged, this guide will show you how to fry an egg perfectly every single time.
The Right Ingredients and Tools Matter
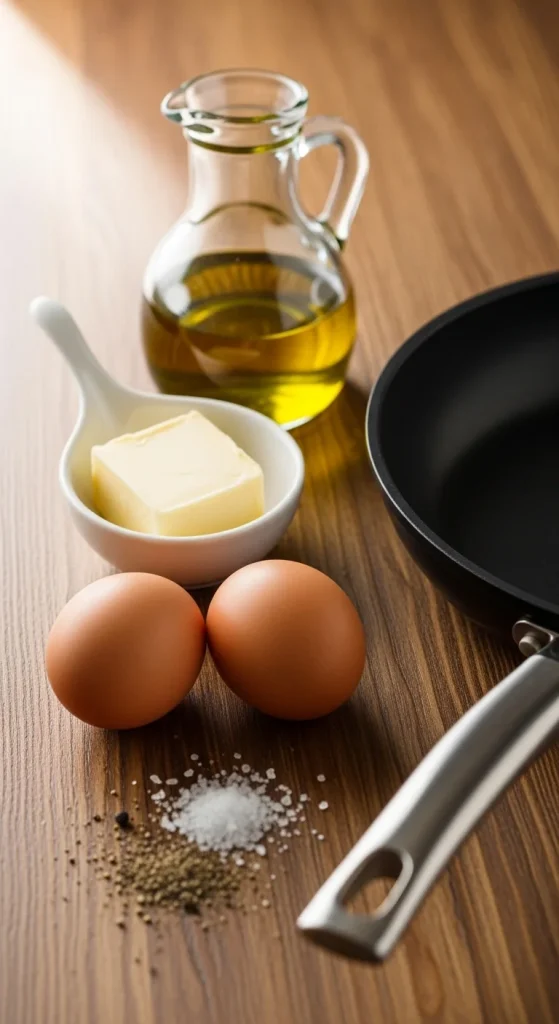
Before you crack that egg, make sure you have everything ready.
You’ll need:
- 1–2 large eggs (the fresher, the better)
- 1 tablespoon of butter or oil
- Salt and pepper to taste
- Non-stick or cast-iron skillet
- A heatproof spatula
Pro Tip: Fresh eggs hold their shape better in the pan, giving you that perfect round edge instead of a spread-out mess.
Step 1: Preheat the Pan — But Not Too Hot
The biggest mistake most people make? Cooking on heat that’s too high.
- Place your pan over medium heat and let it warm up for a minute or two.
- Add your butter or oil — when it starts to shimmer (not smoke), you’re ready.
If you’re after those crispy, golden edges, lean toward medium-high heat and use a bit more oil. For a soft and tender egg, keep the heat on the lower side.
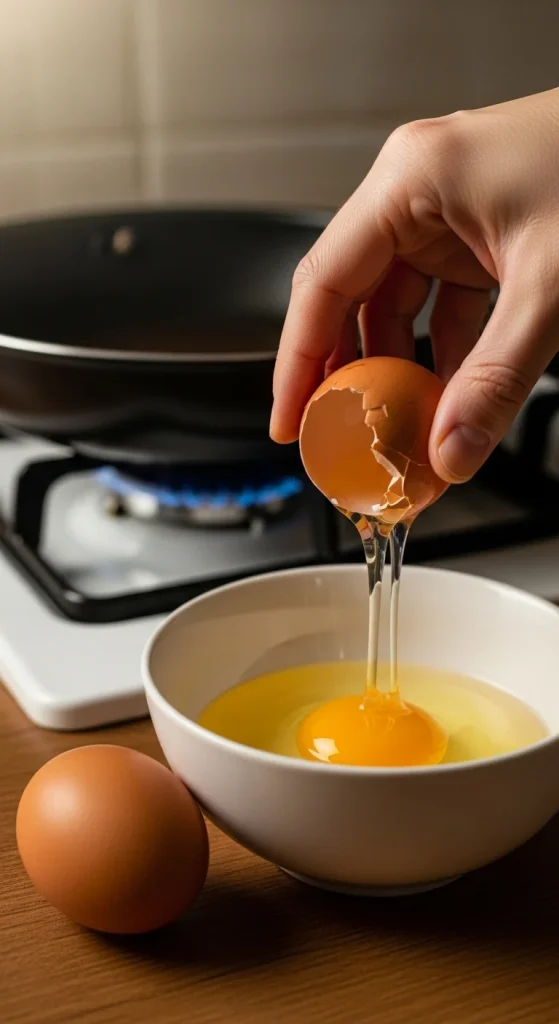
Step 2: Crack the Egg the Right Way
Skip cracking on the bowl edge — it often leads to broken yolks or shell pieces. Instead:
- Tap the egg gently on a flat surface (like the counter).
- Use both thumbs to open it cleanly into a small bowl.
- Then, slide it gently into your hot pan.
This extra step keeps your yolk intact and makes your egg picture-perfect.
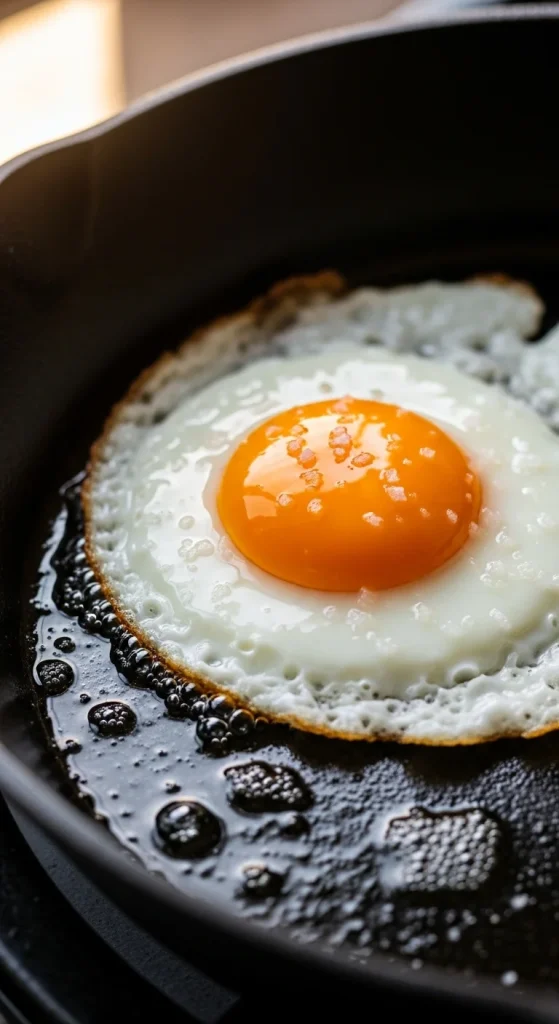
Step 3: Fry to Perfection
This is where you control the magic — the edges, the yolk, the texture.
For Sunny-Side Up:
- Don’t flip it. Let it cook until the whites are fully set but the yolk is still glossy.
- If the edges brown before the top sets, cover the pan with a lid for 30 seconds to steam the top.
For Over-Easy:
- Once the whites are firm, gently flip the egg with a spatula.
- Cook for another 10–15 seconds for a runny yolk or 30 seconds for medium.
For Crispy-Edge Lovers:
- Add a bit more oil and let it sizzle slightly before cracking the egg in.
- Tilt the pan and spoon some of the hot oil over the whites to get that beautiful golden edge.
Step 4: Season at the Right Moment
Timing your seasoning matters.
- Add salt near the end of cooking, not at the start — salt can make the whites watery.
- Sprinkle pepper right before serving for a burst of flavor.
Want a flavor twist? Try these:
- Chili flakes and a drizzle of olive oil for spice.
- A sprinkle of smoked paprika or garlic powder.
- Flaky sea salt and fresh herbs for a gourmet touch.
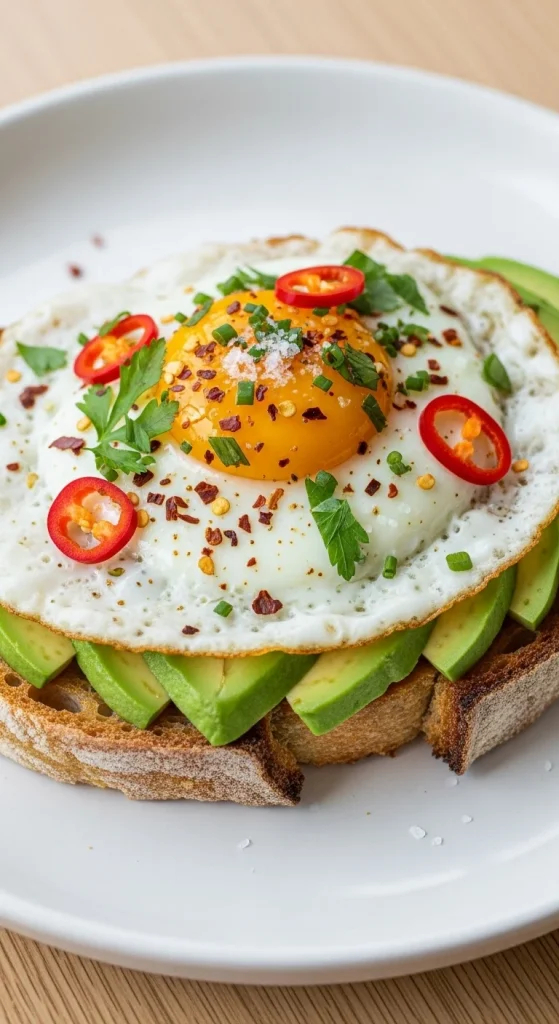
Step 5: Serve It Hot & Proud
Eggs cool fast, and that crispy edge you worked so hard for will soften if it sits too long. Serve your masterpiece right away — over buttered toast, rice, noodles, or even a breakfast hash.
If you’re making several eggs, keep them warm in a low oven (around 200°F or 90°C) until ready to serve.
Bonus Tips for Pro-Level Fried Eggs
- Use the right fat: Butter adds rich flavor, while olive oil or ghee gives crispiness.
- Mind your pan: A well-seasoned cast-iron skillet gives flavor and texture, but a non-stick pan ensures foolproof flips.
- Avoid overcooking: Once the whites set, remove the pan from heat — the residual warmth keeps cooking the yolk gently.
- Experiment: Try sesame oil for an Asian twist or brown butter for nutty richness.
Every cook develops their own favorite way to fry an egg — soft, crispy, or somewhere in between. Find your sweet spot.
The Takeaway
Frying an egg might seem simple, but getting it just right takes a little attention and a touch of technique. The sound of the sizzle, the smell of butter, and those golden, lacy edges make it more than breakfast — it’s a small moment of joy in your day.
Next time you grab the pan, you’ll know exactly how to turn an ordinary egg into something beautiful.
Save this guide for your next breakfast — your eggs will never be the same again!

Hannah Collins is a passionate home cook and food storyteller who believes every recipe tells a little love story. At TastyWriter, she shares simple, delicious recipes made for real kitchens and busy days — from cozy comfort dishes to creative new favorites. When she’s not cooking, you’ll find her photographing food, testing family recipes, or sipping tea while dreaming up her next tasty idea.
Leave a Reply