
There’s something special about a homemade apple pie — that buttery, flaky crust paired with cinnamon-spiced apples bubbling beneath a golden top. It’s the kind of dessert that fills the kitchen with warmth and nostalgia. Whether you’re baking for a holiday, a weekend treat, or just to make your home smell amazing, making apple pie from scratch is pure comfort.
And here’s the good news: you don’t need to be a pastry chef to pull it off. With the right technique, you can bake a pie that’s flaky, sweet, and absolutely irresistible.
Step 1: Gather Your Ingredients
A great apple pie starts with simple, quality ingredients — and the right kind of apples.
For the Crust:
- 2 ½ cups all-purpose flour
- 1 teaspoon salt
- 1 tablespoon sugar
- 1 cup (2 sticks) cold unsalted butter, cubed
- 6–8 tablespoons ice water
For the Filling:
- 6 cups apples (about 5–6 medium apples), peeled and sliced
- ¾ cup sugar
- 2 tablespoons all-purpose flour
- 1 teaspoon ground cinnamon
- ¼ teaspoon ground nutmeg
- 1 tablespoon lemon juice
- 2 tablespoons butter, cut into small pieces
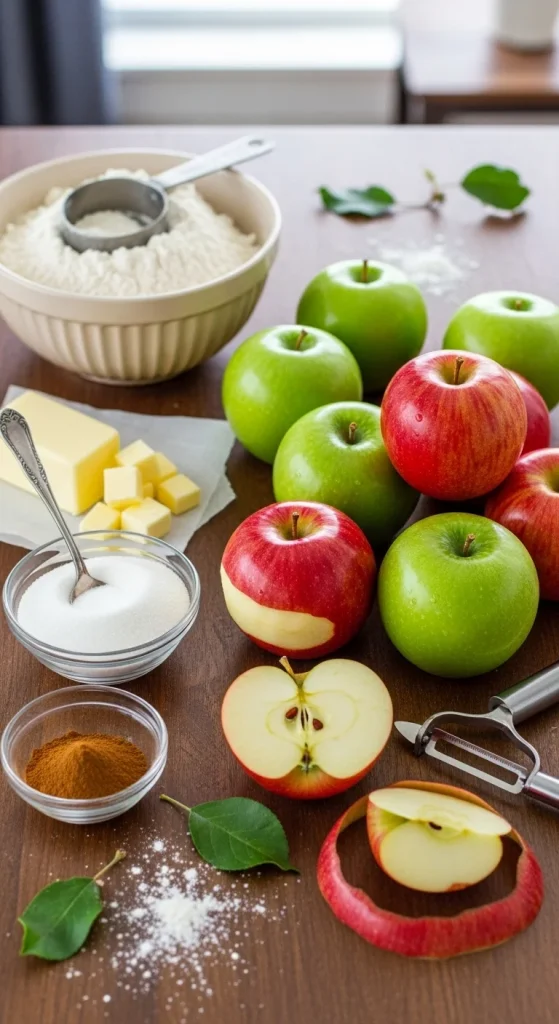
Pro Tip: Use a mix of tart and sweet apples — Granny Smith for tang, Honeycrisp or Fuji for sweetness, and Golden Delicious for that classic pie flavor.
Step 2: Make the Perfect Pie Crust
The crust is what makes or breaks your pie — and homemade is always worth it.
- In a large bowl, whisk together flour, salt, and sugar.
- Add cold butter cubes and use a pastry cutter or your fingers to work it in until you have pea-sized bits.
- Drizzle in ice water, one tablespoon at a time, until the dough just comes together (don’t overmix).
- Divide the dough into two discs, wrap each in plastic, and refrigerate for at least 1 hour.
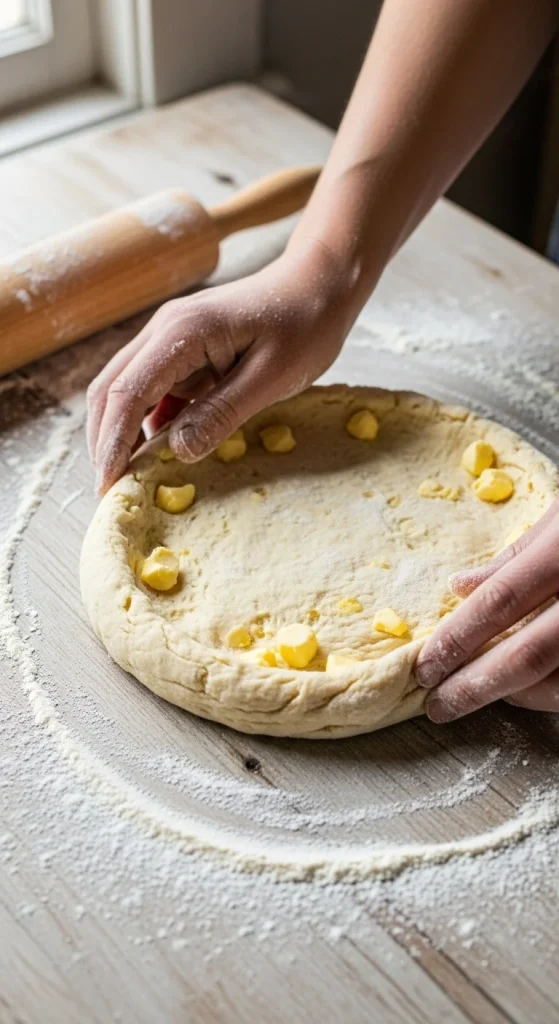
Pro Tip: Cold butter = flaky crust. Keep everything chilled, even your rolling pin if possible!
Step 3: Prepare the Apple Filling
While the dough chills, it’s time to make that cozy, cinnamon-apple filling.
- In a large bowl, combine sliced apples, sugar, flour, cinnamon, nutmeg, and lemon juice.
- Toss gently until every slice is coated.
- Let it sit for 10–15 minutes — the apples will release some juice, which helps create that syrupy filling later.
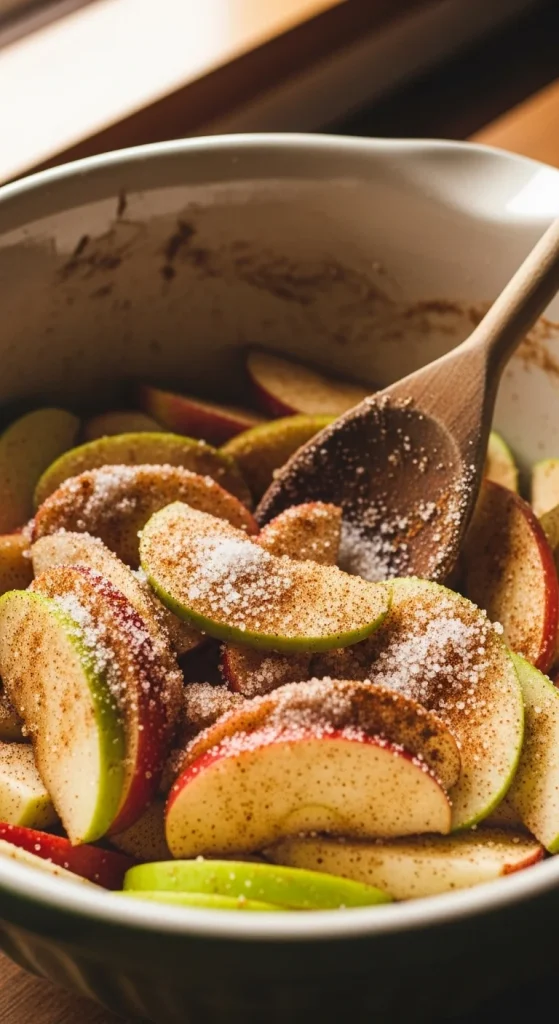
Pro Tip: Taste a slice before baking — this is your chance to adjust sweetness or spice to your liking.
Step 4: Assemble the Pie
Now comes the fun part — building your pie masterpiece.
- Roll out one disc of dough into a circle about 12 inches wide.
- Carefully lay it into your pie dish, letting the edges hang slightly over the sides.
- Spoon in your apple filling, then dot the top with butter pieces.
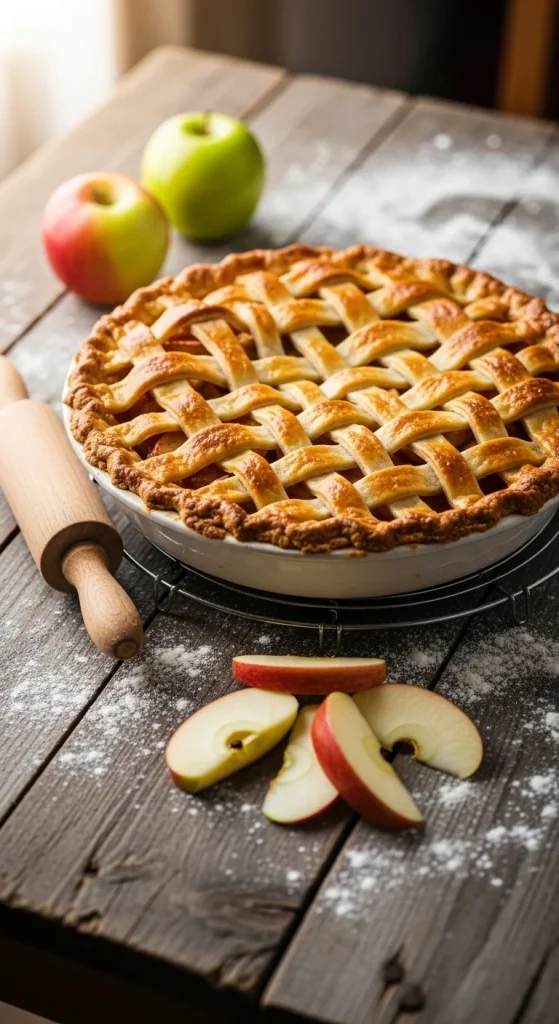
- Roll out the second dough disc for the top — either as a full sheet or cut into strips for a classic lattice pattern.
- Seal the edges and trim the excess dough. Crimp with a fork or your fingers for that homemade touch.

Pro Tip: Brush the top with a mix of 1 egg + 1 tablespoon milk for a shiny golden finish, and sprinkle with a bit of sugar for sparkle.
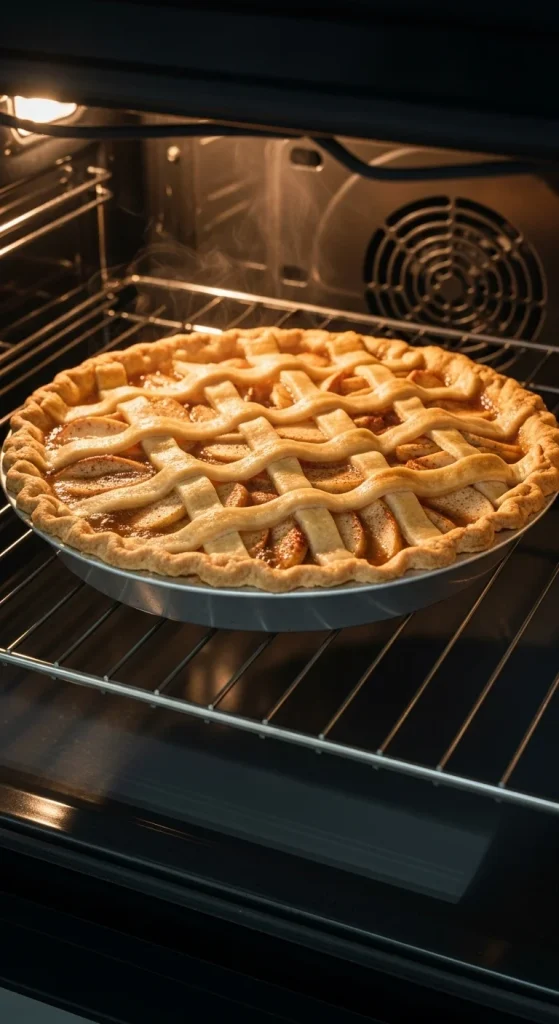
Step 5: Bake to Golden Perfection
Preheat your oven to 425°F (220°C).
- Place the pie on a baking sheet (to catch drips).
- Bake for 20 minutes, then lower the temperature to 375°F (190°C) and bake another 35–40 minutes, until the crust is deep golden and the filling bubbles.
If the edges start to brown too fast, cover them with foil halfway through baking.
Pro Tip: Let the pie cool for at least 2 hours before slicing — the filling needs time to set. (Yes, it’s hard to wait, but totally worth it.)
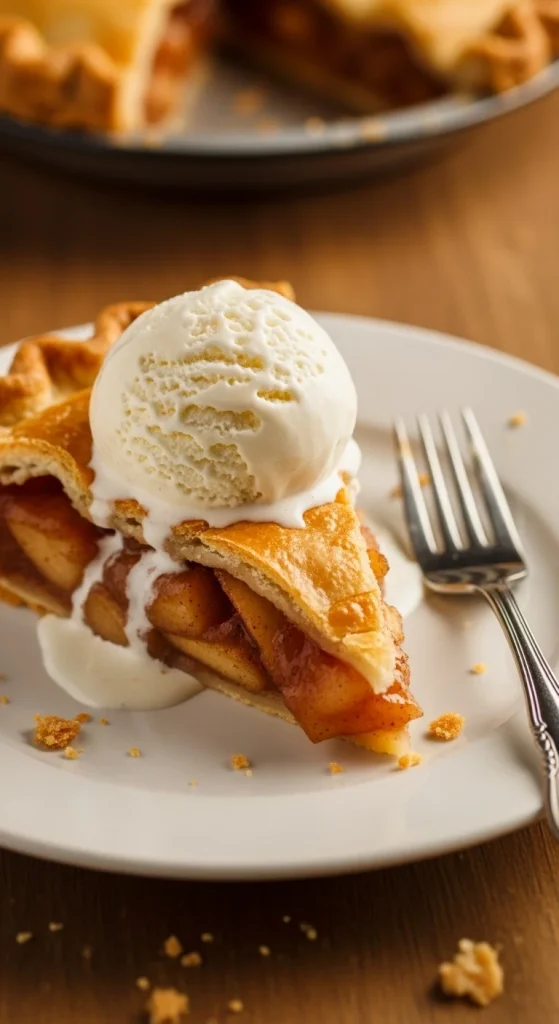
Step 6: Serve It Up
Once your kitchen smells like heaven and the pie has cooled slightly, it’s time to dig in.
Serve warm with:
- A scoop of vanilla ice cream
- A dollop of whipped cream
- Or just as-is, because perfection doesn’t need extras
Pro Tip: If you have leftovers (lucky you!), store them covered at room temperature for up to 2 days, or refrigerate for up to 5. Reheat slices briefly in the oven to revive that just-baked crispness.
Bonus: Make It Your Own
Once you master the basics, try mixing things up!
- Add caramel sauce for a gooey caramel-apple version.
- Sprinkle chopped pecans or walnuts into the filling for crunch.
- Use brown sugar instead of white for a deeper, molasses flavor.
Every tweak makes it a little more you.
Final Slice
Homemade apple pie is more than dessert — it’s a tradition, a mood, and a moment of simple joy. The flaky crust, warm spiced apples, and comforting aroma are what make it a true classic.
So roll up your sleeves, grab those apples, and start baking — because nothing says “home” quite like a pie cooling on the windowsill.
Save this recipe for later — your next cozy afternoon deserves a slice of homemade happiness!

Hannah Collins is a passionate home cook and food storyteller who believes every recipe tells a little love story. At TastyWriter, she shares simple, delicious recipes made for real kitchens and busy days — from cozy comfort dishes to creative new favorites. When she’s not cooking, you’ll find her photographing food, testing family recipes, or sipping tea while dreaming up her next tasty idea.
Leave a Reply