
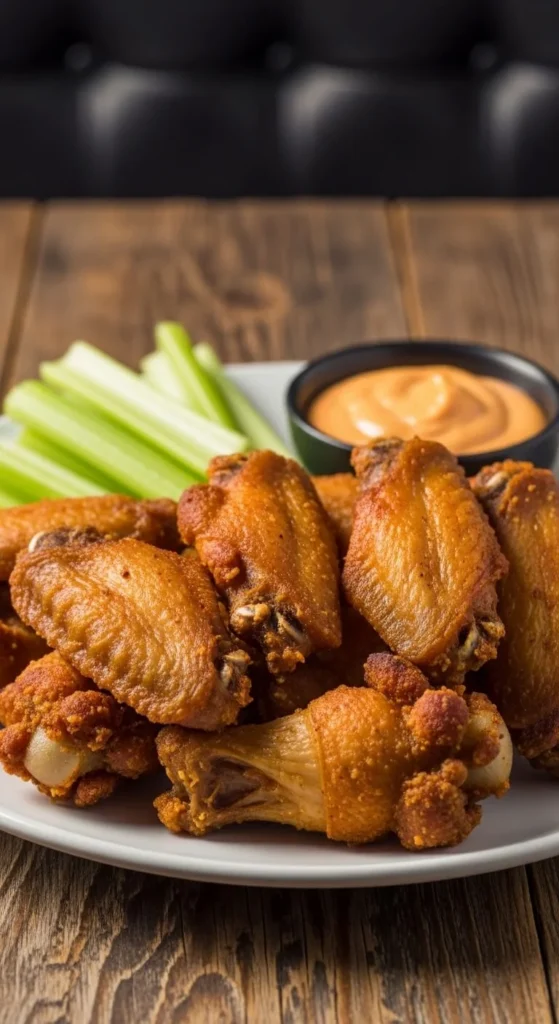
There’s nothing more disappointing than biting into a chicken wing expecting a crunch — and getting soft, soggy skin instead. Extra crispy chicken wings are all about texture. That golden, crackly outside paired with juicy meat inside is what makes them irresistible.
The good news? You don’t need a deep fryer to achieve that crunch. With the right prep and cooking method, you can make restaurant-quality crispy wings right at home.
Let’s break down exactly how to get that perfect crisp every time.
Start With Completely Dry Wings
Moisture is the enemy of crispiness.
Before seasoning or cooking, pat the wings completely dry using paper towels.
If possible:
- Let them sit uncovered in the fridge for a few hours
- Place them on a wire rack for airflow
Air drying helps remove surface moisture, which allows the skin to crisp up beautifully during cooking.
The drier the skin, the crunchier the result.
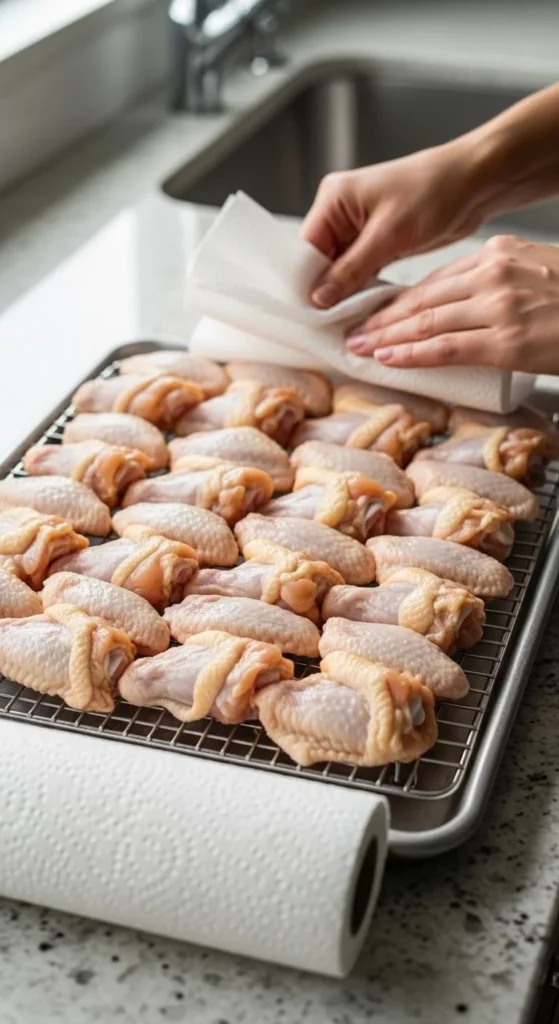
Skipping this step is one of the biggest reasons wings turn out soft.
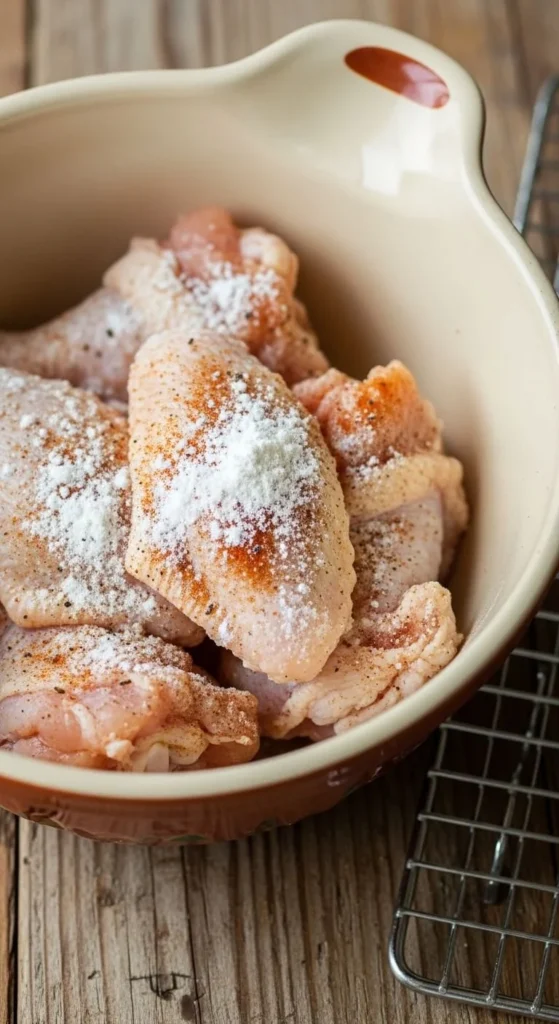
Use Baking Powder for Maximum Crunch
This is the secret ingredient.
A light coating of baking powder (not baking soda) helps break down proteins in the skin, creating a crispier texture.
How to use it:
- Mix 1 tablespoon baking powder per pound of wings
- Toss wings lightly until evenly coated
- Add salt and seasoning after
The baking powder changes the skin’s pH, helping it brown and crisp more effectively.
Don’t overcoat. A light, even layer works best.
Season Simply but Smartly
For extra crispy wings, keep the seasoning simple before cooking.
Use:
- Salt
- Black pepper
- Garlic powder
- Paprika
Avoid wet marinades before baking or roasting. Extra moisture prevents crisping.
If you want saucy wings, add sauce after cooking.
Dry seasoning supports crisp skin.
Bake on a Wire Rack for Even Crisping
Cooking wings directly on a flat pan traps steam underneath, making the bottom soggy.
Instead:
- Place wings on a wire rack
- Position the rack over a baking sheet
This allows air to circulate around the wings, crisping them evenly on all sides.
Preheat your oven to 425°F (220°C).
Bake for 40–50 minutes, flipping halfway through.
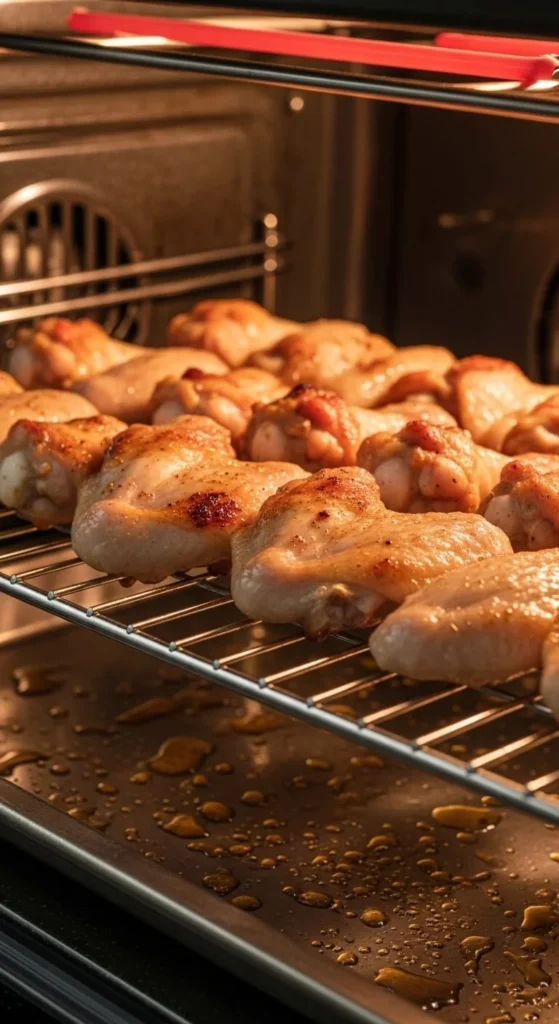
High heat is essential for crispy skin.
Flip for Even Browning
Halfway through cooking, flip the wings.
This ensures:
- Even browning
- Crispiness on both sides
- Better texture
Use tongs for easy flipping.
If you want even more crisp, you can broil for the last 2–3 minutes — but watch carefully to avoid burning.
Consider the Air Fryer Option
If you own an air fryer, it’s perfect for crispy wings.
Air fry at 380°F (190°C) for 20–25 minutes, flipping halfway.
For extra crunch, increase heat to 400°F (200°C) for the last 5 minutes.
The circulating hot air mimics deep frying without extra oil.
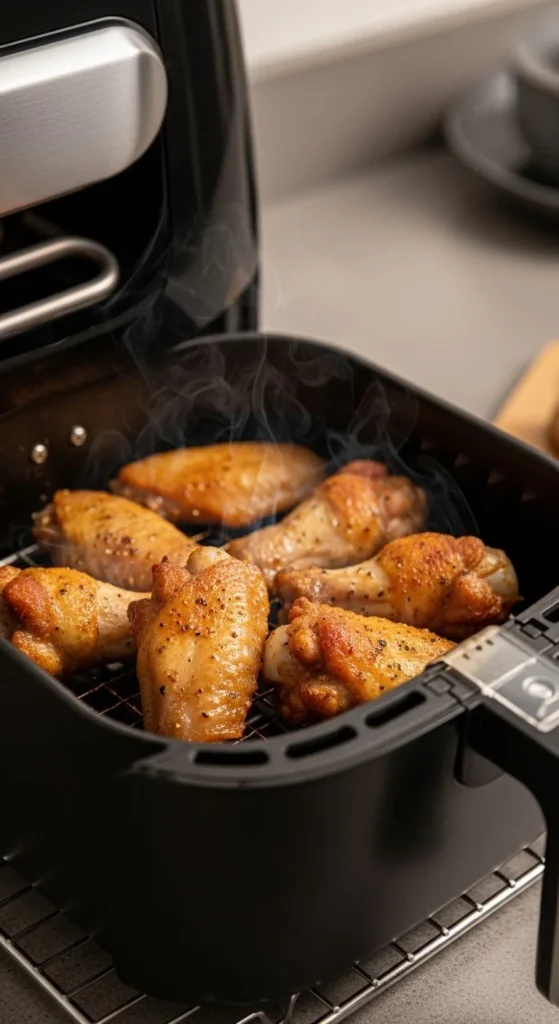
Air fryers are one of the easiest ways to get crispy skin.
Sauce After, Not Before
Once your wings are crispy, then it’s time for sauce.
Classic options include:
- Buffalo sauce
- Honey garlic
- BBQ sauce
- Sweet chili
Toss gently in sauce right before serving.
If you coat too early, the sauce softens the skin.
For maximum crunch, serve sauce on the side.
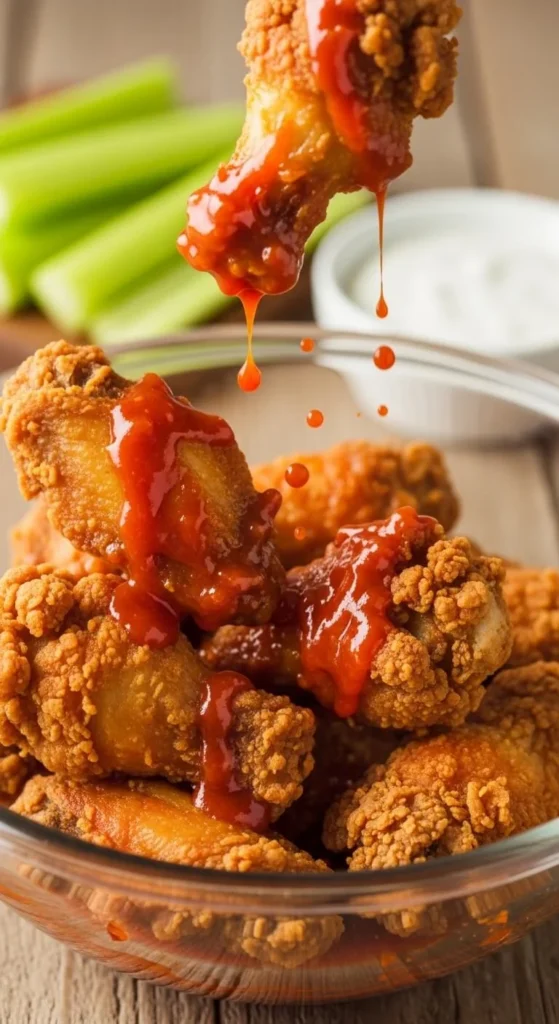
Balance is key — crispy outside, juicy inside.
Avoid Common Crispy Wing Mistakes
Here’s what often ruins crispiness:
- Skipping drying step
- Using too much oil
- Crowding the pan
- Cooking at low temperature
- Adding sauce too early
Spacing matters.
Wings need room to crisp properly.
Why These Techniques Work
Crispiness comes from:
- Removing moisture
- High heat
- Air circulation
- Chemical reaction from baking powder
These steps create a crackly exterior without drying out the meat.
The inside stays juicy while the outside crisps beautifully.
Final Thoughts
Making chicken wings extra crispy isn’t complicated. Dry them thoroughly. Use a light coating of baking powder. Cook at high heat on a wire rack. Add sauce at the end.
Small technique changes create big texture improvements.
Once you master this method, you’ll never settle for soggy wings again.
Save this guide for later and enjoy perfectly crispy chicken wings anytime.

Hannah Collins is a passionate home cook and food storyteller who believes every recipe tells a little love story. At TastyWriter, she shares simple, delicious recipes made for real kitchens and busy days — from cozy comfort dishes to creative new favorites. When she’s not cooking, you’ll find her photographing food, testing family recipes, or sipping tea while dreaming up her next tasty idea.
Leave a Reply