
Few desserts feel as luxurious as a rich, velvety chocolate truffle — and here’s the secret: they’re shockingly easy to make. You don’t need fancy tools, candy thermometers, or pastry chef skills. With just a handful of ingredients and a bit of patience, you can create truffles that look like they belong in a boutique chocolate shop.
What Makes a Truffle So Special
Chocolate truffles are made from ganache — a creamy blend of chocolate and cream that melts in your mouth. Named after the earthy mushroom they resemble, these bite-sized confections are decadent, smooth, and endlessly customizable.
You can coat them in cocoa, roll them in nuts, or dip them in glossy melted chocolate for that picture-perfect finish. The result? A treat that’s as elegant as it is indulgent.
Step 1: Gather the Essentials
Truffles only need a few basic ingredients, but quality matters here. Use good chocolate — the kind you’d happily eat on its own.
Ingredients
- 8 oz (about 225g) high-quality dark or semi-sweet chocolate, finely chopped
- ½ cup heavy cream
- 1 tsp vanilla extract (or a splash of liqueur like Baileys, Grand Marnier, or Kahlúa)
- A pinch of salt
- Optional coatings: cocoa powder, crushed nuts, shredded coconut, or melted chocolate
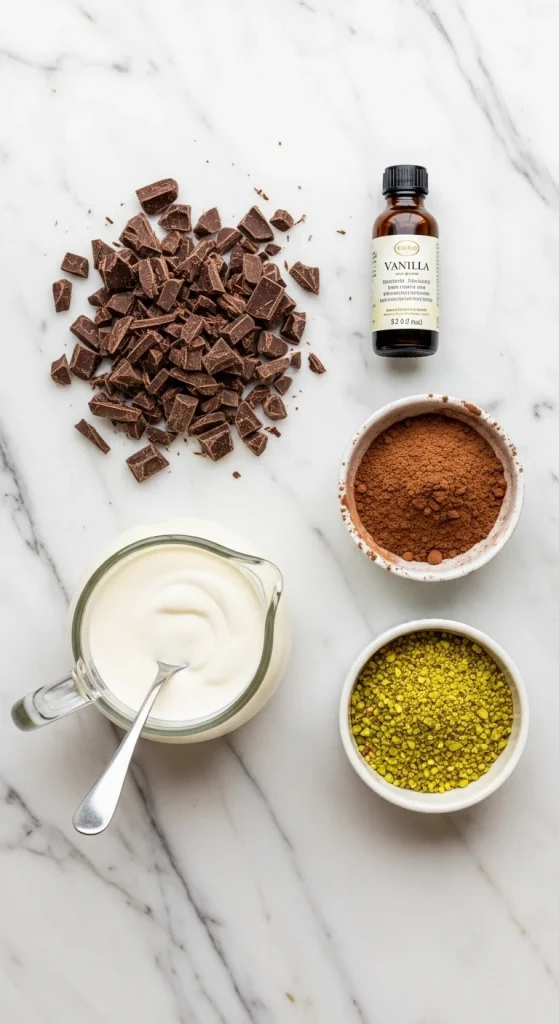
Pro Tip: Dark chocolate gives a bold, rich truffle, while milk chocolate creates a softer, sweeter version.
Step 2: Make the Ganache
Ganache is the silky heart of every truffle. Here’s how to make it perfectly smooth and luscious:
- Heat the cream in a small saucepan until it’s just starting to simmer — not boiling.
- Pour the hot cream over the chopped chocolate in a heat-safe bowl. Let it sit for about a minute.
- Stir gently with a spatula or whisk until the mixture becomes smooth and glossy.
- Add vanilla or liqueur and a pinch of salt. Stir again.
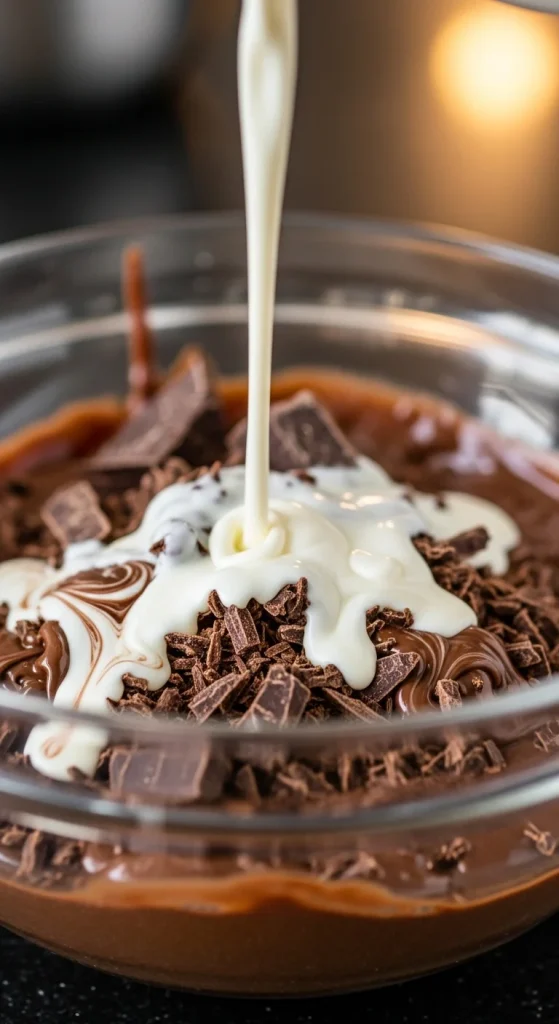
Pro Tip: If your ganache looks grainy, warm it gently over a double boiler while stirring until smooth.
Step 3: Chill Until Set
Once your ganache is silky, cover the bowl with plastic wrap and refrigerate it for about 1–2 hours, or until it’s firm enough to scoop.
You’ll know it’s ready when it feels solid but still scoopable — like firm frosting.
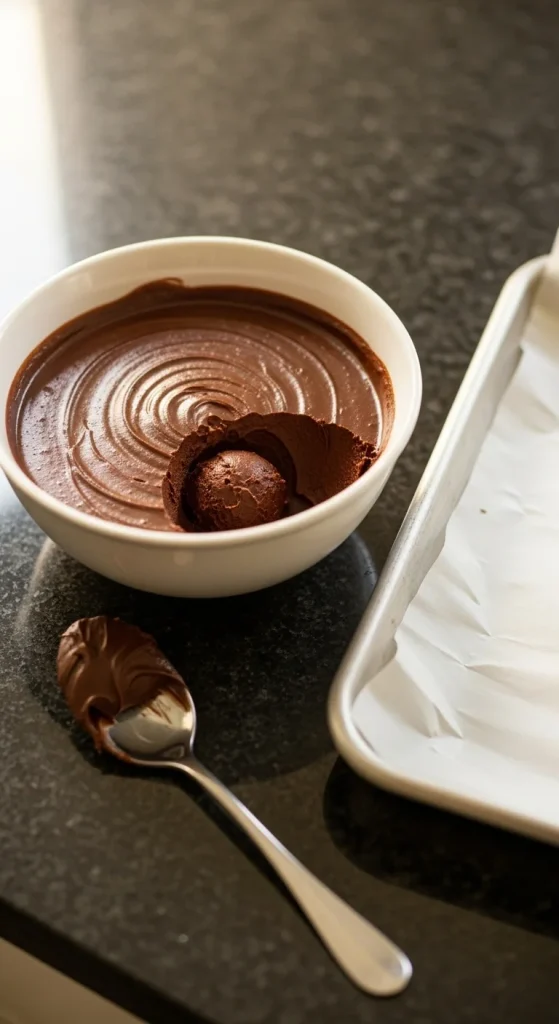
Step 4: Roll Into Perfection
This is the fun (and slightly messy) part!
- Scoop small amounts of ganache using a teaspoon or melon baller.
- Roll each piece quickly between your palms to form smooth balls.
- Place them on a parchment-lined tray.
Don’t worry if they’re not perfectly round — the rustic look is part of their charm. If the ganache starts melting, chill your hands briefly under cold water or pop the tray back in the fridge for a few minutes.
Pro Tip: Lightly dust your hands with cocoa powder to prevent sticking while rolling.
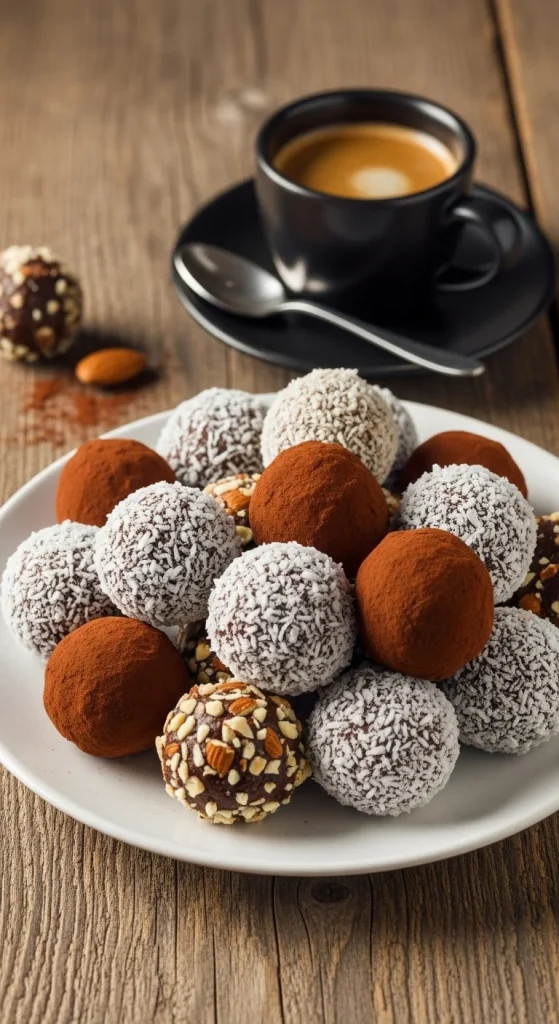
Step 5: Coat & Decorate
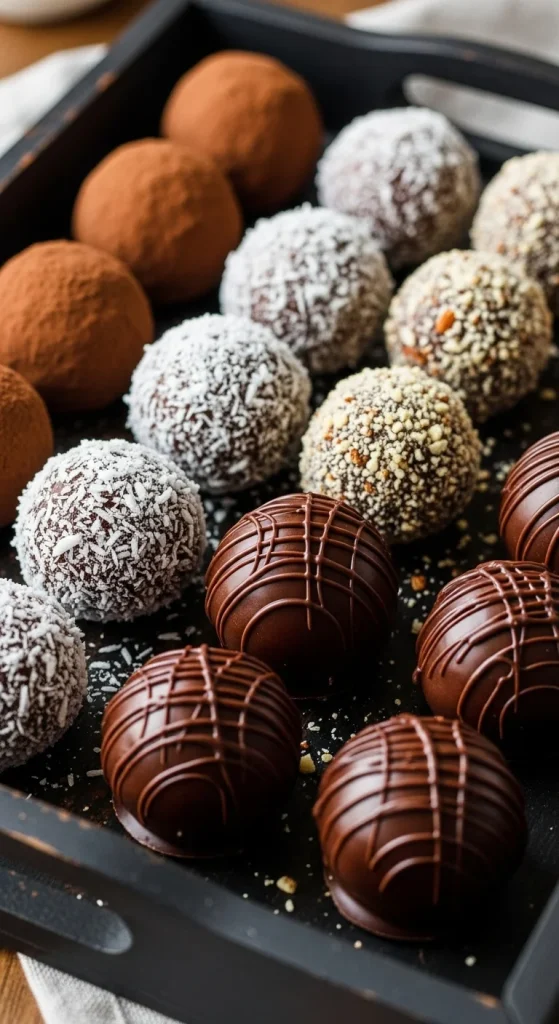
Here’s where you can let your creativity shine. Roll the truffles in your favorite coating for texture and contrast.
Try:
- Classic Cocoa Powder – Deep, rich, and slightly bitter.
- Crushed Nuts – Pistachios, almonds, or hazelnuts add crunch.
- Shredded Coconut – A touch of sweetness and a snow-like finish.
- Powdered Sugar – For an elegant, melt-in-the-mouth coating.
- Melted Chocolate Dip – For a glossy, professional finish.
Pro Tip: If dipping in chocolate, chill the truffles first so they don’t melt while coating.
Step 6: Store & Serve
Homemade truffles keep beautifully if stored right.
- Store them in an airtight container in the refrigerator for up to 2 weeks.
- Bring to room temperature for 10–15 minutes before serving for the best texture.
- For gifting, pack them in mini paper cups and place them in a decorative box.

Bonus: Flavor Variations to Try
Once you’ve mastered the base recipe, experiment with fun flavor twists:
- Espresso Truffles: Stir in 1 tsp instant coffee powder.
- Orange Zest Truffles: Add grated orange zest for brightness.
- Salted Caramel Truffles: Add a caramel swirl to the ganache.
- Peppermint Truffles: Mix in a drop of peppermint extract for a festive touch.
Each batch can have its own unique twist — perfect for holidays or gifting.
Final Bite
Chocolate truffles are proof that elegance doesn’t have to be complicated. A little care, good chocolate, and patience will reward you with rich, luxurious bites that melt in your mouth.
Whether you’re making them for a dinner party, as a heartfelt gift, or just to treat yourself, these little indulgences bring a touch of decadence to any moment.
Save this recipe for later — because homemade truffles taste even better than store-bought!

Hannah Collins is a passionate home cook and food storyteller who believes every recipe tells a little love story. At TastyWriter, she shares simple, delicious recipes made for real kitchens and busy days — from cozy comfort dishes to creative new favorites. When she’s not cooking, you’ll find her photographing food, testing family recipes, or sipping tea while dreaming up her next tasty idea.
Leave a Reply