
Ever find yourself craving something sweet but don’t want to reach for a candy bar? That’s where energy balls come in — bite-sized, no-bake snacks that are as delicious as they are nutritious. They’re chewy, satisfying, and packed with natural energy from oats, nut butter, and dates (or honey). The best part? You can make a batch in just 10 minutes — no oven required!
Why You’ll Love Energy Balls
Energy balls are basically the perfect snack — simple, wholesome, and customizable. Whether you need a pre-workout boost, a midday pick-me-up, or a healthy dessert alternative, these little bites do it all.
Here’s why they’re so popular:
- No baking needed — just mix, roll, and chill.
- Made with real ingredients — no refined sugar or preservatives.
- Portable and mess-free — toss a few in your bag for busy days.
- Endlessly customizable — switch up flavors with nuts, seeds, or dried fruits.
Think of them as granola bars without the hassle.
Step 1: Gather Your Base Ingredients
All energy balls start with a few staple ingredients that bind together and create that chewy texture.
You’ll need:
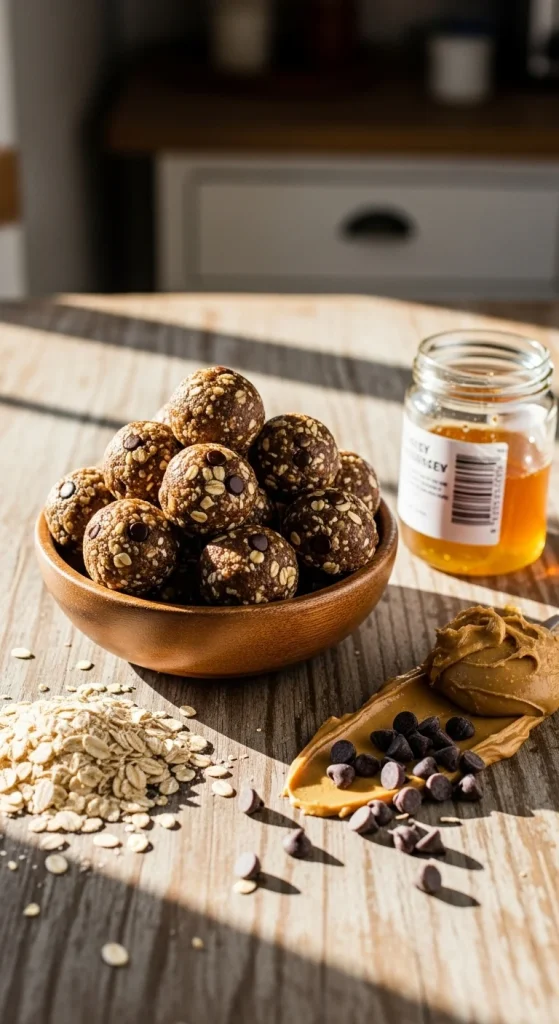
- 1 cup rolled oats – adds fibre and structure.
- ½ cup nut butter (peanut, almond, or cashew) – provides healthy fats and binding power.
- ¼ cup honey or maple syrup – for sweetness and stickiness.
- ¼ cup add-ins (chia seeds, flaxseeds, chocolate chips, or raisins).
- A pinch of salt – enhances all the flavors.

Pro Tip: Use natural nut butter with minimal oil separation — too oily, and your energy balls won’t hold shape.
Step 2: Mix Everything Together
Grab a large mixing bowl and stir everything until well combined. You can use a spoon or your hands (it gets a bit sticky but so satisfying).
If the mixture feels too dry, add a spoonful more nut butter or honey. If it’s too wet, sprinkle in extra oats.
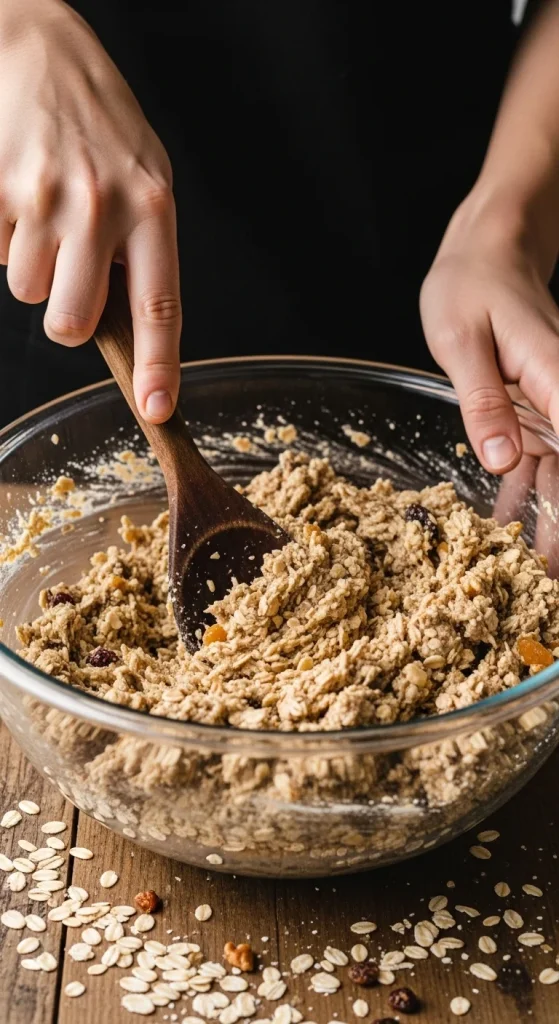
This step is all about balance — you want the mixture to hold together without being overly sticky.
Step 3: Add Your Flavor Twist
Here’s where you can get creative! Mix and match ingredients to make your favorite flavor combo:
Classic Peanut Butter Chocolate
- Peanut butter + mini chocolate chips + a dash of vanilla extract.
Tropical Bliss
- Shredded coconut + chopped dried mango + lime zest.
Espresso Energy
- Cocoa powder + instant coffee granules + a drizzle of maple syrup.
Almond Joy
- Almond butter + coconut flakes + dark chocolate chunks.
Pro Tip: Want extra protein? Add a scoop of protein powder or collagen powder before mixing.
Step 4: Roll Into Bite-Sized Balls
Use a small cookie scoop or tablespoon to portion the mixture. Roll each one between your palms to form smooth, even balls.
Place them on a baking sheet lined with parchment paper.
You should get about 12–14 energy balls from this recipe.
Once rolled, refrigerate for at least 30 minutes to firm up. This helps them hold their shape and develop that chewy texture.
Step 5: Store & Snack Smart
Energy balls can be stored in:
- The fridge for up to 1 week.
- The freezer for up to 2 months (just thaw before eating).
Keep them in an airtight container — they stay perfectly soft and ready to grab whenever you need a snack.

They’re perfect for:
- Pre- or post-workout fuel
- Road trips or hikes
- Lunchbox treats for kids
- Afternoon office snacking
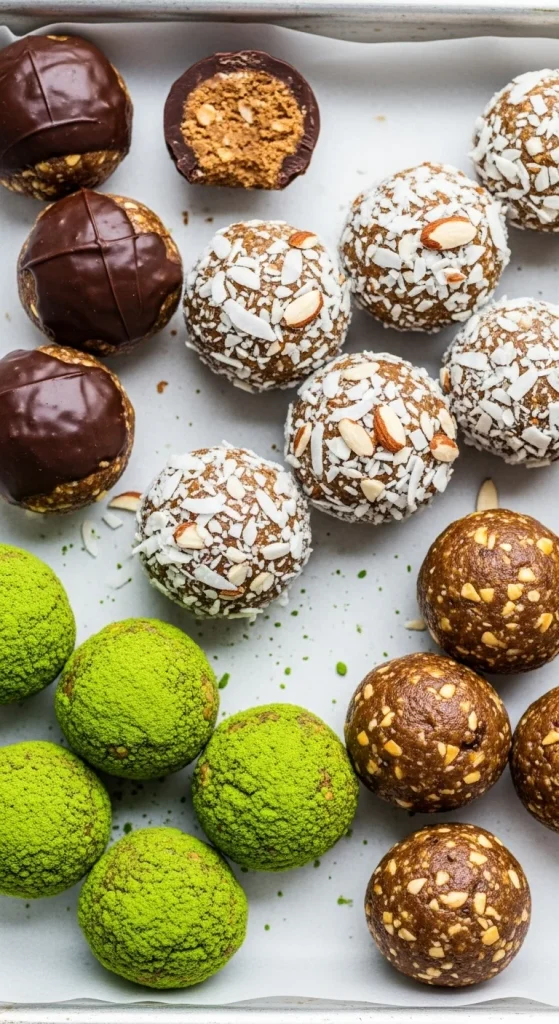
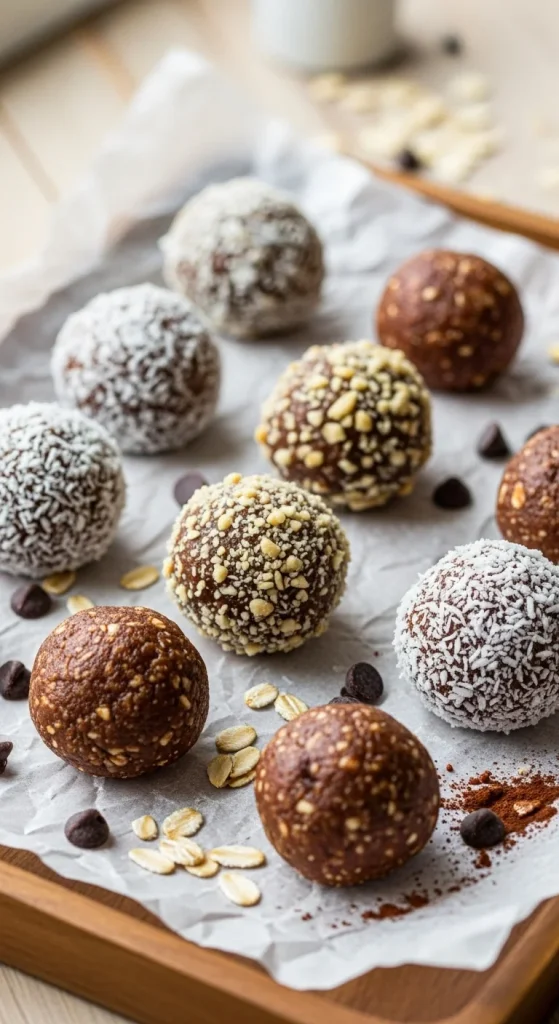
Step 6: Bonus — Fun Coatings!
Roll your finished energy balls in something fun for a little extra flair:
- Cocoa powder for a truffle-like finish.
- Desiccated coconut for a tropical vibe.
- Crushed nuts or seeds for crunch.
- Matcha powder for a boost of antioxidants.
This not only makes them prettier but also adds flavor variety.

Final Bite
Energy balls prove that healthy snacks don’t have to be boring. They’re easy, quick, and endlessly adaptable — the kind of recipe you’ll come back to again and again.
So next time you need an energy boost, skip the store-bought bars and whip up a batch of your own. Your future self (and your taste buds) will thank you.
Save this recipe for later — your snack game just got a major upgrade!

Hannah Collins is a passionate home cook and food storyteller who believes every recipe tells a little love story. At TastyWriter, she shares simple, delicious recipes made for real kitchens and busy days — from cozy comfort dishes to creative new favorites. When she’s not cooking, you’ll find her photographing food, testing family recipes, or sipping tea while dreaming up her next tasty idea.
Leave a Reply