
Let’s be honest — store-bought hummus often tastes fine… until you try making it at home. Then you realize how smooth, rich, and flavorful hummus can be when it’s freshly blended. The best part? It’s incredibly simple. With just a handful of ingredients and a few smart tricks, you can whip up hummus that’s velvety, balanced, and completely customizable.
If you’ve ever wondered how to get that café-style creaminess, this guide breaks it down step by step — no fancy tools or chef skills required.
Step 1: Gather the Essentials
A good hummus starts with quality ingredients. The flavor is simple, so every element matters.
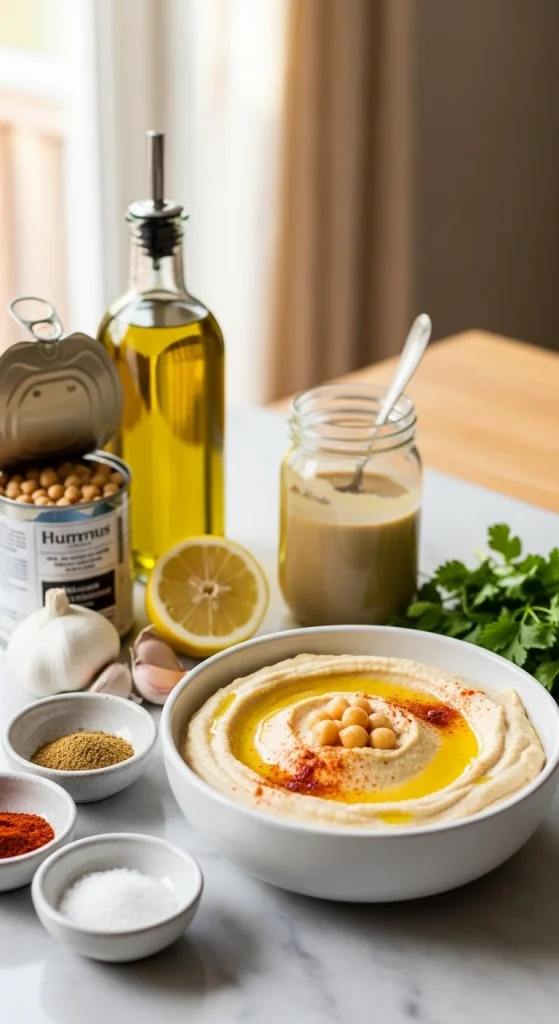
You’ll Need:
- 1 can of chickpeas (or 1½ cups cooked)
- 3 tablespoons tahini (sesame paste)
- 2 tablespoons olive oil
- 1–2 cloves garlic
- Juice of 1 lemon
- 2–4 tablespoons cold water
- ½ teaspoon salt
- Optional: cumin, paprika, or roasted garlic for flavor
Pro Tip: Use canned chickpeas for convenience, but rinse them well to remove excess sodium and that “tinny” flavor.
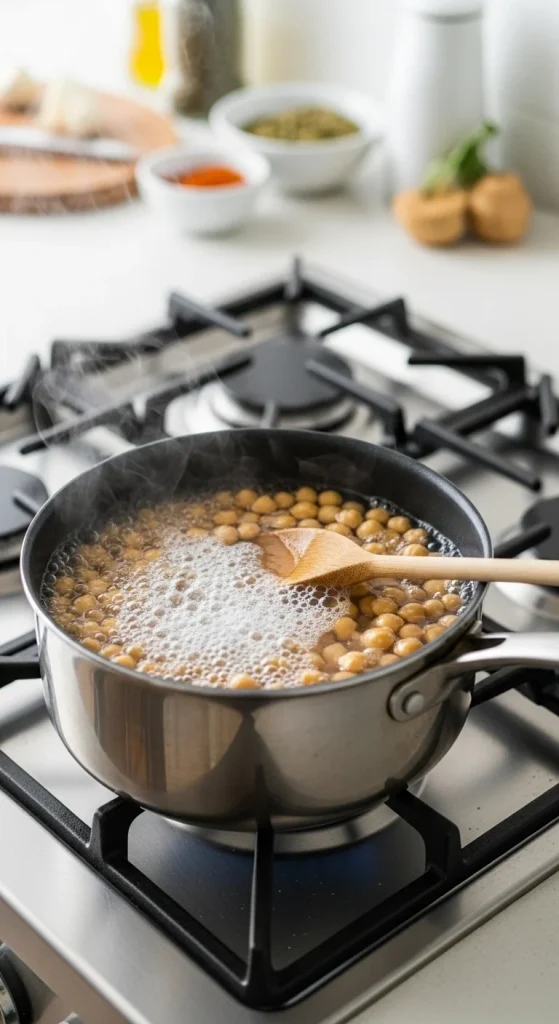
Step 2: The Secret to Creamy Texture — Peeling or Boiling
Here’s where most store versions fall short — texture. The key to that cloud-like smoothness? Removing the chickpea skins.
You’ve got two options:
- Option 1: Gently rub the chickpeas in a kitchen towel or between your fingers to loosen the skins. Tedious but worth it.
- Option 2: Boil the chickpeas for 10 minutes with ½ teaspoon baking soda. Drain and rinse. The skins will slip off easily, and the chickpeas will soften beautifully.
This little trick makes a world of difference. It gives you that ultra-smooth, restaurant-style hummus you’ll want to eat by the spoonful.
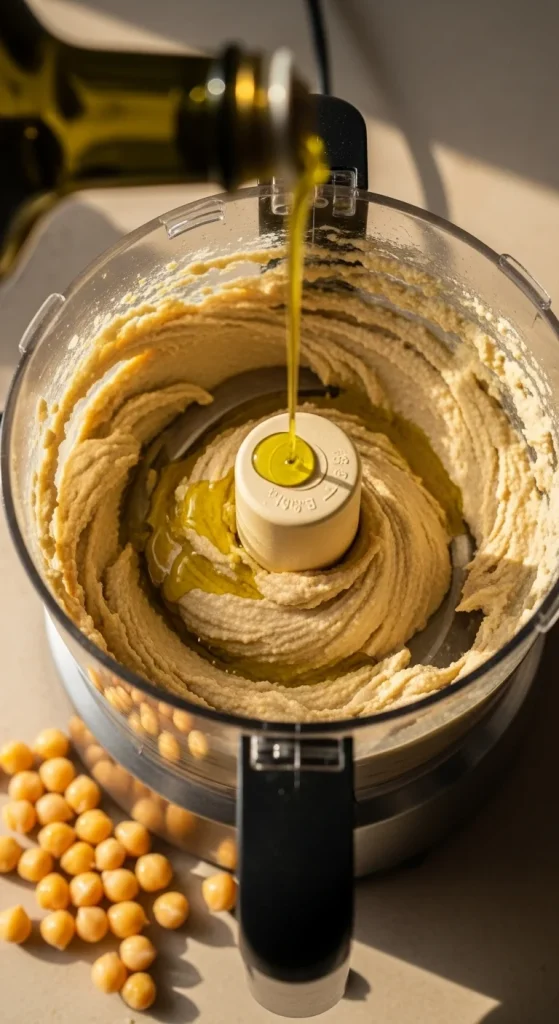
Step 3: Blend Like You Mean It
Once your chickpeas are soft and ready, it’s time to blend. Add tahini, lemon juice, and garlic to your food processor first. Blend for about 30 seconds — this aerates the tahini and builds a creamy base.
Then add your chickpeas, salt, and olive oil. Begin blending while slowly drizzling in cold water. The cold temperature helps emulsify everything into a silky texture.
Blend for 2–3 minutes, scraping down the sides as needed, until it’s unbelievably smooth. If it looks too thick, add another tablespoon of cold water or olive oil until it reaches your desired consistency.
Taste test: Adjust salt and lemon to your liking. Everyone has their own perfect hummus balance — tangy, garlicky, or mild.
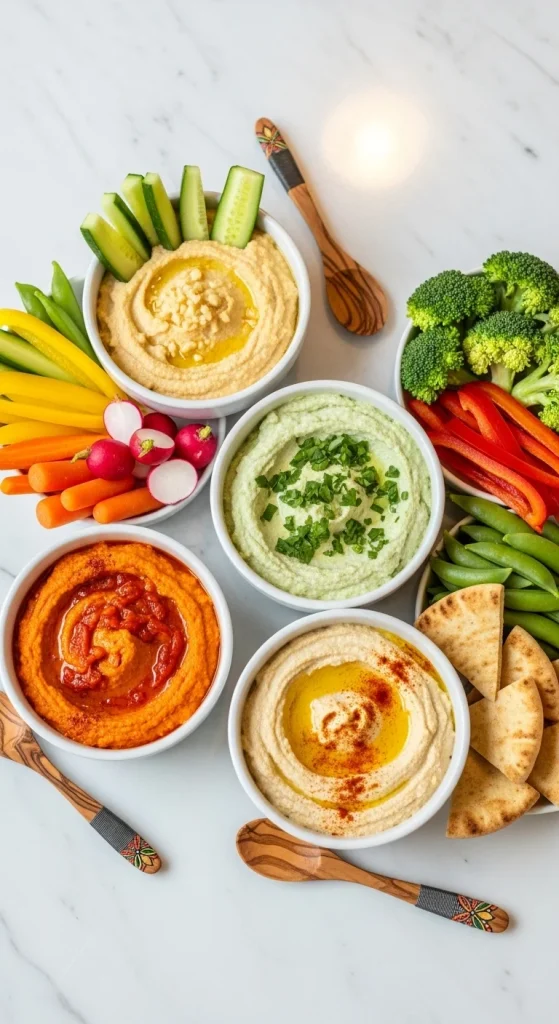
Step 4: Flavor It Your Way
Now that you’ve nailed the base, get creative! Homemade hummus is like a blank canvas for flavor.
Try these ideas:
- Roasted Red Pepper Hummus: Blend in roasted bell peppers for a smoky, sweet flavor.
- Spicy Jalapeño Hummus: Add a small jalapeño or chili flakes for a kick.
- Garlic Lovers’ Hummus: Roast your garlic first to make it milder and buttery.
- Herb Hummus: Blend in parsley, cilantro, or basil for a fresh green twist.
You can even swirl in pesto or sun-dried tomatoes. It’s fun, affordable, and so much fresher than pre-packaged versions.
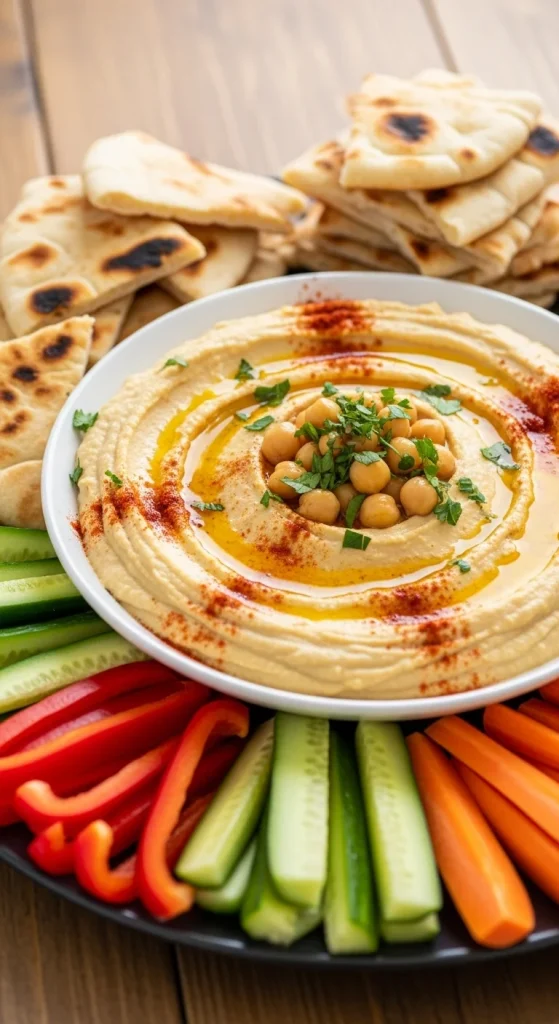
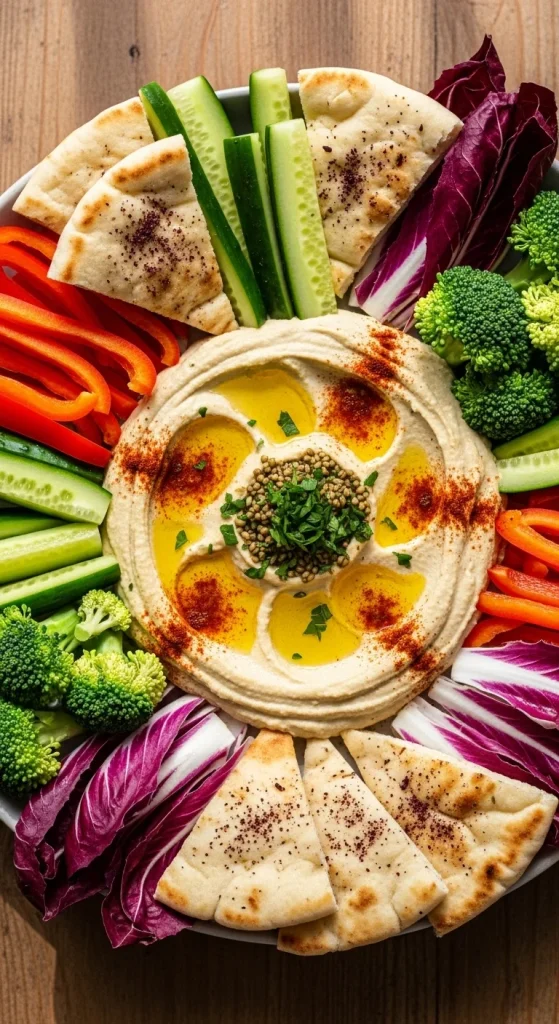
Step 5: Serve and Store Like a Pro
Transfer your hummus to a shallow bowl and use the back of a spoon to make a smooth swirl. Drizzle olive oil over the top and add your favorite finishing touches:
- A sprinkle of paprika or za’atar
- A few whole chickpeas for garnish
- Chopped parsley or toasted pine nuts
Serve it with:
- Warm pita bread or pita chips
- Sliced cucumbers, carrots, and bell peppers
- A side of grilled chicken or falafel
For storage, keep hummus in an airtight container in the fridge for up to 5 days. The flavors actually deepen after a day — it gets even better!
Quick Fixes for Common Hummus Problems
- Too thick? Add cold water one tablespoon at a time until it loosens.
- Too thin? Add extra chickpeas or a bit more tahini.
- Bitter flavor? Check your tahini — some brands can be harsh. Add more lemon juice to balance it.
- Too garlicky? Use roasted garlic next time instead of raw.
Making hummus is all about adjusting as you go. Every batch can be slightly different — that’s the beauty of homemade cooking.
Creamy, Flavorful, and Way Better Than Store
Once you make hummus yourself, there’s no turning back. It’s cheaper, healthier, and endlessly adaptable. You control the ingredients, so it’s fresh and free from preservatives — and you’ll never deal with that grainy texture again.
Whether you’re meal-prepping for the week, planning a party spread, or just craving a satisfying snack, this homemade hummus has your back.
So grab that blender, open a can of chickpeas, and get swirling.

Hannah Collins is a passionate home cook and food storyteller who believes every recipe tells a little love story. At TastyWriter, she shares simple, delicious recipes made for real kitchens and busy days — from cozy comfort dishes to creative new favorites. When she’s not cooking, you’ll find her photographing food, testing family recipes, or sipping tea while dreaming up her next tasty idea.
Leave a Reply