
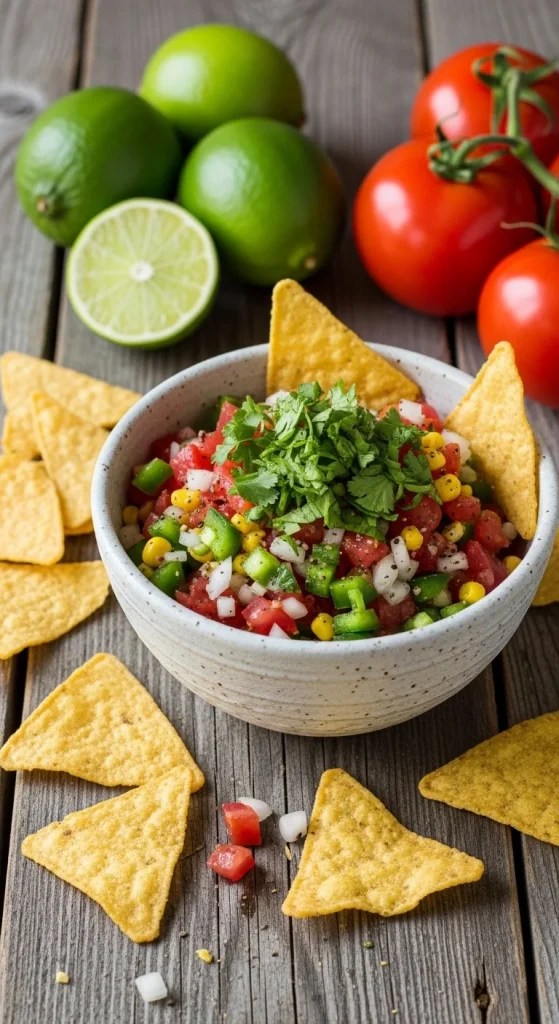
There’s nothing like dipping a crunchy tortilla chip into a bowl of fresh homemade salsa — bursting with ripe tomatoes, tangy lime, and a kick of jalapeño heat. Store-bought versions just don’t compare! The beauty of making salsa at home is how easy it is to adjust the flavor to your liking — spicy, smoky, chunky, or smooth.
Whether you’re prepping for taco night, a summer party, or just want a healthy snack, this simple recipe delivers freshness in every bite — and you can make a big batch to last all week.
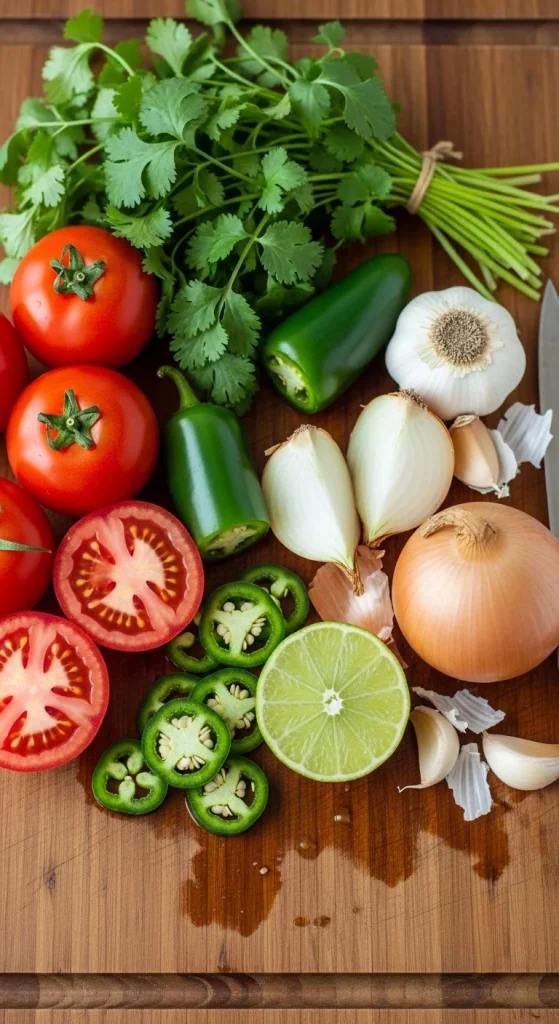
Step 1: Gather Your Fresh Ingredients
The secret to great salsa is fresh, high-quality produce. Here’s what you’ll need:
Ingredients:
- 4 ripe Roma or plum tomatoes (for firmness and flavor)
- 1 small red onion, finely chopped
- 1–2 jalapeño peppers, seeds removed (adjust heat to taste)
- 2 cloves garlic, minced
- ¼ cup fresh cilantro, chopped
- Juice of 1 lime
- Salt to taste (start with ½ teaspoon)
- Optional: 1 teaspoon sugar (balances acidity)
Pro Tip: For a smoky flavor, try roasting the tomatoes and jalapeños before blending — it adds a subtle charred depth to your salsa.
Step 2: Choose Your Style — Chunky or Smooth
Homemade salsa can go two ways:
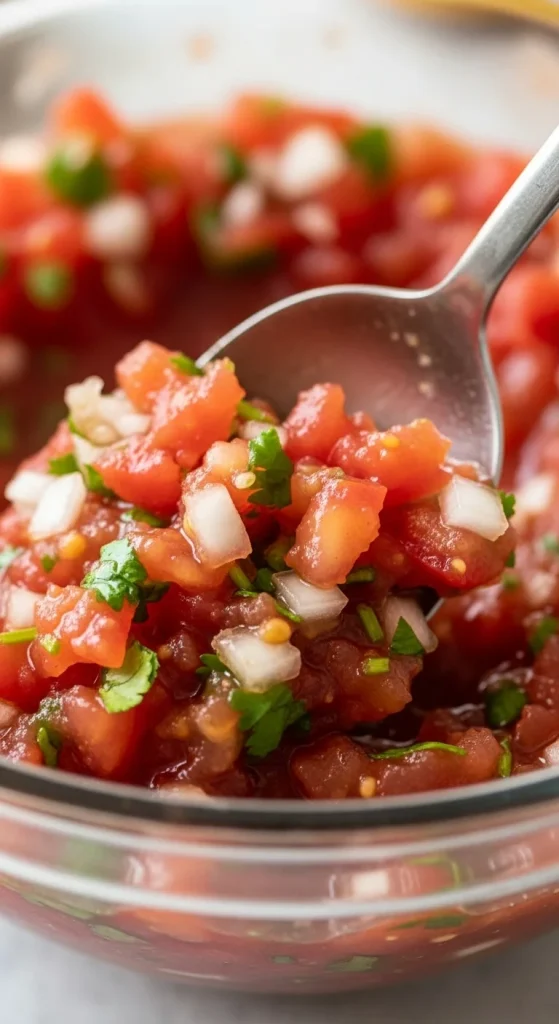
Chunky Fresh Salsa (Pico de Gallo Style)
Perfect for tacos or scooping with chips. Simply chop everything finely, mix it in a bowl, and let it rest for 10 minutes to allow the flavors to meld.
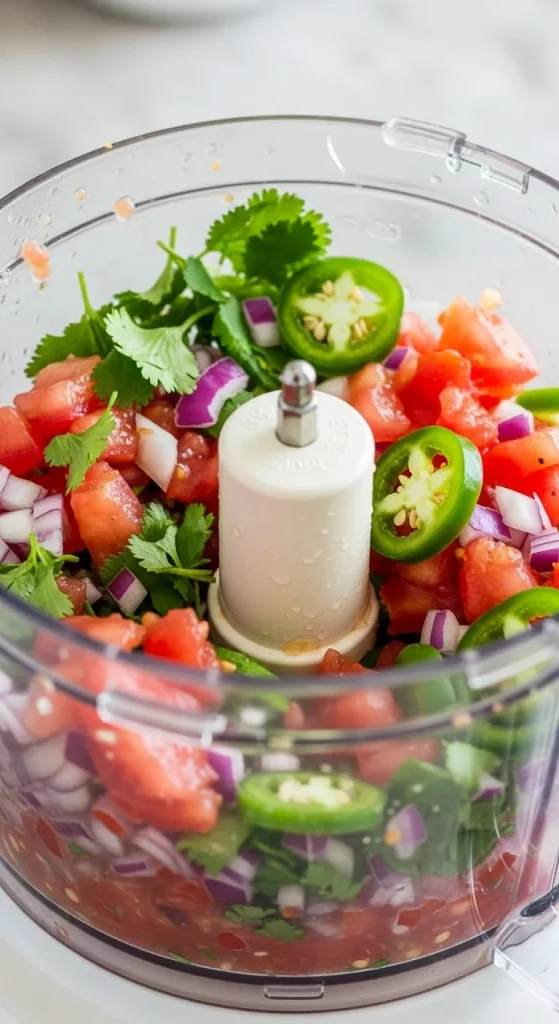
Smooth Restaurant-Style Salsa
Ideal for dipping or drizzling on grilled meats. Add all ingredients to a food processor or blender and pulse until you reach your desired consistency — smooth but still textured.
Pro Tip: For extra depth, add a small roasted tomato or a teaspoon of tomato paste if you like your salsa thicker.
Step 3: Balance the Flavors
This step makes the difference between “good” salsa and can’t-stop-eating-it salsa. Taste and tweak:
- Too acidic? Add a pinch of sugar or more cilantro.
- Too spicy? Stir in extra diced tomato or a splash of lime juice.
- Too mild? Add another jalapeño or a pinch of cayenne pepper.
- Too salty? Mix in a bit more lime juice to brighten it back up.
Pro Tip: Always taste after letting the salsa rest for 10–15 minutes — the flavors deepen and balance as it sits.
Step 4: Chill & Let It Marinate
The magic happens in the fridge! Once mixed, cover your salsa and refrigerate it for at least 30 minutes.
This helps all those flavors — the lime, garlic, and onion — blend beautifully.
If you’re making a big batch, it keeps well for up to 5 days in an airtight container. The longer it sits (within reason), the better it tastes.
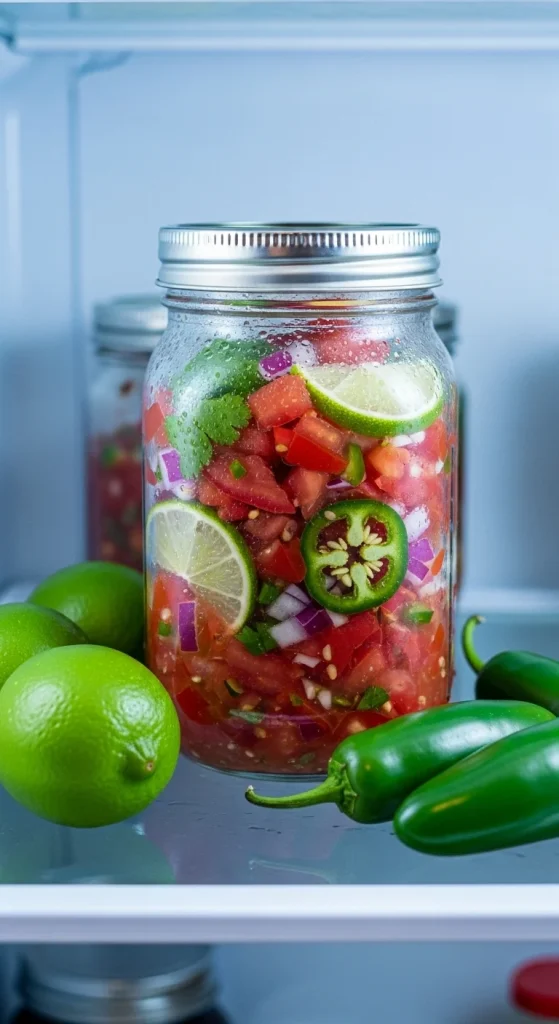
Pro Tip: If you’re serving salsa the next day, give it a quick stir before serving — some liquid may separate as it chills.
Step 5: Customize Your Salsa Like a Pro
Once you’ve mastered the basic recipe, get creative!
Flavor Variations:
- Roasted Corn Salsa: Add grilled corn kernels and diced avocado for a smoky, creamy twist.
- Mango Salsa: Swap tomatoes for mango and add red bell pepper for a tropical vibe.
- Fire-Roasted Salsa: Roast all your ingredients — tomatoes, jalapeños, and onions — under the broiler before blending.
- Tomatillo Salsa Verde: Replace red tomatoes with tomatillos for a tangy, green alternative.
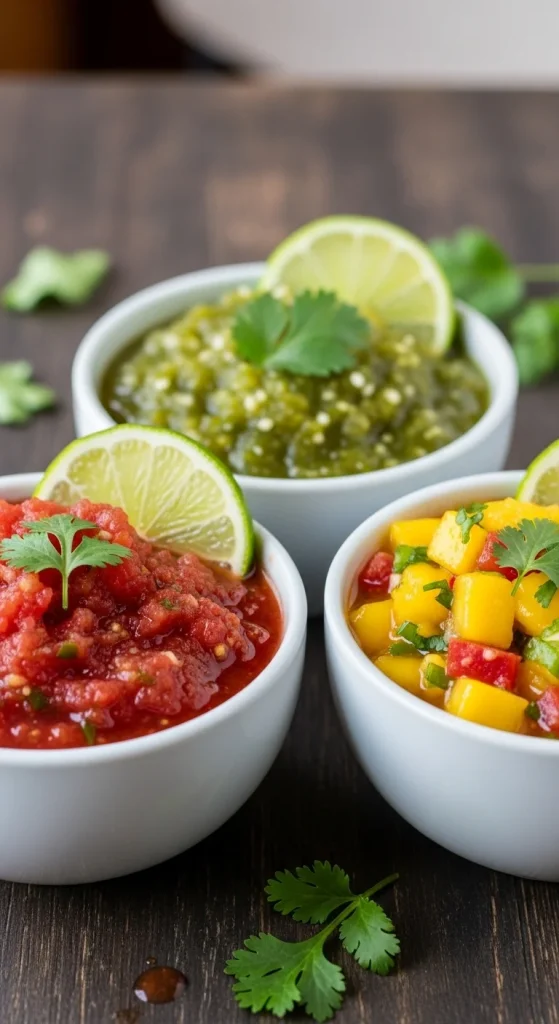
Pro Tip: Don’t be afraid to play with herbs — adding mint, basil, or even a little oregano can change the entire flavor profile.
Step 6: Serve It Up in Style
Homemade salsa pairs beautifully with just about everything. Here are a few ways to enjoy it:
- With tortilla chips as a snack or appetizer.
- On tacos, burritos, or quesadillas for a fresh finish.
- Spoon it over grilled chicken, shrimp, or steak.
- Mix it into rice or grain bowls for extra flavor.
- Use it as a topping for scrambled eggs or breakfast burritos.
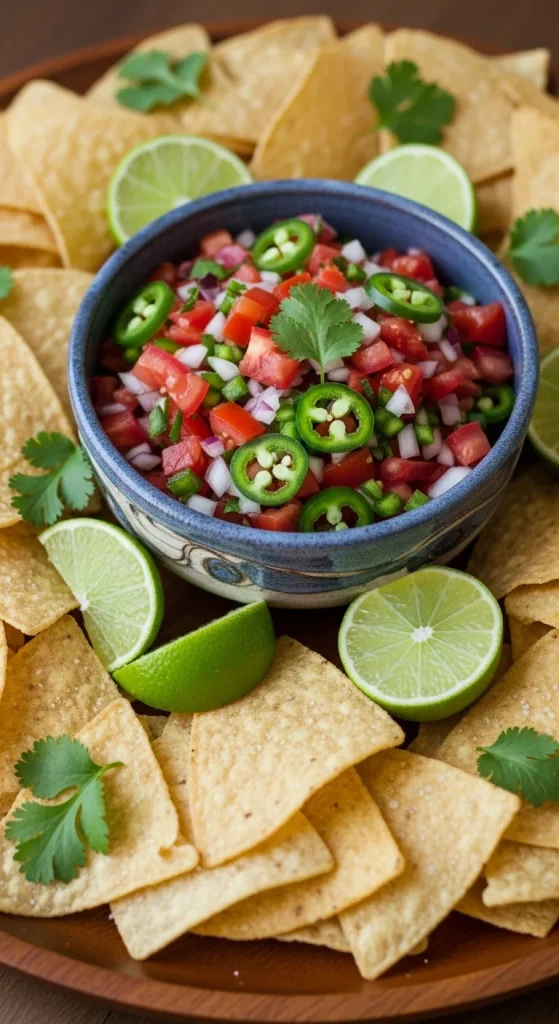
Pro Tip: For parties, serve salsa in mason jars or small bowls with colorful napkins — it looks festive and inviting.
Step 7: Make It Batch-Friendly
One of the best parts about homemade salsa? It’s easy to make in bulk and perfect for storing.
- Short-term storage: Keep in airtight jars in the fridge for up to 5 days.
- Freezing: Pour into freezer-safe bags or containers (leave room for expansion) and freeze for up to 2 months. Thaw overnight in the fridge before serving.
- Canning: If you’re feeling ambitious, salsa can be safely canned with a proper water-bath canning method — ideal for long-term storage.

Pro Tip: Fresh salsa tastes best in the first few days, but batch-prepping lets you enjoy that garden-fresh flavor all year long.
Final Scoop
Making homemade salsa is one of the easiest and most rewarding kitchen skills to master — simple ingredients, big flavor, and endless ways to make it your own.
So grab your chopping board, squeeze that lime, and get ready for a salsa that’s bright, zesty, and undeniably fresh.
Save this recipe for later — because once you taste homemade salsa, you’ll never go back to the jarred kind!

Hannah Collins is a passionate home cook and food storyteller who believes every recipe tells a little love story. At TastyWriter, she shares simple, delicious recipes made for real kitchens and busy days — from cozy comfort dishes to creative new favorites. When she’s not cooking, you’ll find her photographing food, testing family recipes, or sipping tea while dreaming up her next tasty idea.
Leave a Reply