
There’s something incredibly satisfying about making sushi rolls at home — the perfect balance of flavor, texture, and creativity. Whether you’re rolling up a classic California roll or crafting your own fusion masterpiece, sushi-making is fun, fresh, and surprisingly simple once you know the basics. Plus, it’s an impressive skill to show off at dinner parties or date nights!
Step 1: Gather Your Sushi Essentials
Before you dive in, make sure you’ve got all the right tools and ingredients. Once everything’s prepped, the process becomes smooth (and way less messy).
You’ll need:
- Sushi rice (short-grain rice) – it’s stickier and holds shape better.
- Rice vinegar, sugar, and salt – for seasoning the rice.
- Nori sheets (seaweed) – the wrapper for your rolls.
- Fillings: Think fresh and simple — cucumber, avocado, cooked crab, smoked salmon, shrimp, tuna, or tofu.
- Condiments: Soy sauce, wasabi, pickled ginger, and spicy mayo.
- Tools: Bamboo sushi mat (makisu), sharp knife, and cling film.
Pro tip: Lay out everything before you start rolling — sushi-making is all about rhythm and flow!

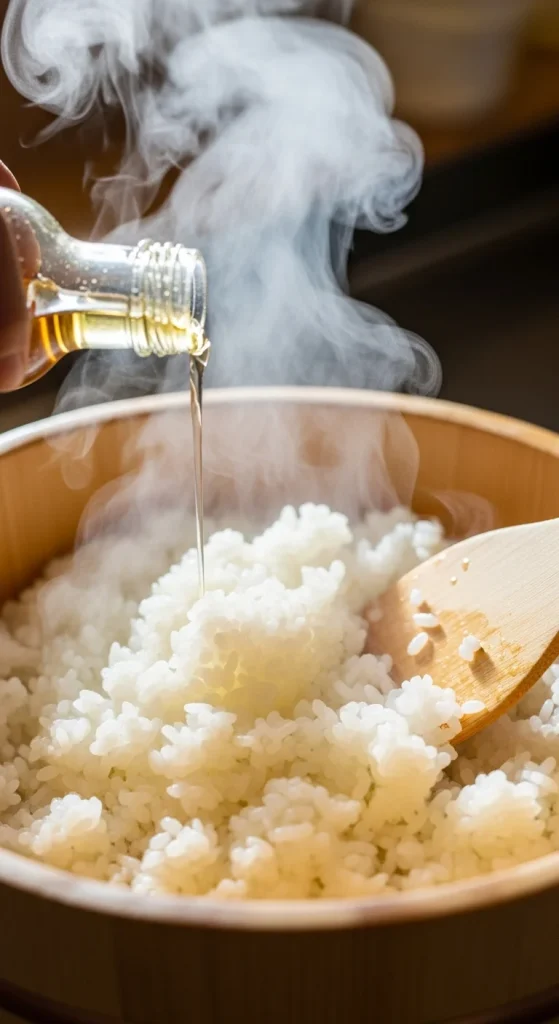
Step 2: Cook and Season the Rice — The Foundation of Great Sushi
Sushi rice is the heart of every roll. Get this step right, and the rest follows beautifully.
How to make perfect sushi rice:
- Rinse: Wash 2 cups of sushi rice under cold water until the water runs clear.
- Cook: Use a rice cooker or pot with a 1:1 ratio of rice to water. Let it steam for about 10 minutes after cooking.
- Season: Mix ¼ cup rice vinegar, 2 tablespoons sugar, and 1 teaspoon salt in a small bowl until dissolved.
- Combine: Gently fold this mixture into the rice while it’s still warm using a wooden spoon or spatula.
Pro tip: Don’t mash the rice — fold it like you’re fluffing a pillow. You want it sticky but still light and glossy.
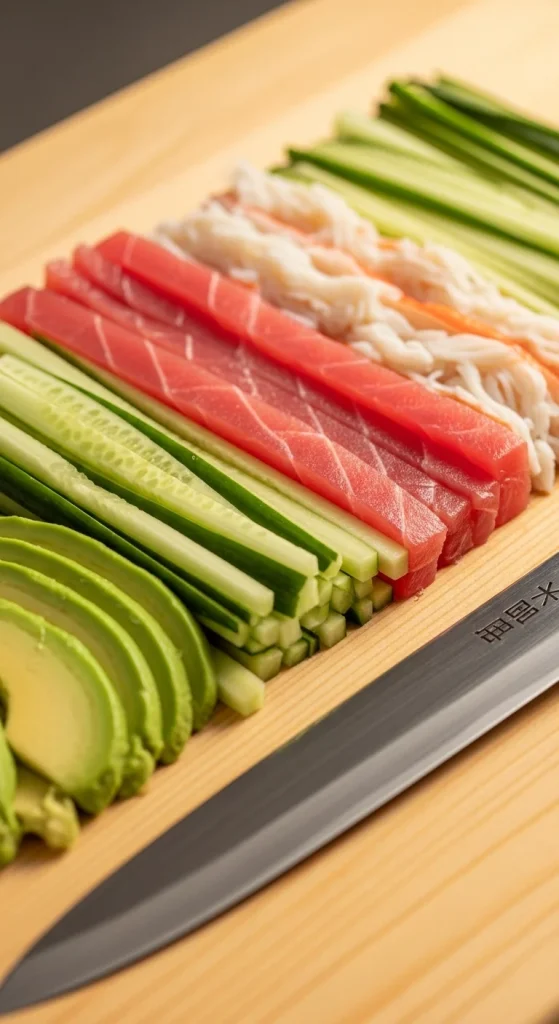
Step 3: Prep Your Fillings
This is where the fun begins! The best sushi rolls are all about contrast — soft rice, crunchy vegetables, creamy avocado, and savory fish.
Popular combinations:
- California Roll: Crab, avocado, cucumber.
- Spicy Tuna Roll: Tuna, sriracha mayo, scallions.
- Veggie Roll: Avocado, carrot, cucumber.
- Philadelphia Roll: Smoked salmon, cream cheese, avocado.
Slice everything into thin, even strips. Keep the pieces small enough to fit neatly inside the roll.
Pro tip: Pat ingredients dry — moisture makes the rolls slippery and hard to seal.
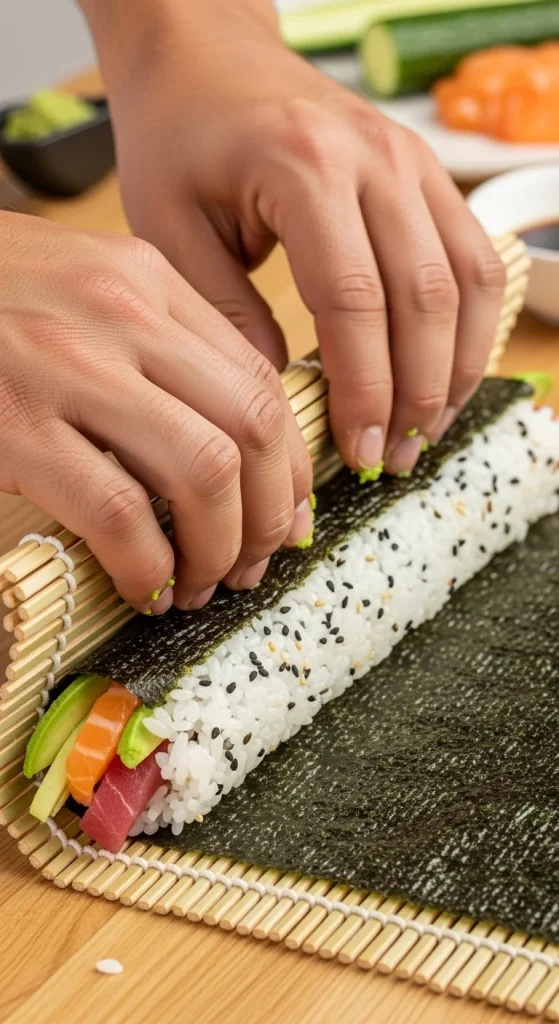
Step 4: Roll It Like a Pro
Now the exciting part — rolling! Don’t worry if your first few look a little uneven; practice makes perfect.
How to roll sushi:
- Lay the base: Place a bamboo mat on a flat surface and cover it with plastic wrap (this keeps it clean).
- Add the nori: Shiny side down, rough side up.
- Spread the rice: Wet your hands (so the rice doesn’t stick) and press a thin layer of rice evenly across the nori, leaving about 1 inch at the top edge bare.
- Add fillings: Line your ingredients horizontally about 1 inch from the bottom edge.
- Roll it up: Use your fingers to lift the edge closest to you and gently roll it over the filling. Apply light pressure with the mat as you roll to keep it tight and compact.
- Seal the roll: Dab the top edge with a little water to close the roll completely.
Pro tip: Don’t overstuff — less is more when it comes to neat, even rolls!
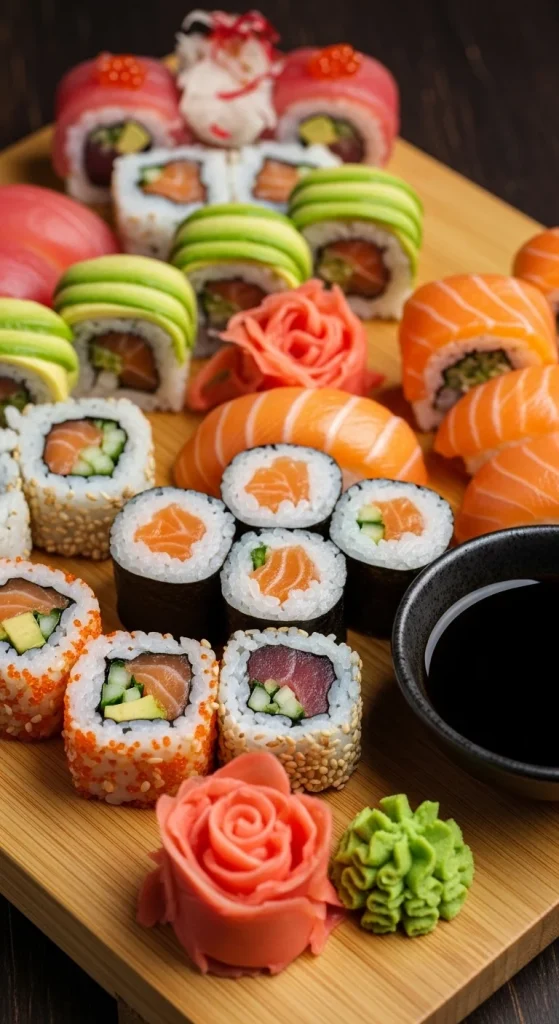
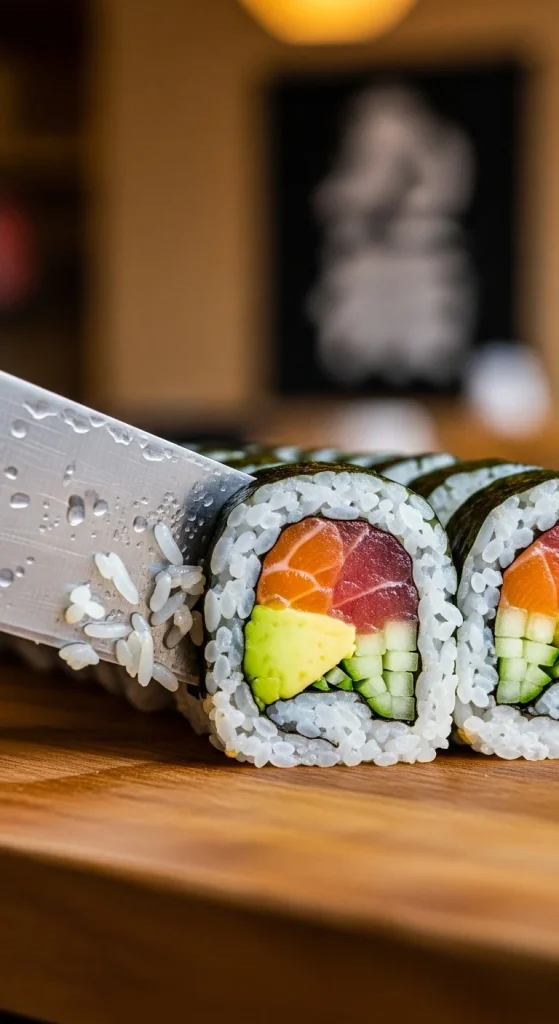
Step 5: Slice & Serve Beautifully
Now that you’ve got your roll, it’s time for the finishing touch — slicing and serving like a true sushi chef.
- Wet a sharp knife (this prevents sticking).
- Cut the roll in half first, then into 6–8 equal pieces.
- Wipe the knife between cuts for clean slices.
Garnish & serve with:
- Pickled ginger for freshness
- Wasabi for a kick
- Soy sauce for dipping
- A sprinkle of sesame seeds or scallions for flair
Step 6: Get Creative with Your Rolls
Once you’ve mastered the basics, try mixing it up!
- Use brown rice or quinoa for a healthier twist.
- Try inside-out rolls (rice on the outside) — sprinkle sesame seeds or tobiko on top.
- Add tempura shrimp for crunch or drizzle spicy mayo for a restaurant-style finish.
- Play with colors and plating — think rainbow rolls, heart shapes, or sushi bowls.
Pro tip: Always keep your ingredients fresh and chilled — freshness is the soul of good sushi.

The Final Roll
Making sushi at home is easier than it looks — and way more rewarding. It’s the perfect blend of art and food, letting you experiment with flavors and presentation while keeping it fun.
So grab your bamboo mat, invite some friends, and roll your way to restaurant-worthy sushi right in your own kitchen.

Hannah Collins is a passionate home cook and food storyteller who believes every recipe tells a little love story. At TastyWriter, she shares simple, delicious recipes made for real kitchens and busy days — from cozy comfort dishes to creative new favorites. When she’s not cooking, you’ll find her photographing food, testing family recipes, or sipping tea while dreaming up her next tasty idea.
Leave a Reply