
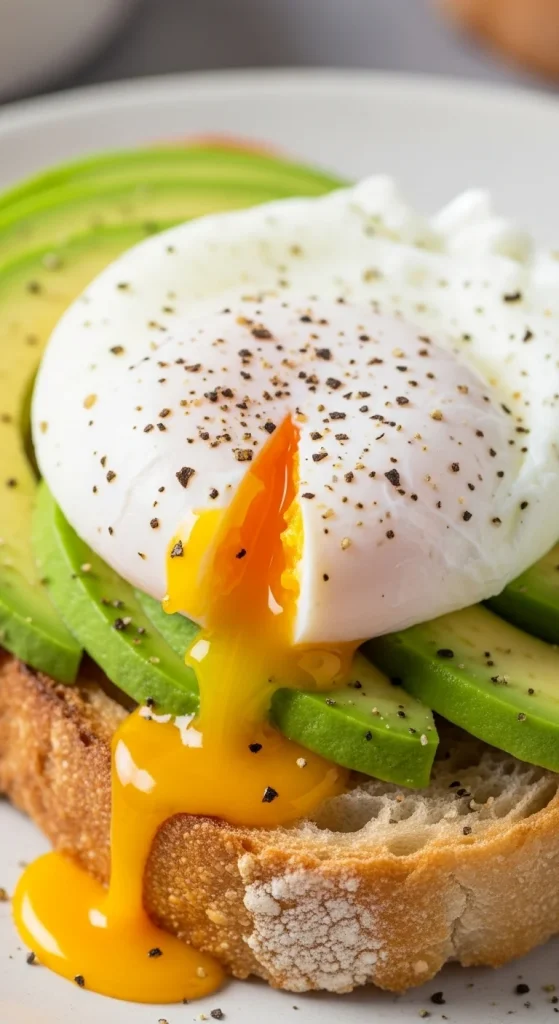
There’s something magical about breaking into a perfectly poached egg — the way the golden yolk slowly spills over your toast or avocado. It feels like a little victory in the kitchen. But let’s be honest — poaching eggs can be intimidating. Watery messes, broken yolks, or overcooked centers are all too common. Don’t worry — this guide will turn you into a poaching pro.
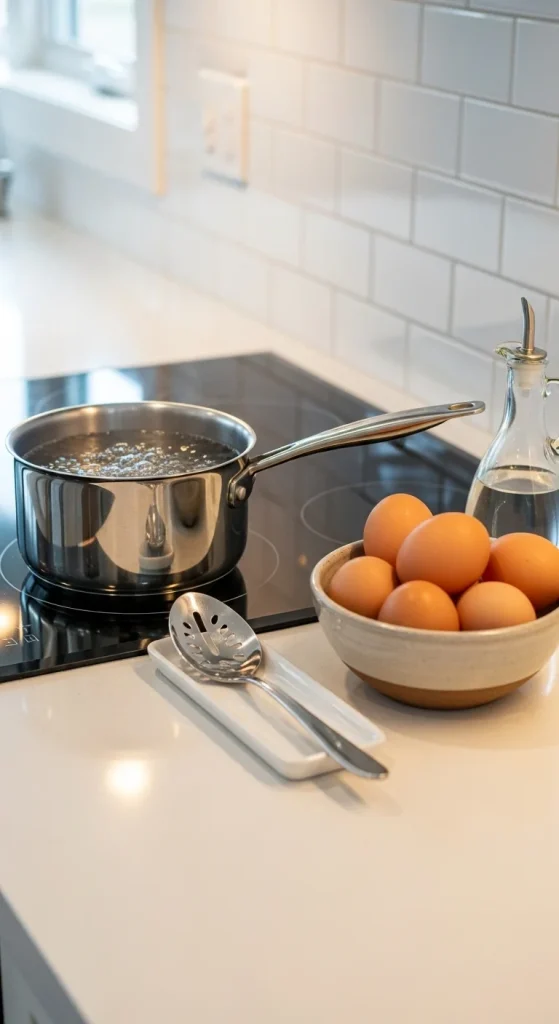
Step 1: Gather Your Simple Ingredients
Before you start, make sure you have everything ready. Poaching is quick, so having ingredients prepped helps keep things smooth.
You’ll need:
- Fresh eggs (the fresher, the better)
- Water
- A splash of vinegar (optional, helps egg whites hold together)
- Salt (for seasoning afterward)
- A slotted spoon
Pro tip: Older eggs have thinner whites that spread out in water. Fresh eggs give you that compact, picture-perfect poach.
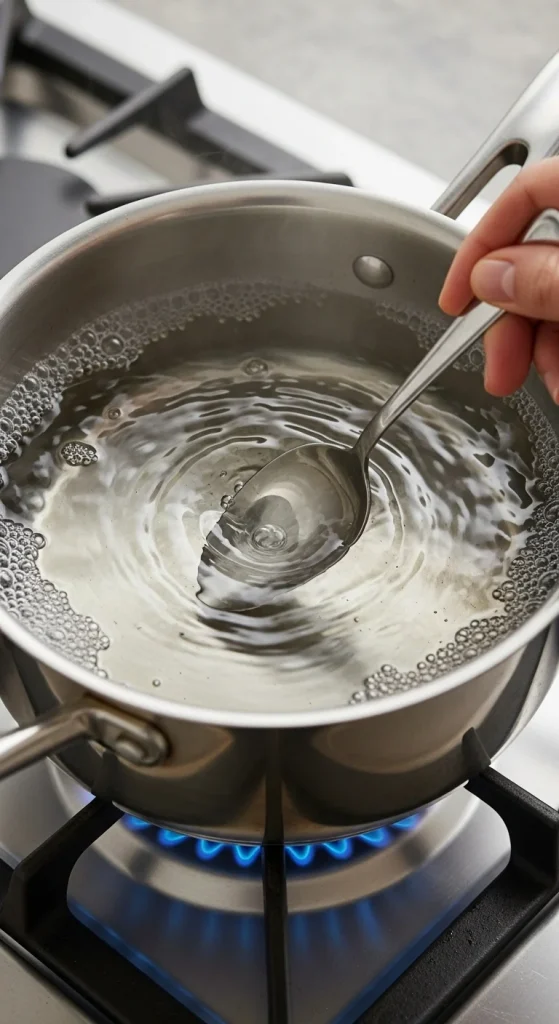
Step 2: Heat the Water Just Right
Bring a pot of water to a gentle simmer — not a rolling boil. You want small bubbles rising slowly from the bottom, around 85–90°C (185–195°F). Boiling water will break apart your delicate egg.
Add about a tablespoon of vinegar to the water if you’d like your egg whites to stay firm and tight. It’s optional but helpful for beginners.
Chef’s tip: Swirl the water gently with a spoon to create a small whirlpool. This helps the egg white wrap neatly around the yolk.
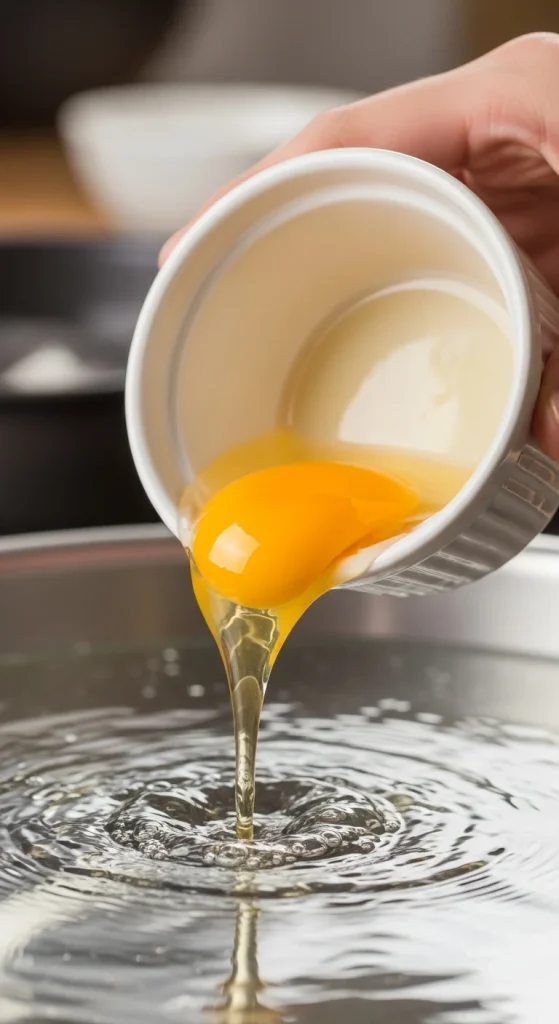
Step 3: Crack Your Egg with Care
Crack your egg into a small bowl or ramekin — not directly into the pot. This gives you control and prevents shell fragments from slipping in.
Then, lower the bowl close to the water’s surface and slide the egg in slowly. The whirlpool will pull the white around the yolk, forming that signature teardrop shape.
Timing:
- Soft, runny center: 3 minutes
- Slightly firmer yolk: 4 minutes
Use a timer — every second counts!
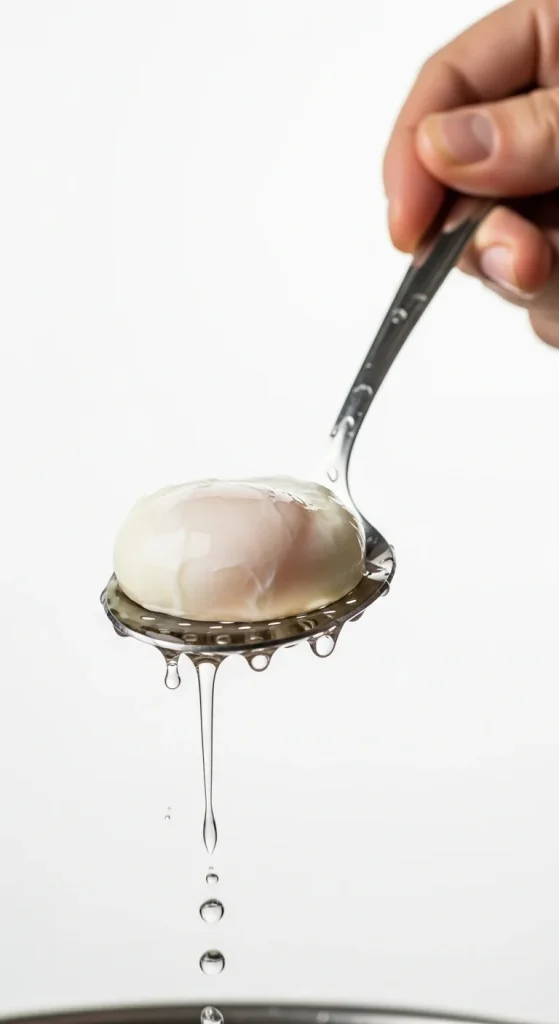
Step 4: Lift and Test for Doneness
Use your slotted spoon to lift the egg from the water gently. Give it a soft tap with your finger — it should feel tender but hold its shape.
If it feels too soft, lower it back in for another 30 seconds.
Once done, rest it on a paper towel for a few seconds to absorb any excess water.
Optional: Trim any uneven edges for that Instagram-worthy finish.
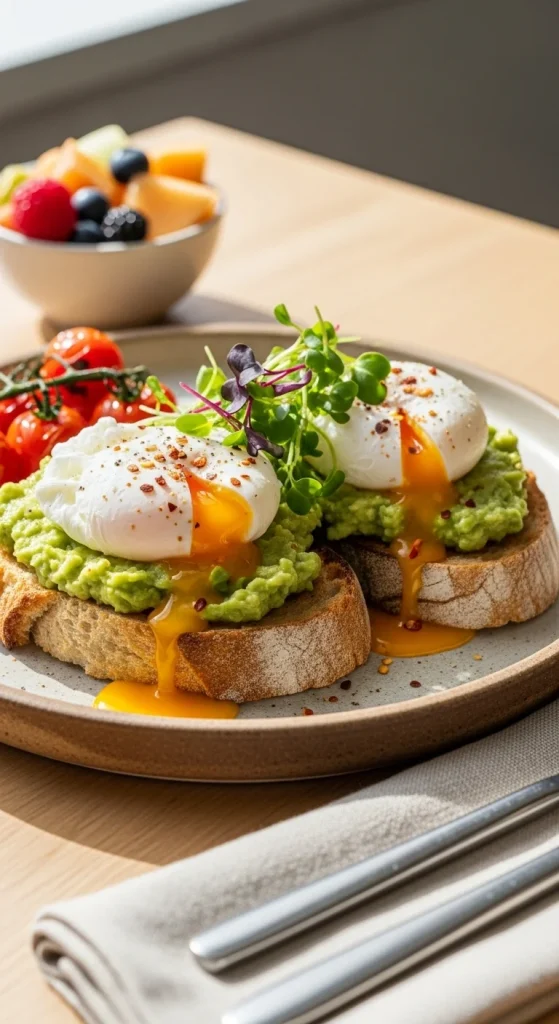
Step 5: Serve It Like a Chef
Now for the fun part — plating! A poached egg can upgrade any meal.
Try these simple combos:
- On avocado toast with chili flakes and microgreens
- Over a grain bowl with roasted vegetables and tahini drizzle
- On smoked salmon and spinach for a brunch classic
- On ramen or soups for an instant upgrade
Finish with a pinch of salt, black pepper, and maybe a drizzle of olive oil. The yolk will act as your sauce — rich, golden, and velvety.
Common Mistakes to Avoid
Even pros slip up sometimes! Here’s how to dodge the usual poaching pitfalls:
- Water too hot: The egg whites will tear apart.
- Cracking directly into water: Causes spreading and messy shapes.
- Overcooking: The yolk turns firm and loses that silky texture.
- Skipping fresh eggs: Makes a huge difference in appearance and texture.
If your first attempt isn’t perfect, don’t worry. It’s all about practice — even chefs took a few tries to master the swirl.
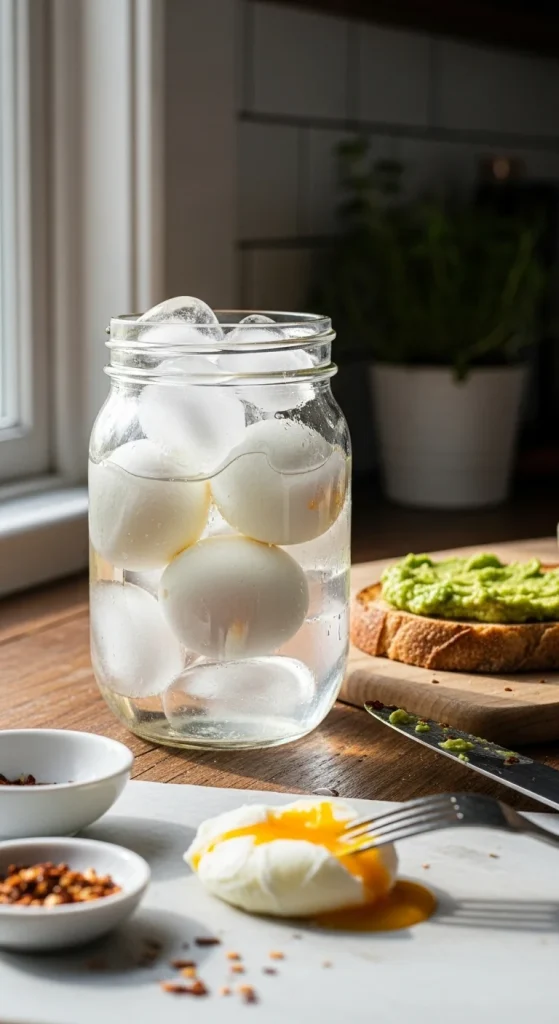
Bonus Tip: Poach Ahead for Busy Mornings
Yes, you can poach eggs in advance!
Once cooked, place them in a bowl of ice water to stop cooking. Store in the fridge for up to 2 days.
When ready to eat, reheat in warm water for 30 seconds, and it’s as good as fresh.
Perfect for weekday breakfasts or meal prep!
Final Takeaway
Poaching eggs isn’t about perfection — it’s about patience. Once you get the water temperature and timing right, it becomes second nature. The soft, runny center and delicate white make every breakfast feel luxurious.
So next time you crave that café-style brunch, you’ll know exactly what to do.
Save this guide for later — your future self (and your breakfast guests) will thank you!

Hannah Collins is a passionate home cook and food storyteller who believes every recipe tells a little love story. At TastyWriter, she shares simple, delicious recipes made for real kitchens and busy days — from cozy comfort dishes to creative new favorites. When she’s not cooking, you’ll find her photographing food, testing family recipes, or sipping tea while dreaming up her next tasty idea.
Leave a Reply