
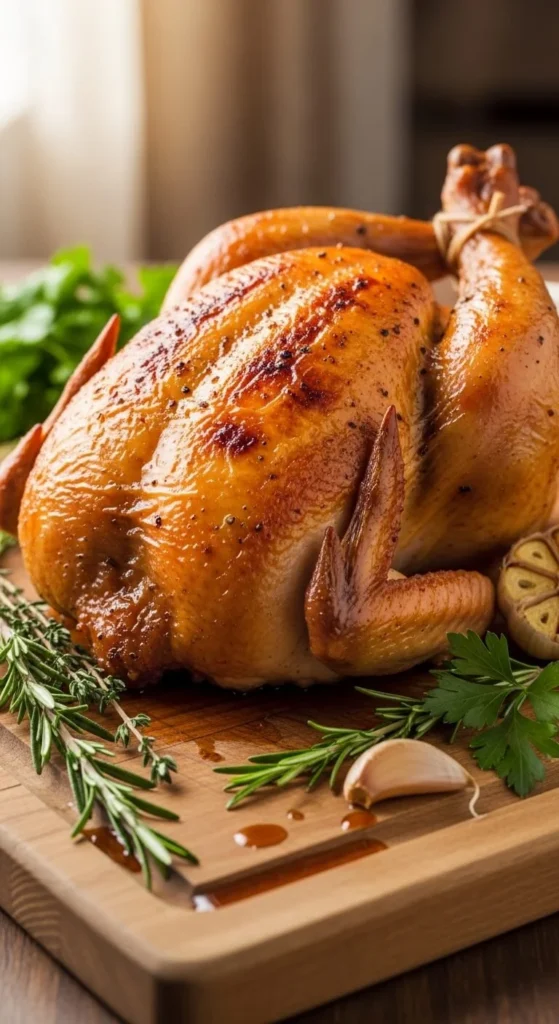
There’s nothing more satisfying than pulling a perfectly roasted chicken out of the oven — crackly golden skin, juicy meat, and that rich, comforting aroma filling your kitchen. Yet so many home cooks end up with pale, rubbery skin or dry chicken inside. The secret isn’t luck. It’s technique, timing, and a few simple rules.
Imagine slicing into a roast chicken and hearing that gentle crunch before revealing tender, steaming meat beneath. That’s the result you’re aiming for — simple, beautiful, and absolutely delicious.
If you want roast chicken that looks and tastes like it came from a professional kitchen, follow these steps and you’ll nail it every time.
Start With the Right Chicken
Choose a good-quality whole chicken — ideally fresh, not frozen. If yours is frozen, thaw it completely in the fridge before cooking.
Look for:
- Firm, plump meat
- Pale pink color
- No strong smell
A 1.5–2 kg chicken is ideal for roasting. It cooks evenly, stays juicy, and gives you plenty of crispy skin to enjoy.
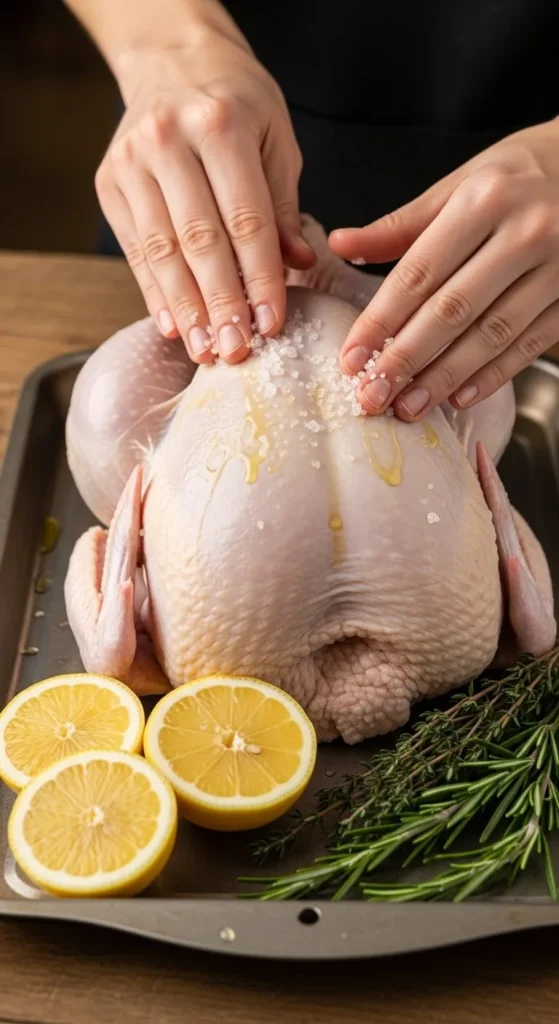
Before anything else, pat the chicken very dry with paper towels — inside and out. Moisture is the enemy of crispy skin.
Season Generously (Inside and Out)
Great roast chicken begins with proper seasoning.
Rub the chicken all over with:
- Salt
- Black pepper
- Olive oil or softened butter
Then season the inside cavity too — this adds depth to the flavor.
For extra aroma, stuff the cavity with:
- Lemon halves
- Garlic cloves
- Fresh rosemary or thyme
- Onion wedges
These won’t just flavor the chicken; they also help it cook evenly from the inside.
Let the Chicken Air-Dry (If You Have Time)
If you want truly shatter-crisp skin, this step is a game-changer.
Place your seasoned chicken uncovered in the fridge for 4–12 hours. This dries out the skin, making it crisp beautifully in the oven.
No time? You can skip this — you’ll still get good results — but if you can, do it.
Preheat the Oven Properly
Set your oven to 220°C / 425°F (fan 200°C).
A hot oven is essential for crispy skin. Lower temperatures steam the chicken instead of roasting it.
Place a rack in the middle of the oven so heat circulates evenly around the bird.
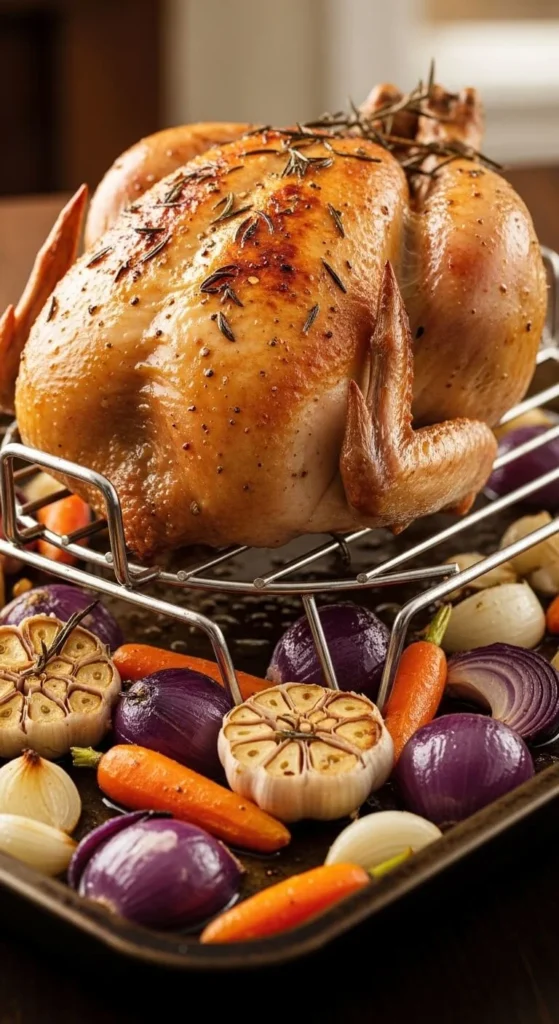
Roast on a Rack, Not a Flat Pan
Put your chicken on a roasting rack over a tray.
Why this matters:
- Air flows under the chicken
- Skin crisps on all sides
- Juices drip into the pan (perfect for gravy)
If you don’t have a rack, use chopped carrots, onions, and celery as a makeshift stand. Bonus — they become delicious roasted vegetables.
Roast Hot, Then Lower the Heat
Start roasting at 220°C / 425°F for 20 minutes. This jump-starts browning.
Then reduce the oven to 180°C / 350°F and continue roasting for about 45–60 minutes, depending on size.
A simple timing rule:
- About 20 minutes per 500g (1 lb), plus 10 extra minutes.
But timing isn’t everything — temperature is.
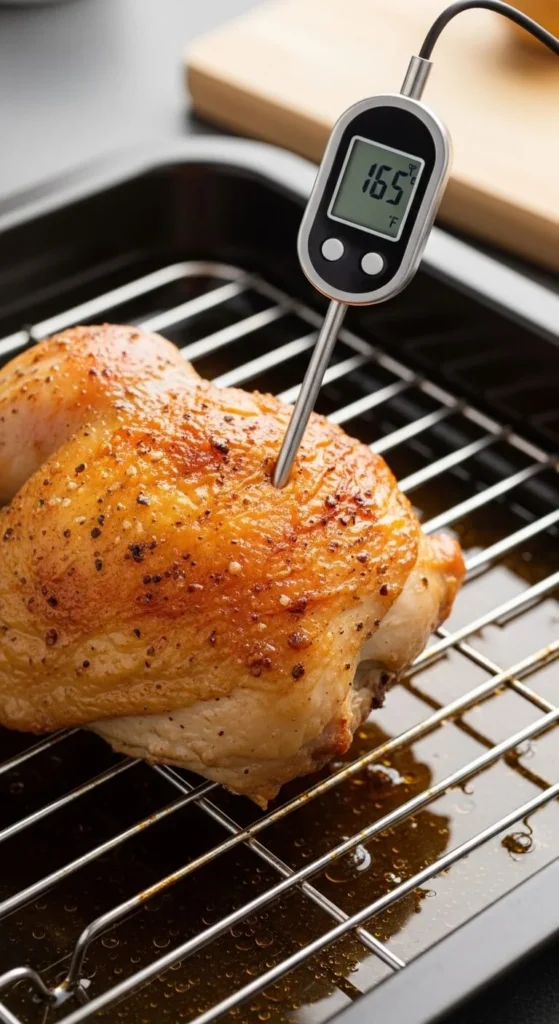
Check for Doneness (The Safe Way)
The most reliable method is a meat thermometer. Insert it into the thickest part of the thigh (without touching bone).
You want:
- 75°C / 165°F in the thigh
If you don’t have a thermometer, pierce the thigh with a knife. If the juices run clear (not pink), the chicken is cooked.
Let It Rest — Don’t Skip This
This is the hardest part, but also the most important.
Transfer the chicken to a board and let it rest 15–20 minutes before carving.
Resting allows:
- Juices to redistribute
- Meat to stay moist
- Skin to stay crisp
Cut too early, and all the juices will run out, leaving dry chicken.
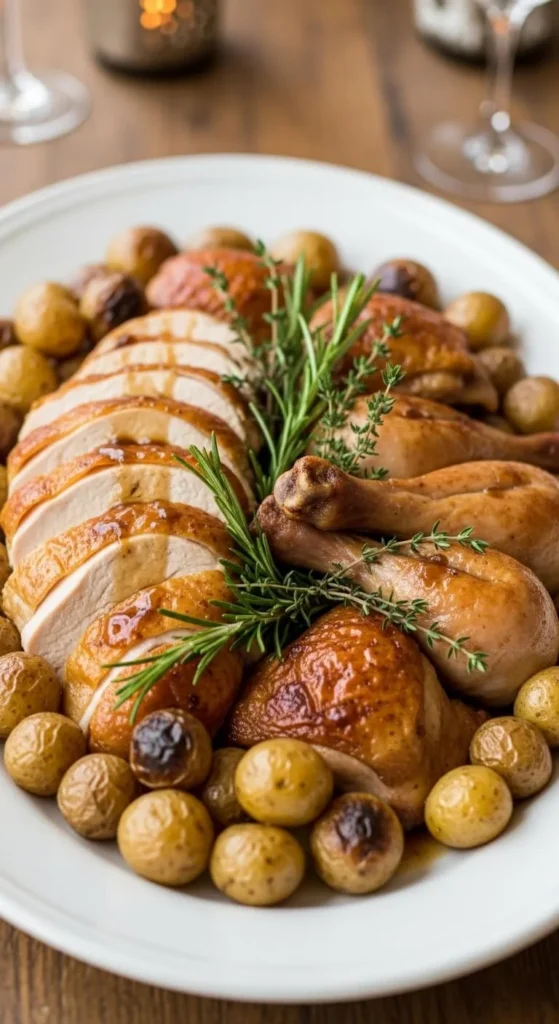
Carve Like a Pro
Start by removing the legs, then the wings, and finally slice the breast meat.
Use a sharp knife and cut against the grain for tender bites.
Arrange everything on a platter with roasted vegetables and fresh herbs for a beautiful presentation.
Make Simple Pan Gravy (Optional but Amazing)
Don’t waste those flavorful drippings in the tray.
- Place the roasting tray on the stovetop.
- Add a splash of chicken stock or water.
- Scrape up browned bits with a wooden spoon.
- Simmer for a minute, then strain.
Stir in a little butter for shine, and you have quick, delicious gravy.
Common Mistakes to Avoid
Skin isn’t crispy
- Chicken was too wet
- Oven wasn’t hot enough
- Chicken wasn’t on a rack
Meat is dry
- Overcooked
- Not rested long enough
Bottom is soggy
- Chicken sat directly in juices
- No airflow underneath
Flavor Variations to Try
Once you master the basic method, play with flavors:
Garlic Butter Roast
Spread garlic butter under the skin before roasting.
Herb-Crusted Chicken
Mix chopped rosemary, thyme, and parsley with butter and rub over skin.
Lemon Pepper Roast
Add lemon zest and cracked pepper to your seasoning.
Same technique — endless possibilities.
What to Serve With Roast Chicken
Classic sides include:
- Roast potatoes
- Steamed green beans
- Creamy mashed potatoes
- Fresh salad
- Crusty bread
Leftovers are perfect for sandwiches, salads, soups, or pasta the next day.
Final Takeaway
Golden crispy skin comes from dry chicken, high heat, proper roasting, and patience. Follow these steps and you’ll turn a simple chicken into a show-stopping meal every time.
Love this method? Save this guide for your next Sunday roast — and enjoy the crunch.

Hannah Collins is a passionate home cook and food storyteller who believes every recipe tells a little love story. At TastyWriter, she shares simple, delicious recipes made for real kitchens and busy days — from cozy comfort dishes to creative new favorites. When she’s not cooking, you’ll find her photographing food, testing family recipes, or sipping tea while dreaming up her next tasty idea.
Leave a Reply